1. Added the section and elevation editing of moldings in customize wall, floor and ceiling modules
In the Customize Wall, Customize Ceiling and Customize Floor modules, the new section and elevation editing function allows you to edit the molding shape and its materials more flexibly and accurately.
Instruction:
How to edit the section of the molding?
1) Select a face and enter any module of customize wall, ceiling or floor.

2) After drawing a shape and set up the extrusion thickness for each part, left-click to select an edge, click "Edit Section" on the right and enter the edit interface.

3) Select the appropriate molding on the left, and drag it to the corresponding area in the Edit Section window, after which you can edit the parameters of width, height, flip direction or offset distance on the right property panel. Then just click the Save button when you are done editing.


How to edit the elevation of the molding?
1) Select a face, and enter any module of customize wall, ceiling, or floor. You need to draw a modeling shape with extrusion thickness before you can edit the elevation.

2) Select an edge, click "Edit Elevation" on the right and enter the Edit interface.

3) Select the appropriate material on the left, drag the material to the corresponding area, and click Save (the material angle and other parameters can be adjusted on the right).

4) You can also click on the material to enter "Tile Flooring" for more customized editing and settings.

2. Updated the auto-snapping for drawing with Tile Patterns in the Tile Flooring module
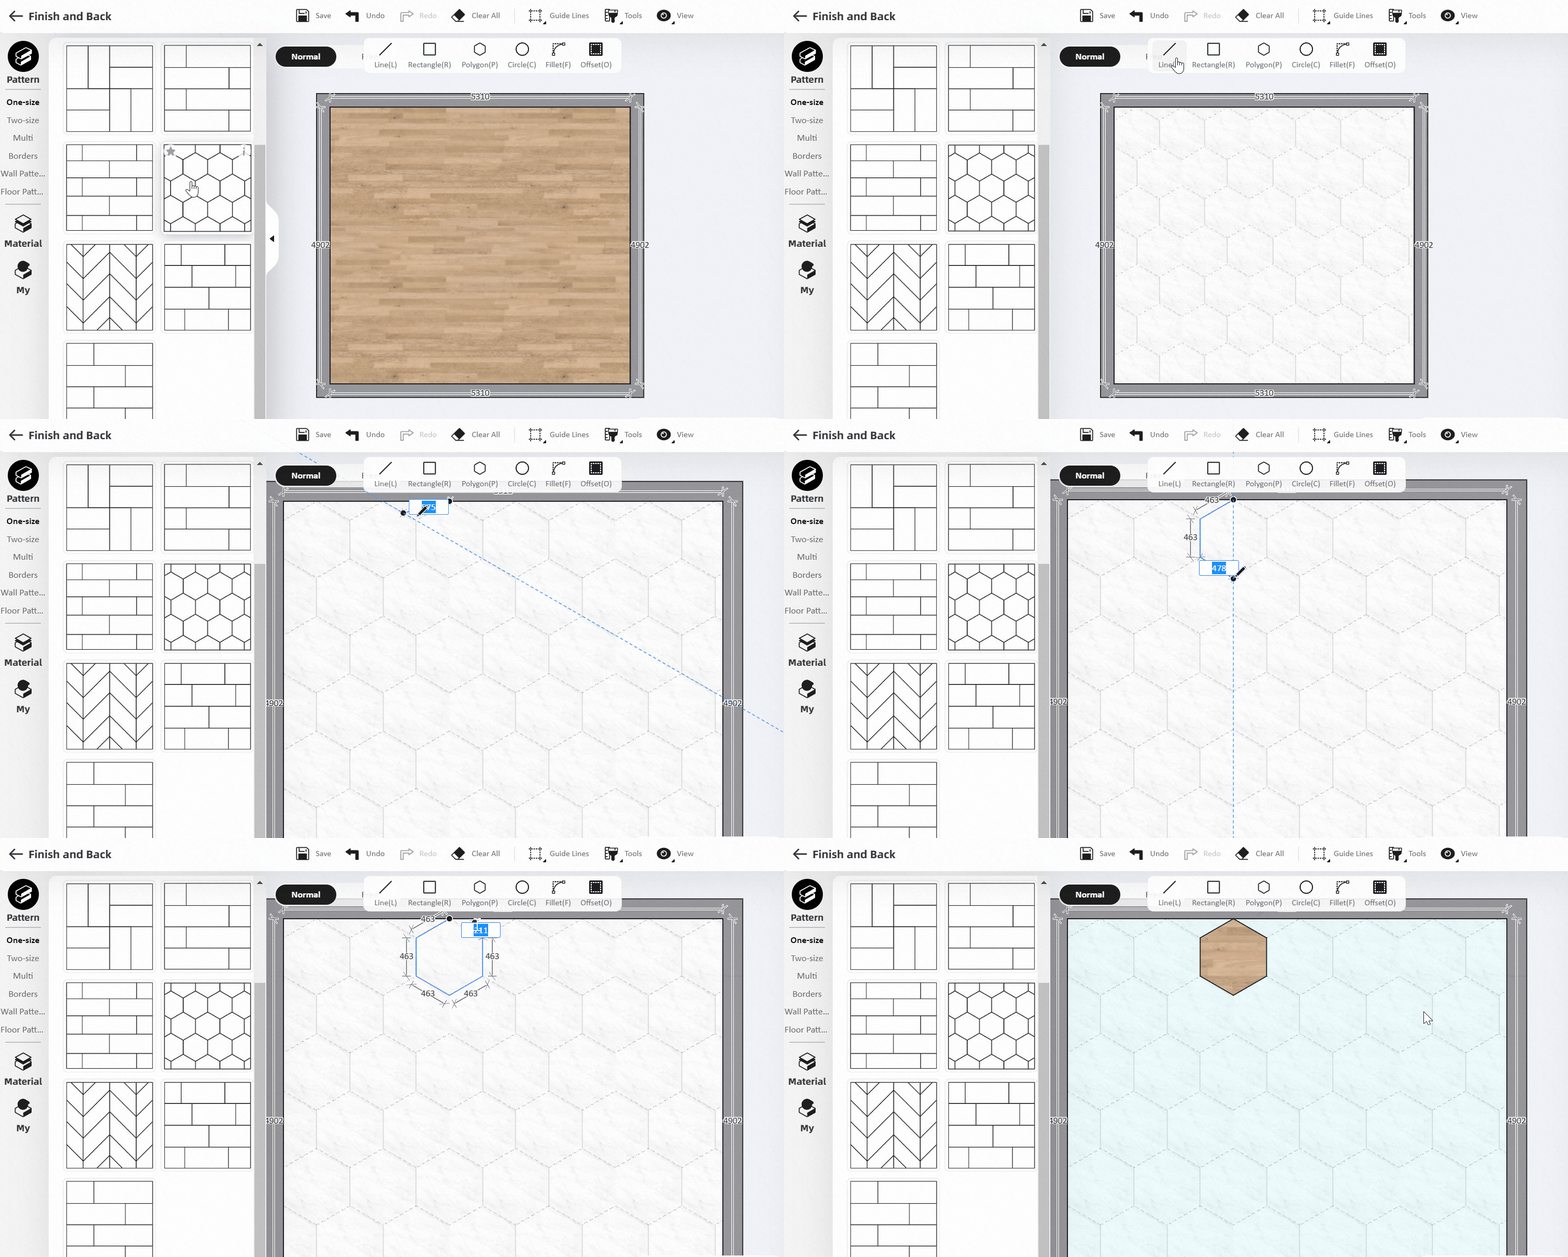
In the "Tile Flooring" function, it can now automatically snap to the tile pattern when drawing shapes, making it more efficient for you to design tiles or floorings.
Instruction:
1) Select a wall or floor, click and enter "Tile Flooring"

2) Select a pattern in the left "Pattern" catalog and drag it to apply to the face, and select the top drawing tool to automatically snap the endpoints on the pattern for further modeling and drawing.

3. The waistline material supported automatic adaptation to the material height
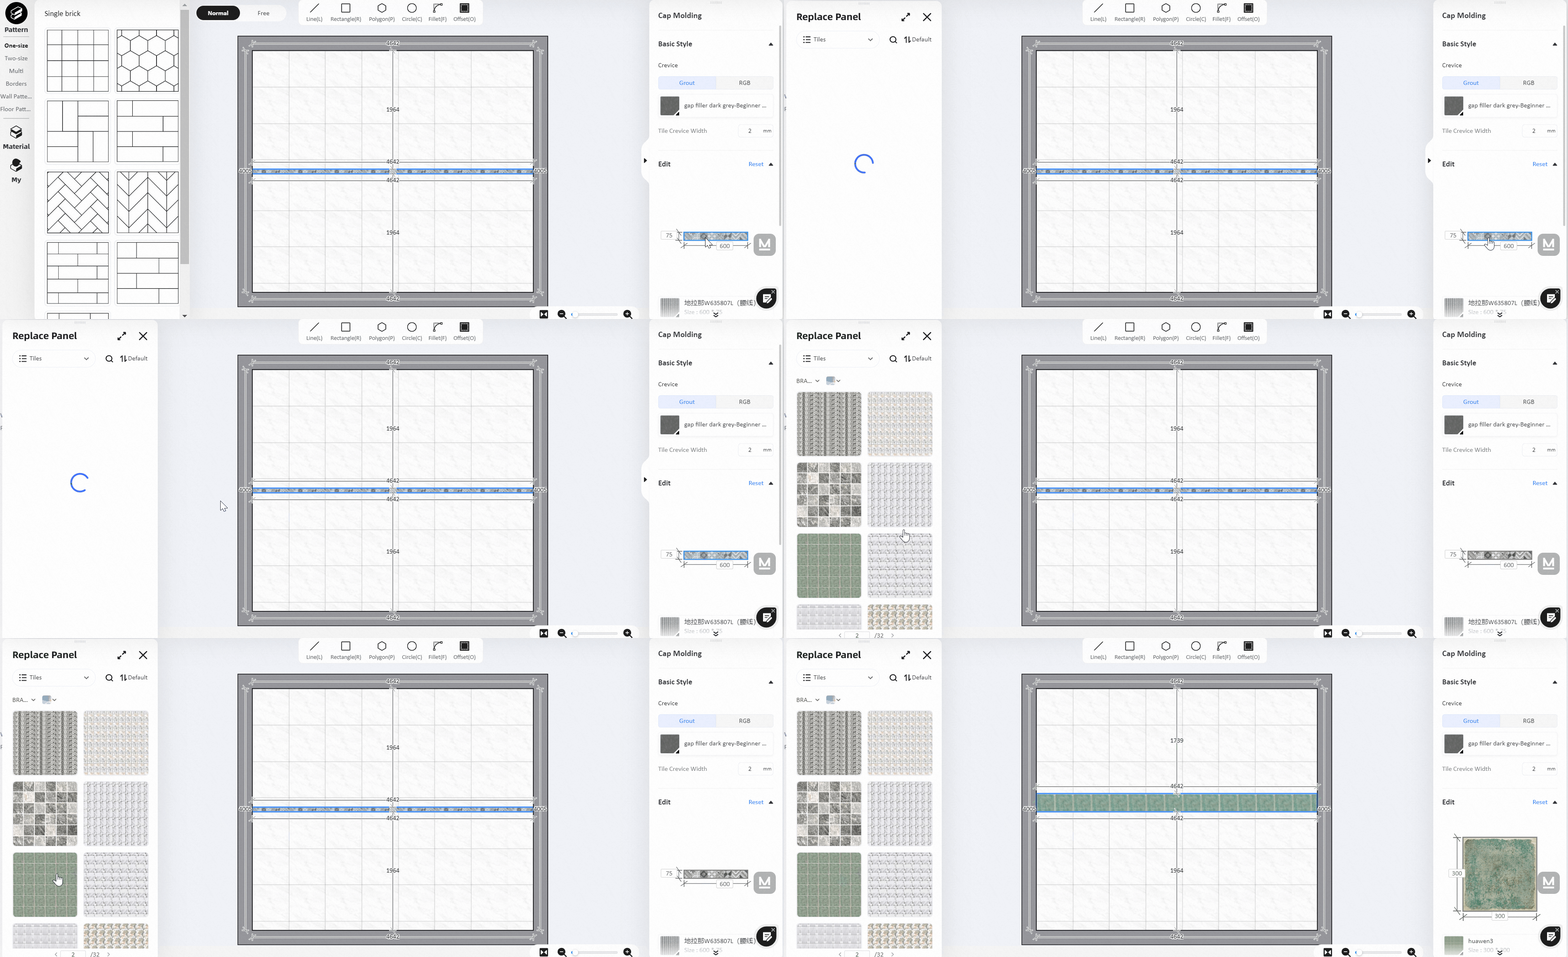
Before optimization: The default waist height is 75mm. Once the height of the material exceeds the default waistline height, the material will be cut and the waistline height needs to be adjusted manually.
After optimization: When changing the material of the waistline, the height of the waistline will adapt to the height of the material, without the need for further adjustment.
Instruction:
1) Select a wall/floor, click and enter "Tile Floor"

2) Left-click anywhere on the surface and select "Add Waistline"

3) Click the material in the property panel on the right, and select the material on the left to replace it. The height of the waist is automatically adjusted according to the height of the material. At the same time, you can still customize the dimensions on the right.


