
Updated Functions:
1.【General Features】
1.1【Function】Model supported precise adjustment of the rotation angle.
1.2【Function】Supported applying the current material to the same doors / windows.
1.3【Function】Supported applying the elevation height to the same doors / windows.
1.4【Function】Supported continuous duplication of door and window models.
1.5【Function】The Measure tool supported display multiple measurement size.
1.6【Function】Added update log link in the design interface.
2.【Interior Modeling 2.0】
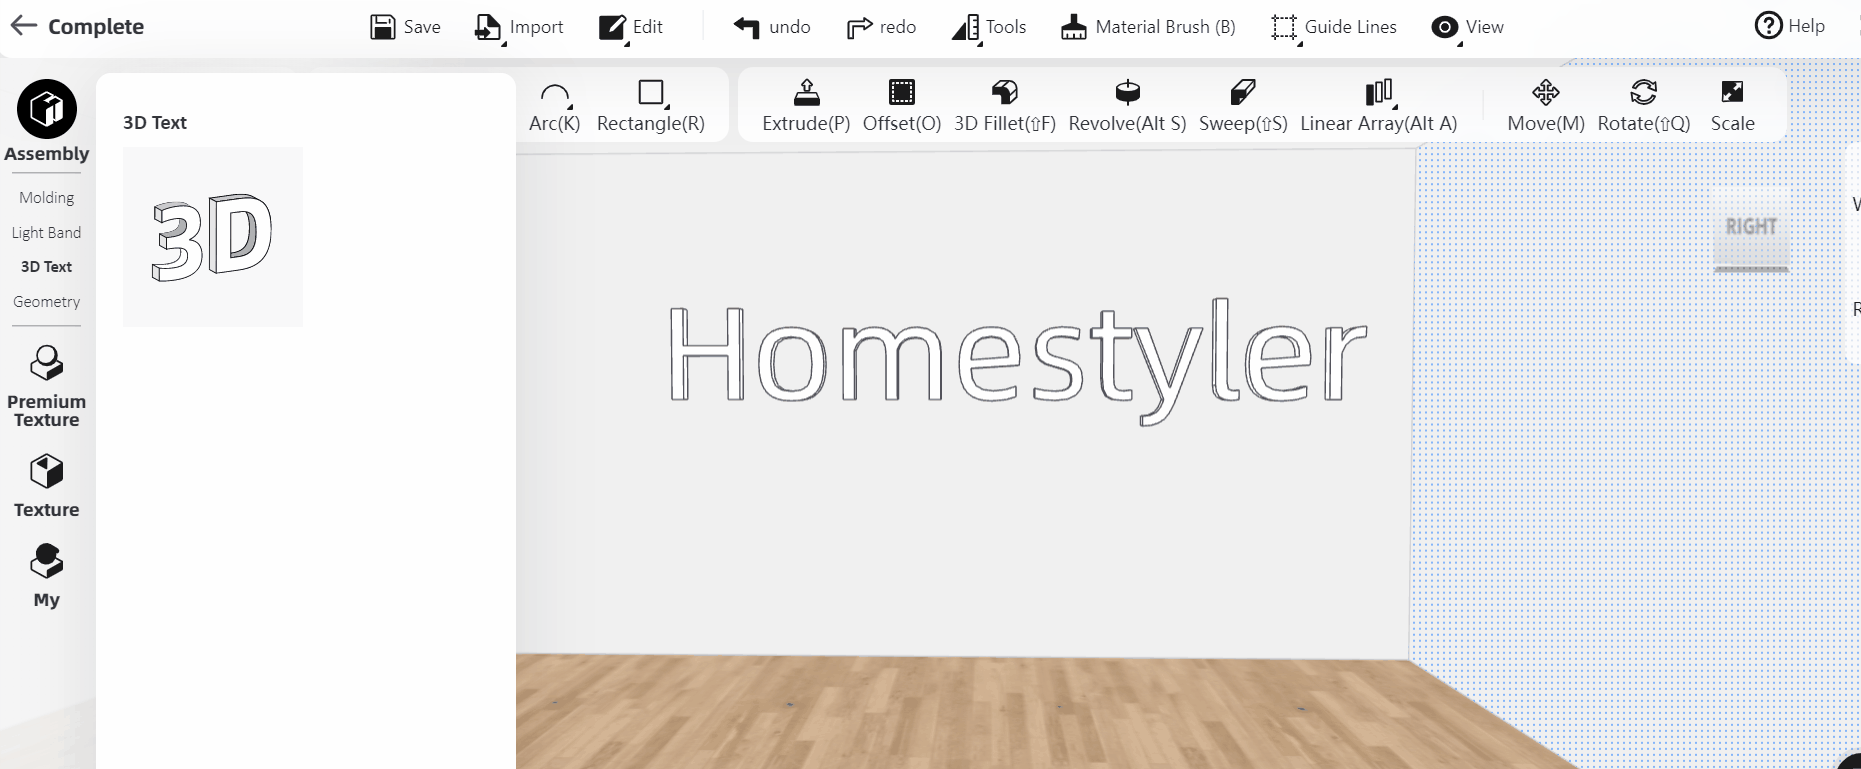
2.1【Interior Modeling 2.0】3D text can be converted into a model, and can be further edited with the material and modeling.
2.2【Interior Modeling 2.0】Added curve drawing in Interior Modeling.
2.3【Interior Modeling 2.0】Added batch extrusion function.
2.4【Interior Modeling 2.0】Supported modifying the width of the light band.
3.【Rendering&Video】
3.1【Video】Added time frame management in the advanced mode of video rendering.
3.2【Render】Supported changing room names in 720°Virtual Tour.
3.3【Render】Allowed remark on renders.
3.4【Render-Member Exclusive】Optimized watermark removal process.
3.5【Render-Member Exclusive】Supported for upgrading resolution after Lightmix.
3.6【Render-Member Exclusive】Added color temperature adjustment in Lightmix.
3.7【Render-Member Exclusive】Supported saving the Lightmix parameters as lighting template for further rendeirng.
Detailed Introduction:
1.【General Features】
1.1【Function】Model supported precise adjustment of the rotation angle.
Select the model with the left mouse button, and adjust the angle of the model precisely in the property panel on the right.

1.2【Function】Supported applying the current material to the same doors/windows.
When you have the same door/window models in your design, you can apply the material of the current model to the same models in your design when changing the material.

1.3【Function】Supported applying the elevation height to the same doors/windows.
After placing the window/door, first adjust the elevation height of a certain window from the ground. The system will prompt you whether you want to apply the height to other windows with one click, if yes, just click "Apply".
1.4【Function】Supported continuous duplication of door and window models.
Right click a door or window, click "Duplicate" and then you can duplicate continuously by dragging to new places directly.
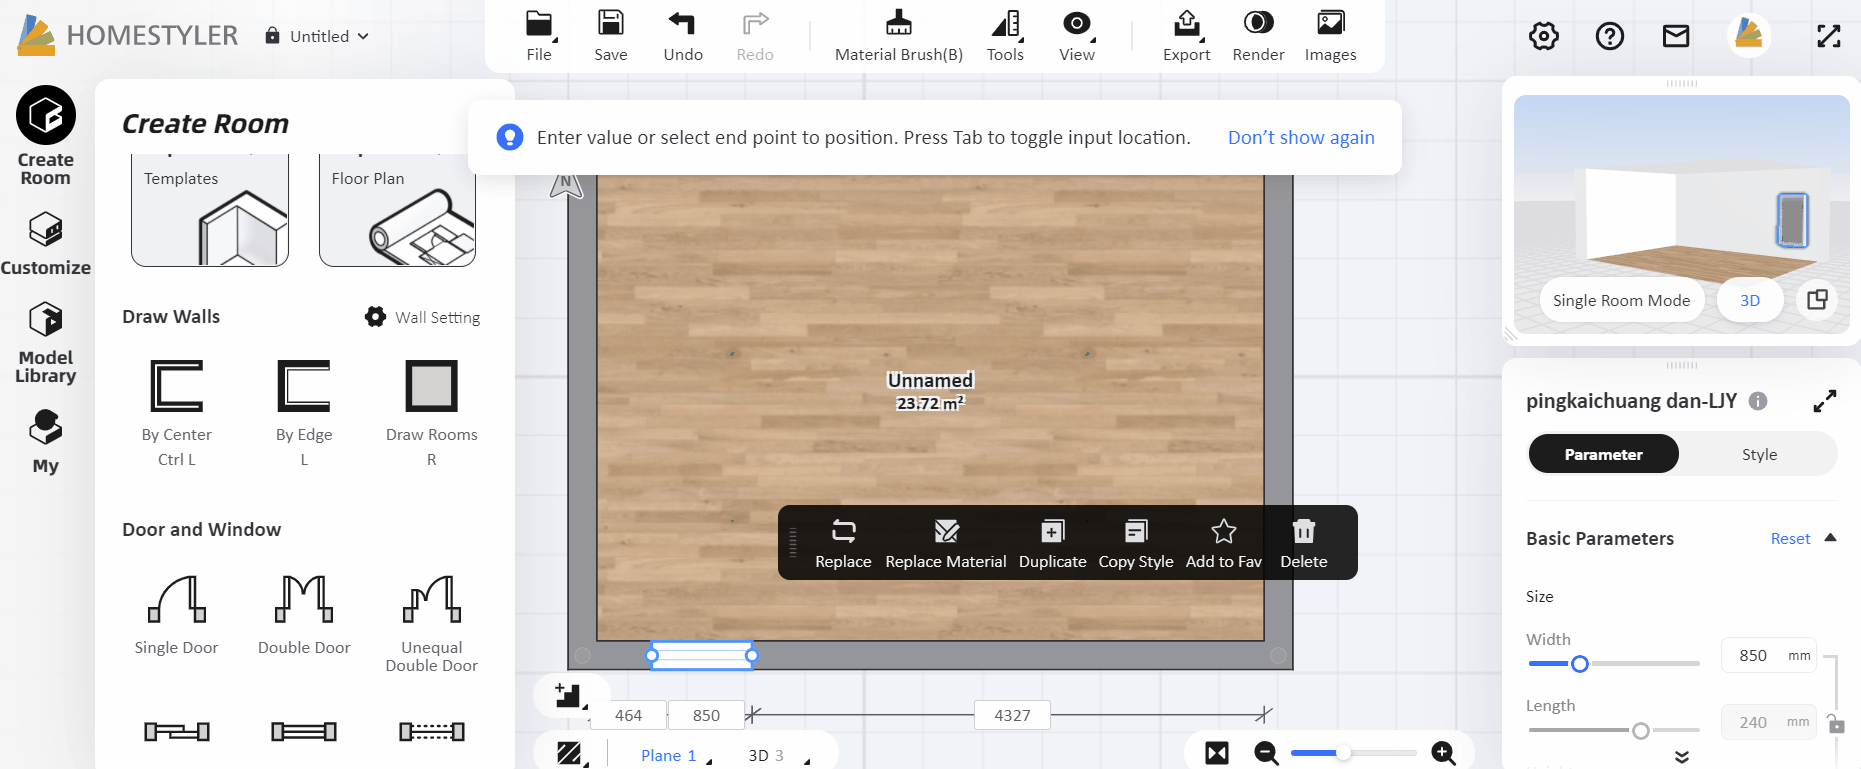
1.5【Function】The Measure tool supported display multiple measurement size.
In the 2D view, select "Measure" in the "Tools" on the top to measure the size in the canvas. Instead of measuring one single distance, now it can measure and display multiple distances. (It should be noted that once the measurement command ends, the size will disappear)

1.6【Function】Added update log link in the design interface.
The update log entry has been added to the upper right corner under "Help" of the design interface, you can click it to view the update record of Homestyler.

2.【Interior Modeling 2.0】
2.1【Interior Modeling 2.0】3D text can be converted into a model, and can be further edited with the material and modeling.
Enter Interior Modeling 2.0, after entering the 3D text, select the text and click "convert to model", double-click the mouse to edit each text separately (if you need to combine letters, you can double-click the letters to form a group)
2.2【Interior Modeling 2.0】Added curve drawing in Interior Modeling.
Added curve drawing. After drawing the shape, you can choose to drag to adjust the details, and finally press Esc to exit drawing. (make sure the curve drawn is in a closed state, the curve will disappear if it is not enclosed)

2.3【Interior Modeling 2.0】Added batch extrusion function.
After extruding a certain face, double-click the other face to continuously extrude the same thickness, which effectively improves the design speed.

2.4【Interior Modeling 2.0】Supported modifying the width of the light band.
After adding the light band, select the light band and adjust the width of the light band in the parameter settings on the right.

3.【Rendering&Video】
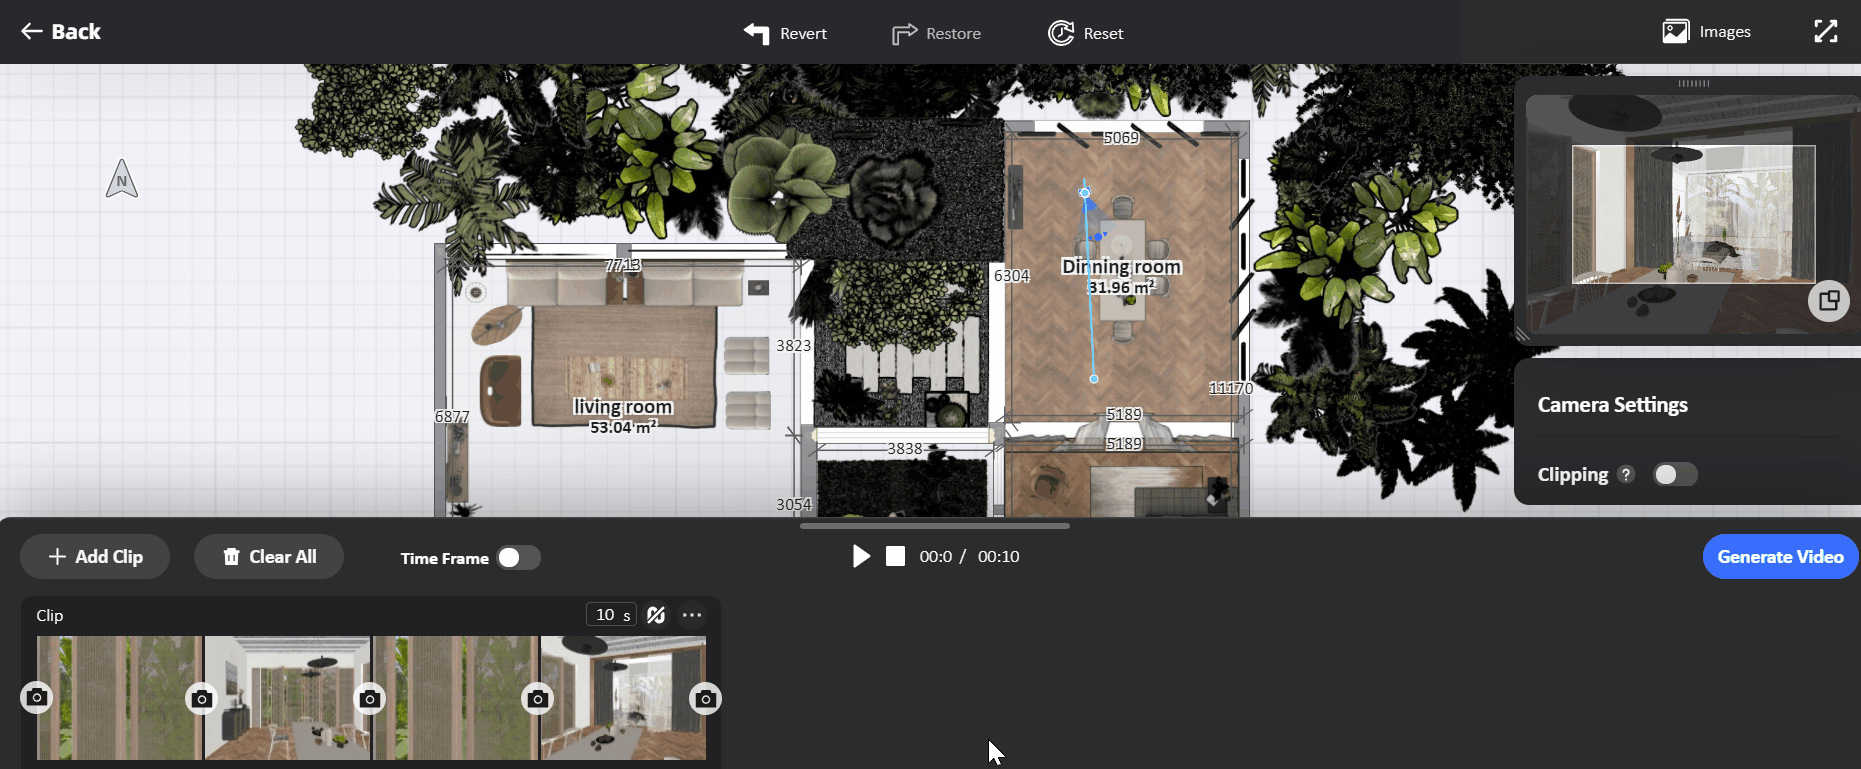
3.1【Video】Added time frame management in the advanced mode of video rendering.
When you render videos, enter the advanced mode to create clips by adding keyframes. When you finish the clip, turn on the "Time Frame" switch.
If your clip is set as "grow effect", then you can precisely control the starting and ending time of the animated motion of each model. You can also adjusting the duration between keyframes by dragging the little dot on the main timeline(each dot represents a keyframe you took).
If your clip does not have grow effect, you can still adjusting the keyframe timeline by dragging the keyframe dot.
3.2【Render】Supported changing room names in 720°Virtual Tour.
Open the image album, select 720°Virtual Tour and click "Edit", then you can modify in "info-Room Name".
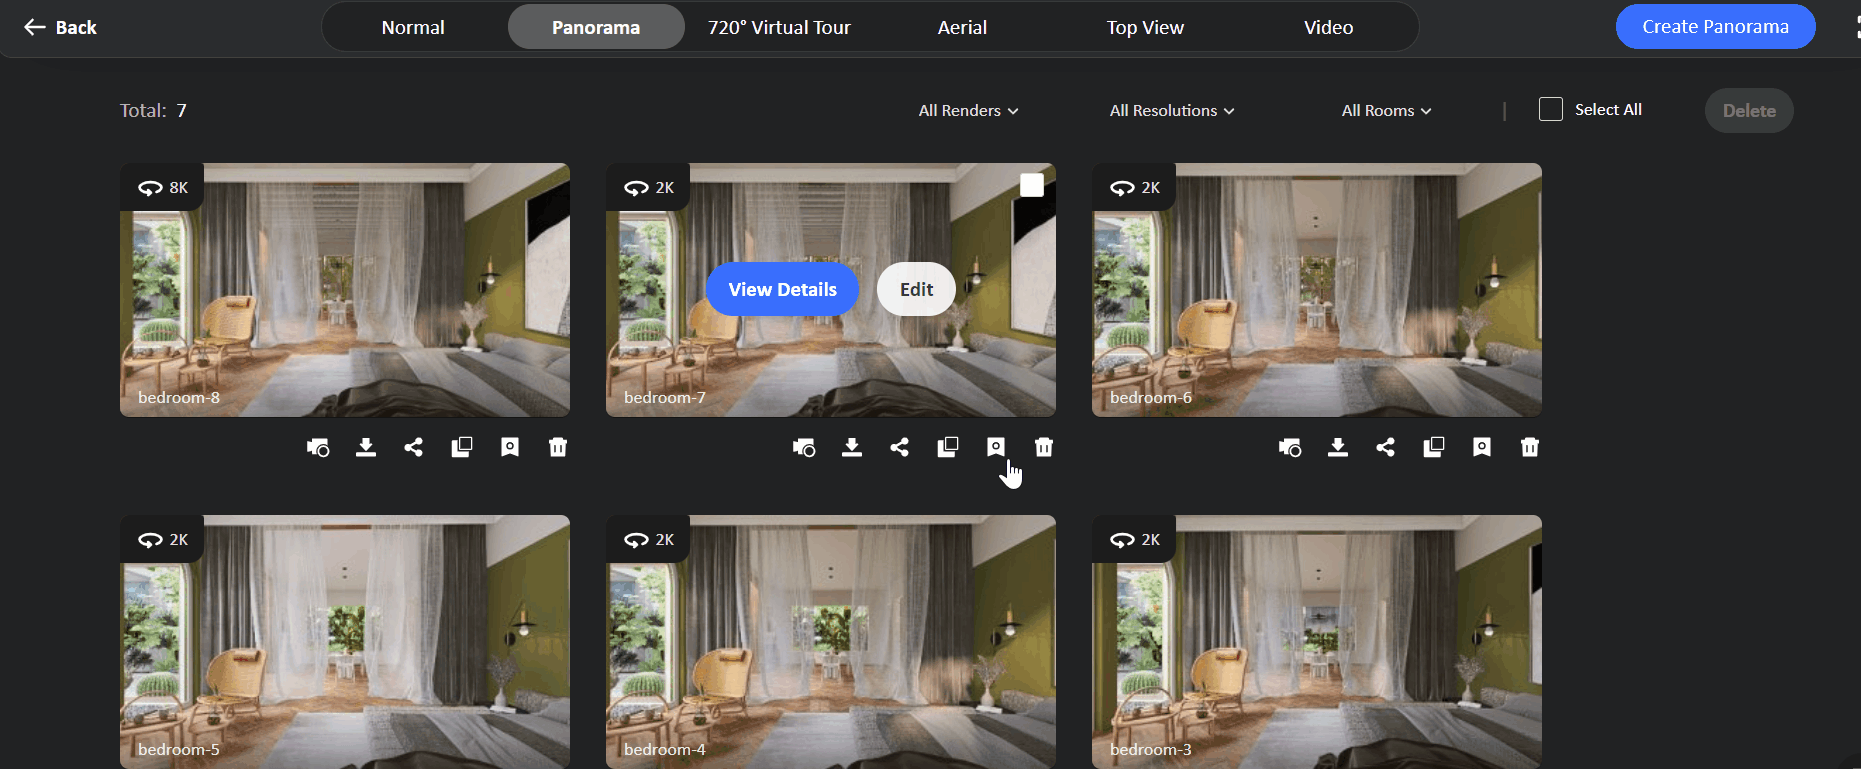
 3.3【Render】Allowed remark on renders.
In the case that you have created too many renders in one design, you can now mark important ones with flag, and you can batch download, delete, and do more operations on the marked renders together.
3.4【Render-Member Exclusive】Optimized watermark removal process.
Optimized the removal of watermark function, open the image album, select all the rendered images you want to remove the watermark, and click "Remove Watermark" above.

3.5【Render-Member Exclusive】Supported for upgrading resolution after Lightmix.
Now the renders that have been adjusted with Lightmix can be upgraded in resolution.

3.6【Render-Member Exclusive】Added color temperature adjustment in Lightmix.
After entering Lightmix, you can adjust the color temperature properties of each type of light sources on the right.

3.7【Render-Member Exclusive】Supported saving the Lightmix parameters as lighting template for further rendeirng.
After adjusting the lighting parameters in Lightmix, click "Save As Lighting Template" below to synchronize this lightmix parameters to the lighting template of the rendering interface for further rendering, which would allow you to use the lightmix lighting setup to render other scenes.