Crafting a 3D representation of your home can be a thrilling and satisfying endeavor, appealing to both expert designers and enthusiastic novices. With the appropriate tools and a dash of imagination, you can transform your dream residence into a stunning visual reality! This guide will help you embark on your journey into 3D house modeling.
To begin, selecting the ideal software for your modeling project is essential. There are numerous programs available, each offering unique features. For those new to the field, user-friendly options like Homestyler, SketchUp, or Blender are excellent choices. These platforms frequently provide templates and instructional materials that simplify the learning process.
Once you've chosen your software, it's time to gather inspiration and plan your design. Explore images of homes or architectural styles that resonate with you. Creating a mood board can help visualize the elements you wish to incorporate into your 3D model.
Next, sketch out the floor plan of your house. This blueprint will act as the foundational guide for your 3D creation. Pay attention to the layout of each room, including sizes and furniture arrangement. A clear vision of your space will facilitate a smoother modeling experience.
When you're ready to dive into modeling, start by defining the basic structure of your house. Most software allows for the straightforward creation of walls, floors, and roofs. Begin with the exterior walls, then add interior partitions based on your floor plan.
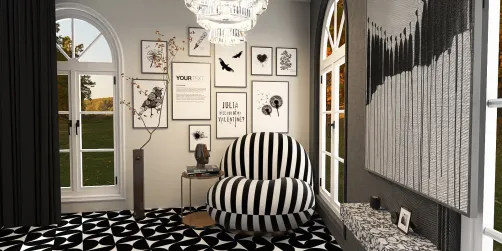
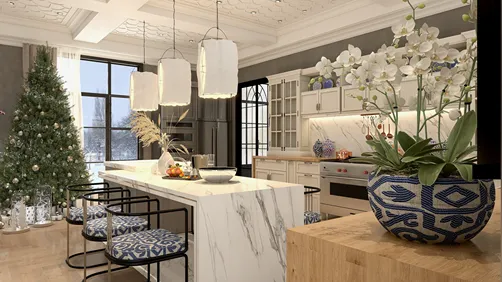
Once the primary structure is established, you can begin embellishing your model with features like windows, doors, and furnishings. Most 3D modeling tools come equipped with libraries of pre-made objects that you can easily integrate into your design, saving you time while enhancing realism.
Textures and colors play a vital role in bringing your model to life. Experiment with various materials for walls, floors, and furniture to discover the perfect combination. Many software options allow for easy texture application, so make the most of this feature to achieve a lifelike appearance.
Lighting is another crucial element in 3D modeling. Incorporating light sources can significantly alter the atmosphere of your space. Experiment with different lighting configurations to observe their effects on your model’s overall feel. Don’t forget about natural light; consider window placement in your design.
Ultimately, rendering your model is an indispensable step. This process transforms your 3D design into high-quality images or animations that highlight your work. While rendering can take some time based on your model's complexity, the resulting visualization will be worth the wait.
In summary, creating a 3D model of a house is a fulfilling adventure. With the right tools, a bit of creativity, and a defined plan, anyone can craft their ideal home. Whether your goal is casual exploration or a more serious project, the possibilities are limitless. So get ready to unleash your creativity and start building with confidence!
Tips 1:
Always remember to save your progress frequently to prevent data loss, and don’t hesitate to seek out online tutorials for additional support.
FAQ
Q: Do I need any prior experience to create a 3D model? A: Although having experience can be beneficial, many software options are beginner-friendly and equipped with tutorials to guide you along the way.
Q: Can I share my 3D models with others? A: Certainly! Many platforms enable you to export your models for sharing with friends or for professional purposes.
Q: Is there a cost associated with 3D modeling software? A: Some programs are offered for free, while others may require a purchase or subscription. Explore the available options to find one that meets your requirements.
Welcome to Homestyler