
With Import Floor Plan, designers can upload floor plans in image, PDF, or CAD format and choose to generate walls automatically or draw them manually, making floor plan creation faster and more convenient.
Access
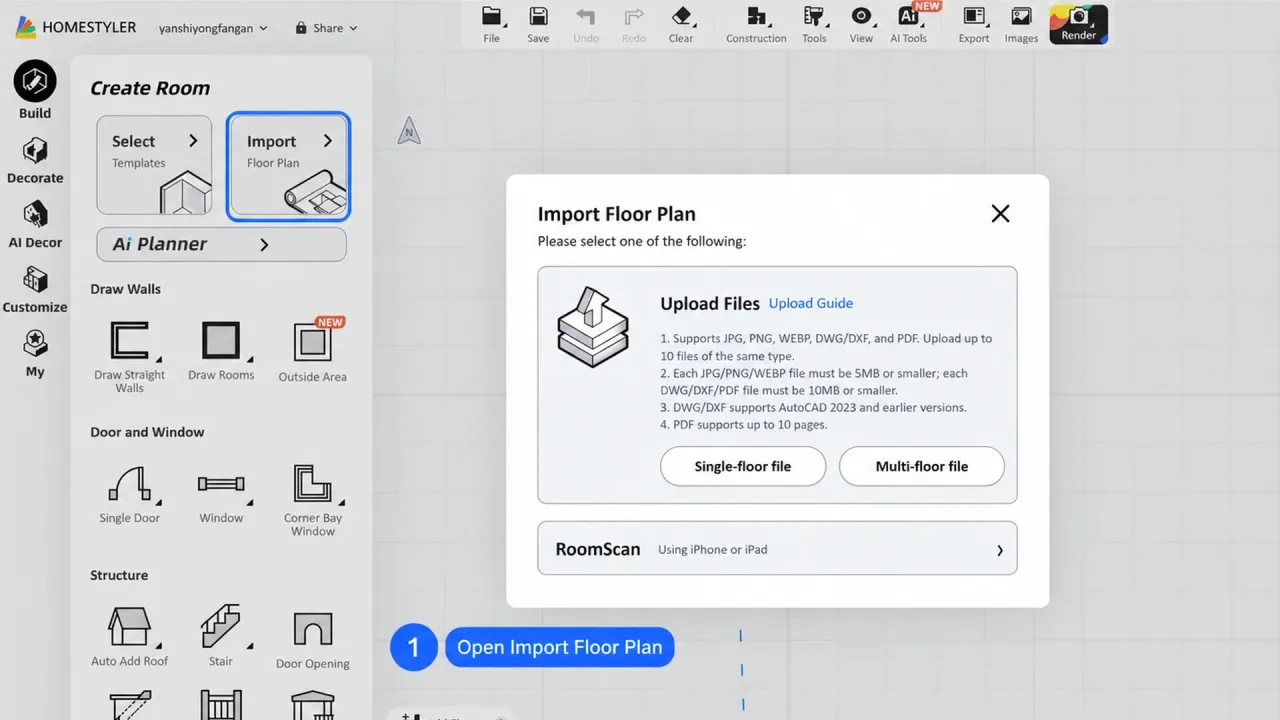
Open the design interface and select Build > Import Floor Plan.
In the Import Floor Plan window, select one of the following options:
- Single-floor file: Import a single-floor plan.
- Multi-floor file: Import floor plans for multiple floors.
- RoomScan: Scan a space using an iPhone or iPad.
Upload Requirements
1. Supported formats include JPG, PNG, WEBP, DWG/DXF, and PDF. You can upload up to 10 files of the same type.
2. Each JPG, PNG, or WEBP file must be 5MB or smaller. Each DWG, DXF, or PDF file must be 10MB or smaller.
3. DWG/DXF files created with AutoCAD 2023 or earlier are supported.
4. Each PDF can contain up to 10 pages.
Import a Single-Floor Plan
The following instructions use an image file as an example.
Step 1: Upload the Floor Plan
In the Import Floor Plan window, select Single-floor file.
On the upload page, select Upload Image, click Upload, and upload a floor plan in JPG, PNG, or WEBP format.
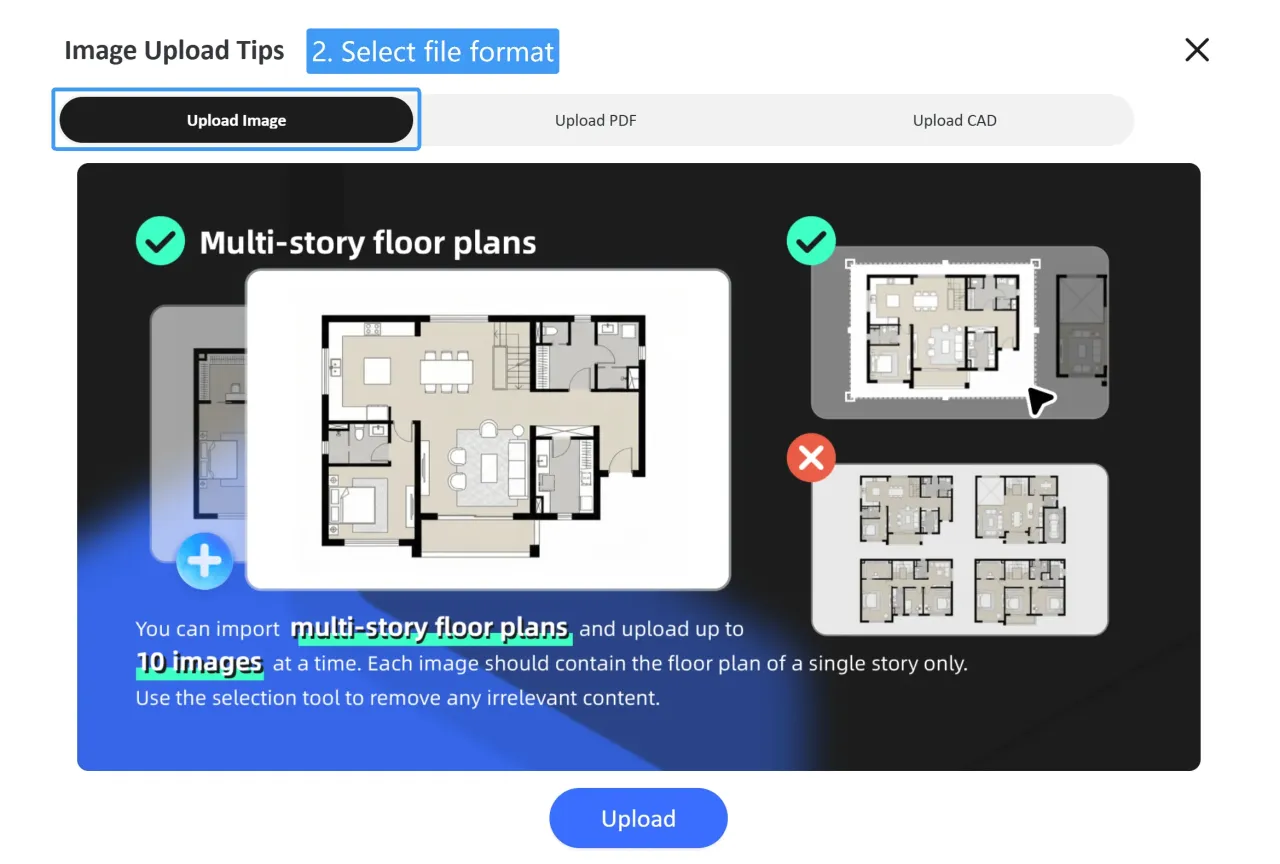
Step 2: Select the Floor Plan Area
After uploading the image, adjust the selection in the Select Plan Area window to keep only the area you want to draw.
Remove title blocks, borders, and other irrelevant content to avoid affecting manual drawing or automatic recognition.
Step 3: Choose a Drawing Method
After selecting the floor plan area, choose Draw Manually or Auto Generate(Beta).

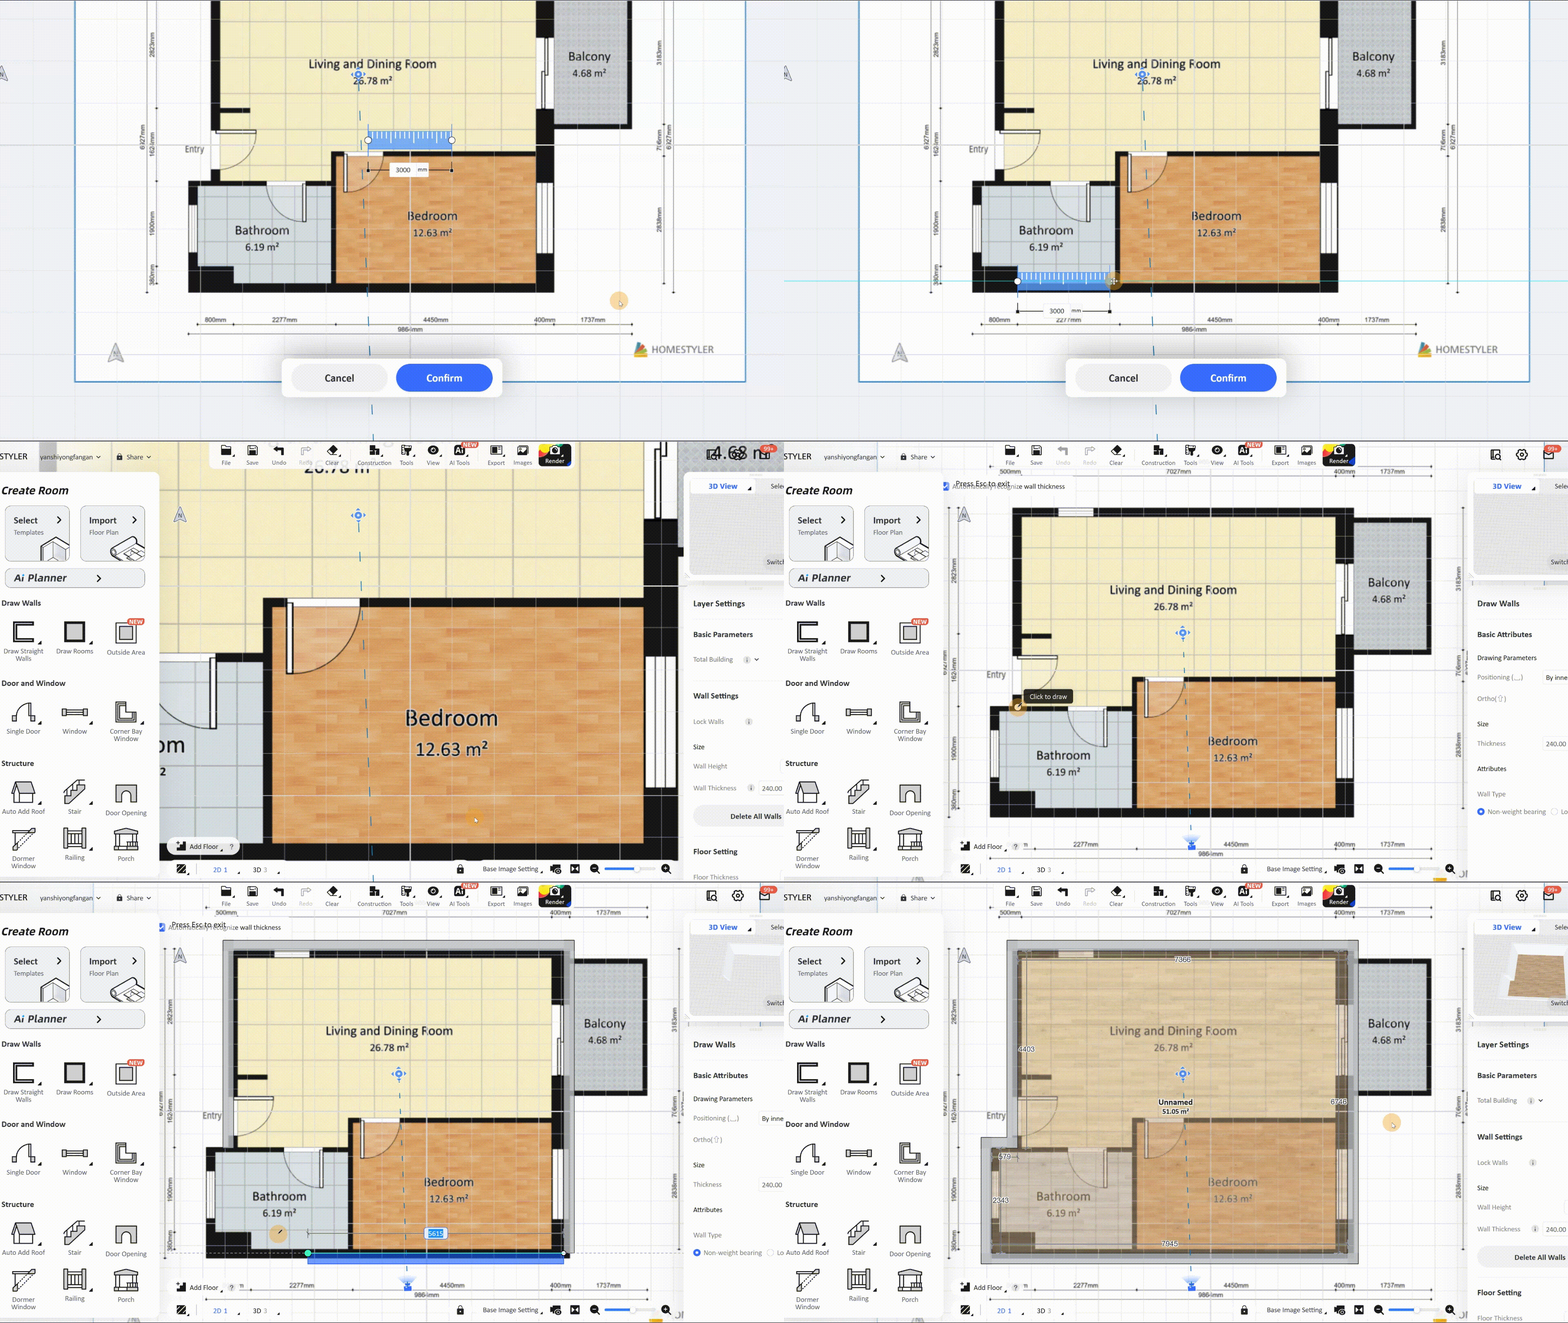
Draw Manually
Select Draw Manually, align the calibration ruler with a wall of known length, and enter its actual dimension.
Click Confirm to calibrate the scale. Then use Draw Walls to trace the walls based on the uploaded floor plan.
Auto Generate(Beta)
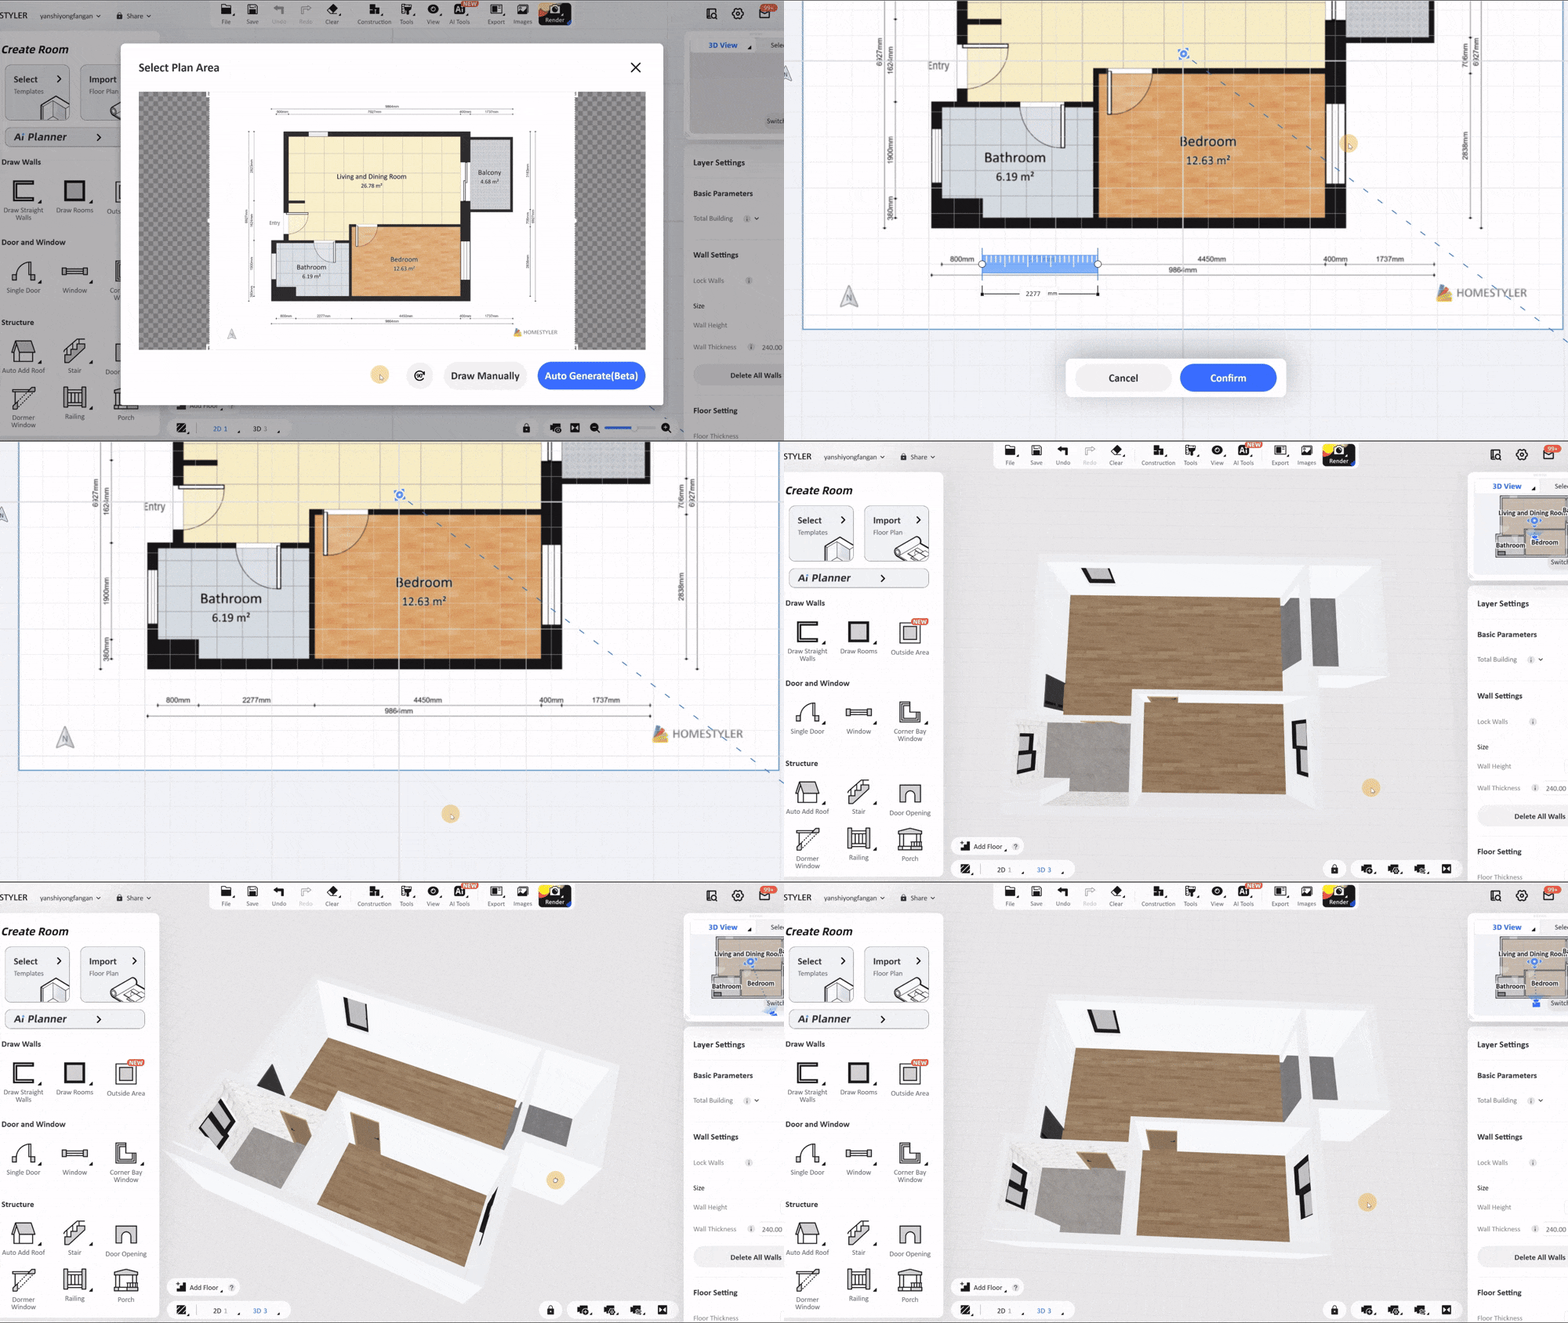
Select Auto Generate(Beta), and the system will automatically calibrate the floor plan scale.
After confirming the dimension, click Confirm. The system will automatically generate walls, doors, windows, and other structures. If the result does not match the original floor plan, adjust it manually in the design interface.
Adjust the Base Image Display
After generating the floor plan, use Base Image Setting in the lower-right corner to adjust the base image display when you need to compare it with the drawing or review the result.
Note: A deleted base image cannot be restored. Make sure you no longer need it before deleting it.
Import a Multi-Floor Plan
To import a multi-floor plan, select Multi-floor file in the Import Floor Plan window.
- When uploading multi-floor plan images:
- You can upload up to 10 images at a time.
- All files must be of the same type.
- Each image must contain only one floor.
- Arrange the files in the correct floor order.
- Use the selection tool to remove irrelevant content from each image.
For detailed instructions, see [Importing Multi-Floor Plans].
Use RoomScan
Select RoomScan in the Import Floor Plan window to view the feature details and instructions.
RoomScan requires an iPhone or iPad and can be used to scan a physical space and capture its floor plan.
