
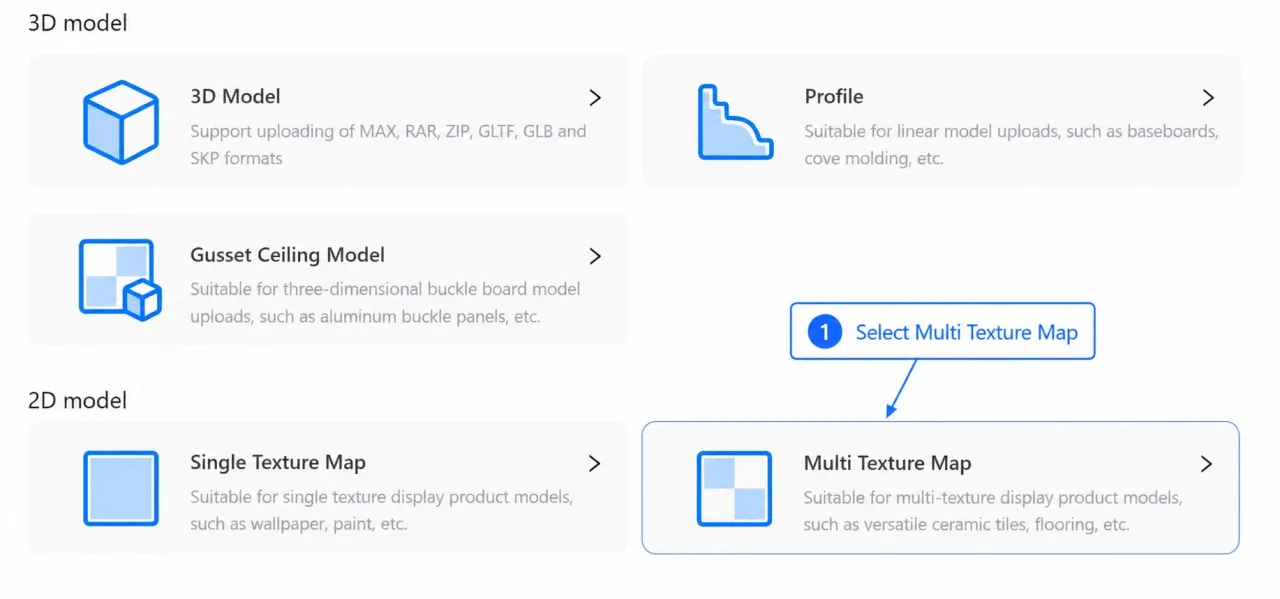
Multi Texture Map is designed for materials that contain multiple texture variations, such as ceramic tiles, stone, and flooring.
Unlike Single Texture Map, multiple texture images must be placed in the same folder and uploaded by selecting the entire folder.
1. Prepare the Texture Folder
Place all texture images you want to use in a single folder.
·Supported formats: JPG, JPEG, and PNG
·Maximum number of images per folder: 32
·All images should belong to the same material set
For texture dimensions, color mode, and other file requirements, refer to Homestyler Model Creation Guidelines and Upload Requirements.
2. Upload the Texture Folder
Click Upload Model, select Multi Texture Map, and upload the prepared texture folder.
Note: Select the folder containing all texture images. Do not select and upload the images individually.
3. Submit the Material
After the files have been uploaded, click Go submit to open the Unsubmitted 2D models page.
Locate the material you want to submit and click Submit.

4. Edit the Material Information
4.1 Complete the Basic Information
Complete the following settings on the Edit Model page:
·Category: Select the appropriate material category.
·Name: Enter a name for the material.
·Name:Single Brick Size: Enter the actual dimensions of a single tile.
·Material effect: Select the appropriate material effect.
4.2 Select a Texture Mode
Under the second Category setting, select a texture mode:
·Multi-faceted stone: Suitable for a material set containing multiple surface variations.
·Seamless pattern matching: Suitable for texture maps that must be arranged in a predefined sequence.

4.3 Arrange the Tiling Sequence — Optional
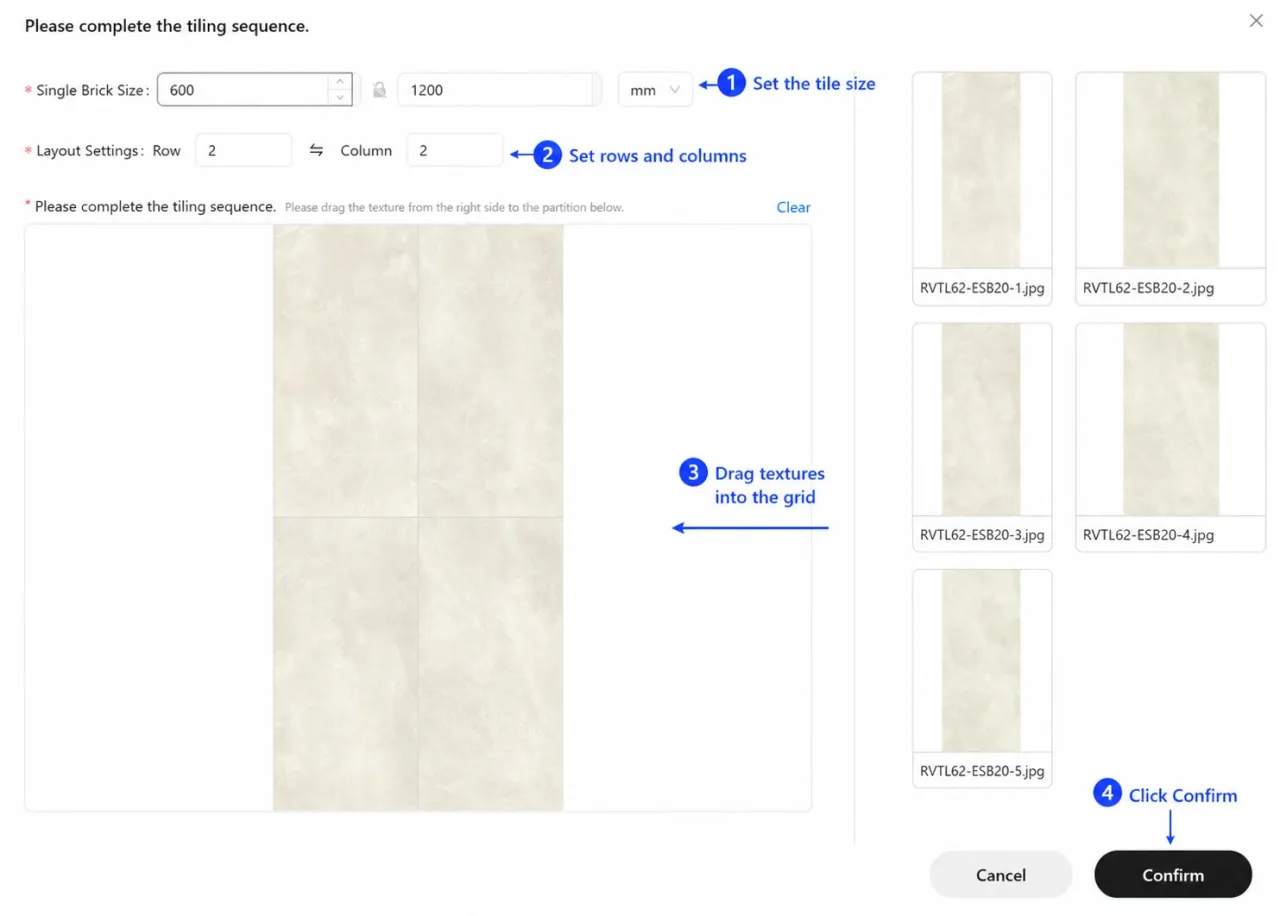
The Please complete the tiling sequence window opens automatically only when Seamless pattern matching is selected.
In this window:
·Set the Single Brick Size.
·Set the number of rows and columns under Layout Settings.
·Drag the texture maps from the right panel into the layout grid.
·Click Confirm to save the sequence.
This step is not required when Multi-faceted stone is selected.
4.4 Adjust Advanced Material Settings — Optional
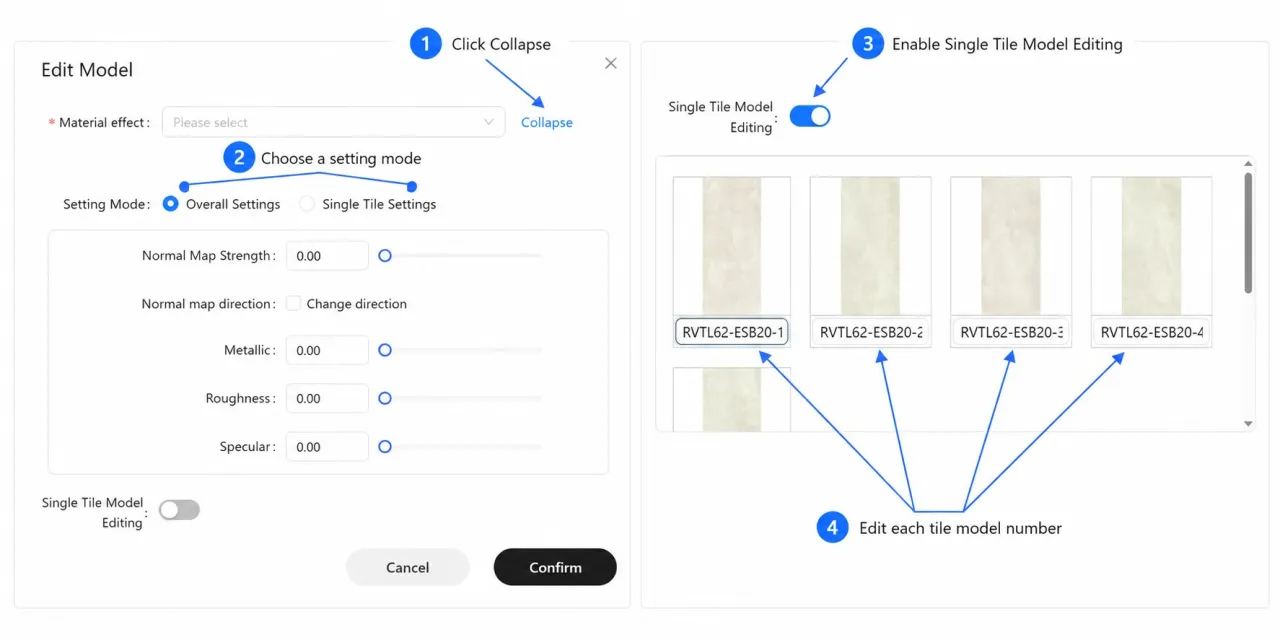
Click Collapse to display Setting Mode and the advanced material parameters.
Under Setting Mode, select:
·Overall Settings: Apply the same material parameters to all texture maps.
·Single Tile Settings: Adjust the material parameters of an individual texture map.
For detailed instructions on advanced material parameters, refer to the Homestyler Material Upload Guide.
4.5 Edit Individual Tile Model Numbers — Optional
Enable Single Tile Model Editing to display all individual tile textures in the uploaded folder.
You can then edit the model number of each tile, making different texture variations easier to identify and manage.
5. Complete the Upload
After confirming all settings, click Confirm.
Once processing is complete and the thumbnail appears, the material is ready to use in Homestyler.