

| Design choice | Why it helps | Check before buying |
|---|---|---|
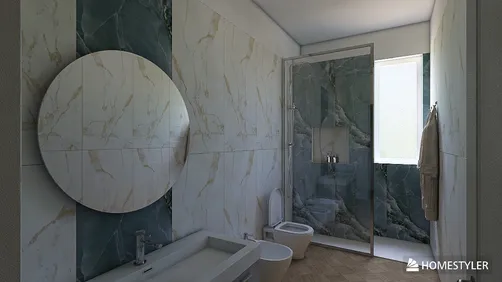
| Wall-hung vanity | Opens the view of the floor | Wall support, plumbing, drawer clearance |
| Glass shower screen | Preserves sightlines | Splash control, safe fixing, cleaning access |
| Recessed niche | Keeps bottles off the floor | Waterproofing details and usable depth |
| Large mirror | Reflects light and broadens the view | Lighting position and reflected clutter |
| Large-format tile | Reduces grout lines | Floor slope, drain, and wet-area suitability |
A small bathroom can feel luxurious without a freestanding tub or a costly full-room renovation. The difference often comes from choices that reduce visual clutter, improve daily comfort, and give a few well-chosen materials room to stand out. These small luxury bathroom ideas focus on proportion and function first, then add the details that make the room feel personal.

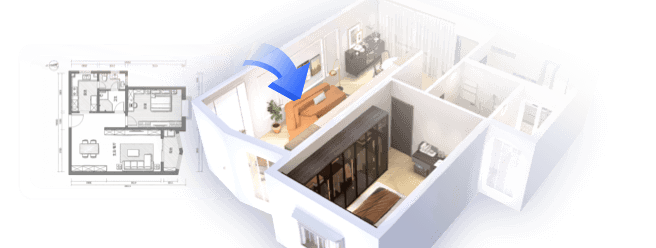
Before buying finishes, measure the room, note door swings, and mark plumbing locations. A quick plan in Homestyler can help compare vanity widths, shower screens, and tile patterns before you commit. In my experience, testing the layout on screen catches awkward clearances earlier than choosing accessories does.
Plan Your Luxury BathroomSmall Luxury Bathroom Ideas: Start with the route through the room
Luxury is difficult to enjoy when the door hits a cabinet or the shower entrance feels cramped. Sketch the room to scale and show the door swing, toilet, vanity, and shower footprint. Keep the main path as direct as possible, and avoid placing frequently used storage behind the door.
If a hinged door consumes useful floor area, consider a pocket or outward-swinging door where the building layout and local requirements allow it. A wall-hung vanity can expose more floor and make cleaning easier, but it still needs secure backing and enough storage for everyday items. Do not assume that a smaller fixture automatically creates a comfortable room: check the clearances required by local code and the actual dimensions of the products you plan to install.
Small Luxury Bathroom Ideas: Choose one focal point, not a collection of statements
A compact room benefits from a clear visual anchor. That might be a distinctive mirror, a stone-look shower wall, a sculptural faucet, or a carefully selected vanity. When every surface competes for attention, the room can feel busier rather than richer.
Use a restrained palette as the backdrop, then let one feature carry the character. For example, pair warm white walls with a veined stone surface and a simple oak cabinet. Repeat one metal finish in the faucet, cabinet pulls, and lighting so the details feel connected. I usually recommend choosing the focal point before shopping for smaller accessories; it makes later decisions easier.
3. Make the vanity work harder
The vanity is often the room’s most useful storage zone. Select a width that leaves comfortable access to the toilet and shower, then decide what needs to live inside it. Drawers are convenient for small items, while a combination of drawers and a shallow shelf can accommodate taller bottles without turning the counter into a storage area.
A floating vanity can lighten the view, but it is not the only route to an airy look. A furniture-style cabinet with legs can also reveal floor beneath it. In either case, measure the basin, faucet, drawer depth, and plumbing together; a beautiful cabinet is frustrating if the trap blocks the top drawer.
4. Use vertical storage with restraint
When floor space is limited, use the wall above the toilet, beside the vanity, or inside the shower. A recessed niche keeps shampoo bottles off the floor, while a slim cabinet can hold spare towels and toiletries. Open shelves are useful for a few attractive or frequently used items, but too many exposed products create visual noise.
Group supplies by task and keep only daily essentials within reach. Store backups elsewhere if possible. My advice is to plan storage around real routines rather than filling every available wall: a clear counter often contributes more to a calm, upscale impression than another shelf.
5. Let the shower feel open
A frameless or minimally framed glass screen can preserve sightlines between the shower and the rest of the room. It does not add floor area, but it can make the room read as one continuous space. Choose hardware that suits the overall finish and confirm that the screen can be installed safely on the planned surfaces.
For a walk-in shower, check the floor slope, drain position, waterproofing system, and splash control with a qualified installer. A curbless entry may improve visual continuity, but it requires careful planning and may not suit every existing floor structure. If a full glass enclosure is impractical, a well-proportioned fixed panel can still reduce visual interruption.


6. Pick tile for scale, maintenance, and grip
Large-format tile can reduce the number of grout lines and create a quieter surface, but it is not automatically the best choice for every small bathroom. The floor slope, drain, and room geometry may call for smaller pieces, especially in a shower. A consistent tile across connected areas can help the room feel cohesive; a contrasting floor can define zones without adding a wall.
Look at samples in the actual room, because daylight and warm bulbs can change how a color reads. For shower floors, ask the supplier or installer about the tile’s suitability for wet areas and the applicable slip-resistance information. Do not choose a glossy floor solely because it looks polished in a showroom. Grout color matters too: a close match creates a calmer field, while a deliberate contrast emphasizes the tile pattern.
7. Layer light instead of relying on one ceiling fixture
A single overhead light can leave faces in shadow and make a small room feel flat. Combine general illumination with task lighting at the mirror and, where useful, a low-level accent such as a niche light. Fixtures in wet or damp locations must be rated for their installation zone and installed according to local electrical rules.
For grooming, light from both sides of the mirror or from a well-designed vertical fixture can illuminate the face more evenly than a bright source directly overhead. Choose a color temperature that works with the finishes and gives a natural appearance. Dimmers can help shift the mood, provided the lamps and controls are compatible.
8. Use mirrors to extend the view
A mirror can reflect light and make the room feel less enclosed. A broad mirror above the vanity is a practical starting point; a mirrored cabinet adds concealed storage if its depth does not interfere with the faucet or movement. Keep the mirror proportionate to the vanity and leave enough room for the lighting.
A mirror does not fix poor lighting by itself. Check what it reflects: a bright window or attractive tile can add depth, while a cluttered shelf simply appears twice. If you are comparing mirror sizes, model the vanity and light positions together in Homestyler so the proportions are easier to judge.
9. Choose a palette that suits the light
Pale colors can help a compact bathroom feel open, but white is not the only option. Soft taupe, muted green, warm gray, and gentle blue can all work when their undertones suit the room. In a windowless bathroom, test paint and tile samples under the artificial lighting you intend to use.
A useful approach is to keep the largest surfaces relatively quiet and introduce color through a vanity, towels, artwork, or a small tile area. If you want a darker, more intimate room, use the deeper shade deliberately and balance it with adequate lighting and reflective surfaces. The goal is not to make every small bathroom look identical; it is to make the chosen palette feel coherent.
10. Add warmth through texture and touch
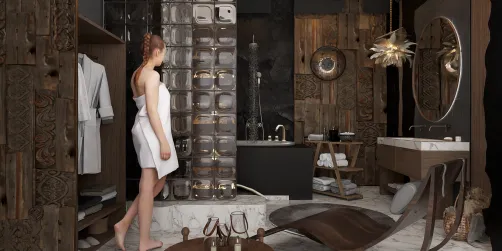
A room can feel considered without expensive ornament. Natural wood tones, tactile towels, a stone tray, and a soft bath mat add contrast to hard tile and glass. Choose materials that can handle humidity, and follow care instructions for wood, stone, and metal finishes.
Keep the number of textures limited. One wood tone, one stone-like surface, and a consistent metal finish are often enough. A small plant can bring life if the room has suitable light and ventilation; otherwise, choose a humidity-tolerant alternative or skip greenery rather than keeping a struggling plant in a dark corner.
11. Improve comfort with details you use every day
Small upgrades can have a larger effect on daily experience than decorative extras. A quiet exhaust fan, a reachable towel hook, a shower niche at a useful height, and a faucet that is comfortable to operate all contribute to a better room. Ventilation is especially important: use an appropriately sized fan and make sure it exhausts outdoors as required, rather than into an attic or enclosed cavity.
Consider where wet towels will hang, where toiletries will sit, and whether the mirror fogs after a shower. These practical questions help distinguish a bathroom that photographs well from one that works well. I've seen simple changes to hook placement and counter organization make a room feel more finished without changing its footprint.
12. Spend strategically and plan the sequence
A full remodel is not always necessary. Replacing a dated mirror, improving lighting, repainting, or changing hardware can refresh a room while leaving sound tile and plumbing in place. If you are renovating, prioritize waterproofing, ventilation, and reliable installation before premium accessories.
A sensible sequence is to confirm the layout and product dimensions, complete any plumbing or electrical work, prepare and waterproof wet areas, install tile and fixtures, then finish with paint and accessories. The exact order depends on the project and the trades involved, so coordinate it with your contractor. Avoid moving plumbing simply for appearance unless the benefit justifies the added cost and disruption.
A compact planning checklist
- Measure the room, door swing, and fixture locations before selecting products.
- Decide what must be stored in the bathroom and where it will go.
- Choose one focal point and keep supporting finishes coordinated.
- Check wet-area ratings, ventilation, waterproofing, and local code with qualified professionals.
- Compare samples under the room’s real lighting.
- Review the layout in a simple 3D plan before ordering fixed items.
A digital model can help you compare alternatives, but it cannot replace site measurements or professional advice. Use Homestyler to test vanity proportions, tile combinations, and lighting placement, then verify every dimension on site before purchasing.
Make the room feel like yours
Built on technology originally developed at Autodesk, Homestyler empowers anyone to design beautiful, realistic spaces in minutes. Join over 20+ million registered users (platform data, 2026) who have already discovered a smarter way to plan, visualize, and bring their dream homes to life — all from the comfort of a browser.
The strongest small luxury bathroom ideas are not about squeezing in more features. They make movement easier, keep essentials organized, and use light and materials with intention. Start with the layout, solve storage and ventilation, then add a few finishes that you genuinely enjoy seeing and touching. A compact bathroom can feel restful and polished when every choice earns its place.
Concevez maintenant gratuitement