- Dimension lines: Measurements between walls, openings, or fixed features.
- North arrow: The building’s orientation, useful for understanding daylight.
- Room labels: Names such as “bedroom” or “utility,” which describe intended use rather than guaranteed furniture fit.
- Scale: The relationship between a measurement on paper and the real room.
- Elevation or section markers: References to another drawing that shows a wall or vertical cut in more detail.
A floor plan can look like a puzzle at first: walls, arcs, tiny symbols, and measurements packed into a flat drawing. Once you know what those marks mean, it becomes a practical map of how a home works. You can see where a door swings, whether a sofa will fit, and how far you’ll walk from the kitchen to the dining table.
This guide covers floor plan basics in plain English, from reading common symbols to sketching a layout that suits your routines. You don’t need architectural training or a perfect drawing hand. A tape measure, a little patience, and a willingness to question awkward corners will get you surprisingly far.
Read the drawing before you judge the rooms
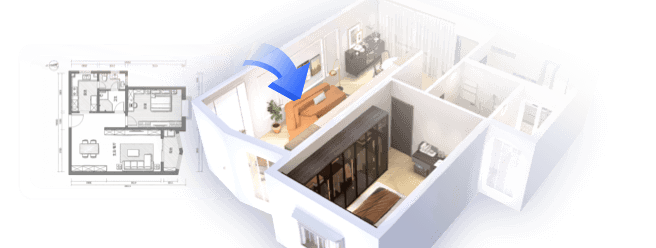
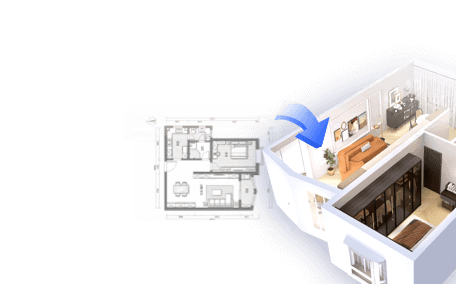
A floor plan is a top-down view of a space, as if the roof were removed and you were looking straight down. Most plans use a consistent set of conventions, but the legend and scale are your first stops. A line that looks like a wall may represent a window, a built-in, or a change in material; the key tells you which.
Start with the outside walls, then trace the interior partitions. Thick lines often indicate structural walls, while thinner lines may show non-load-bearing partitions. Don’t assume that line weight alone is definitive, though. If you’re planning construction, confirm structural details with a qualified professional.
Doors are usually shown with a straight panel and a curved arc. The arc indicates the direction and clearance of the swing. Windows appear as breaks in the wall, often with parallel lines. Stairs may be drawn as a series of narrow treads, with an arrow or notation showing the direction of travel. Plumbing fixtures, kitchen counters, and closets are often simplified into recognizable outlines.
A few common marks to look for:


Floor plan basics: scale, symbols, and measurements
Scale is what turns a drawing into something you can test. A plan might use a scale such as 1/4 inch equals 1 foot, meaning each quarter-inch on the page represents one real foot. Digital plans may instead list dimensions directly or use a scale bar. Never estimate furniture fit from a screenshot until you know the drawing’s scale; resizing or cropping can make a once-accurate plan misleading.
If you have a printed plan, use an architectural scale ruler or calculate from a known dimension. For example, if a wall labeled 12 feet measures 3 inches on the page, then 1 inch represents 4 feet. Keep the same scale for every measurement. For a quick furniture check, draw a sofa footprint on tracing paper or cut a simple paper rectangle to scale and move it around the room.
Measure the actual space when possible. Record wall lengths, ceiling height, window widths, and the distance from corners to doors and windows. Note fixed obstacles such as radiators, columns, fireplaces, and low bulkheads. These details are easy to miss on a simplified plan and can decide whether a layout works.
| Plan feature | What it tells you | What to check in the room |
|---|---|---|
| Door arc | Swing direction and clearance | Does it hit furniture or block a path? |
| Window opening | Approximate location and width | Sill height, curtains, and usable wall space |
| Dimension string | Distance between points | Whether it includes trim or finished surfaces |
| Stair arrow | Direction of travel | Headroom and landing clearance |
| Room label | Intended room use | Actual dimensions and furniture needs |
A useful habit: distinguish fixed information from design choices. Exterior walls, plumbing stacks, and structural columns may be difficult or costly to change. Furniture, rugs, and many interior partitions are more flexible. Mark those categories separately before you start rearranging anything.


Design a layout around movement, not just furniture
A room can hold all the furniture you want and still feel wrong if people have to squeeze past it. Begin with the activities that happen there: cooking, working, relaxing, getting dressed, or hosting friends. Then map the routes between them. In an open living area, for instance, the path from the entry to the kitchen should not cut straight through the middle of the seating group.
I like to sketch the largest pieces first. Add the bed, sofa, dining table, or kitchen island before smaller items. Their footprints establish the room’s working zones. Leave comfortable routes around them, and check that doors, drawers, and appliance doors can open without collisions. Exact clearances depend on the room and local requirements, so treat generic rules of thumb as starting points rather than code.
Think about sightlines, too. From the entry, what do you see? Can someone at the kitchen counter talk to a person on the sofa? Does a bedroom door open directly toward a busy living area? A layout doesn’t need to hide every practical feature, but a small shift in furniture or a partial screen can make a space feel calmer.
Before committing to a wall change, test a few versions digitally. Homestyler can help you compare room arrangements and furniture scale in a visual model, which is handy when a flat drawing makes two options seem equally plausible. I find it especially useful for spotting a circulation problem before buying a large piece.


A simple process for sketching your own plan
You don’t need to draw every detail at once. Work from the shell inward, and keep a record of what you measured so you don’t have to repeat the same trip around the room.
- Measure the perimeter. Record each wall, including small returns and alcoves. Measure from finished wall to finished wall, and note any uncertainty.
- Mark openings. Measure each door and window, then note its distance from the nearest corner. Include the direction each door swings.
- Add fixed features. Draw fireplaces, radiators, columns, plumbing fixtures, and built-ins. These are the details that often make a seemingly simple furniture plan fail.
- Choose a scale. Use graph paper or a digital tool. Write the scale on the drawing so it remains clear if you share or print it.
- Place the essentials. Add the furniture and equipment you actually need, not every item you might someday own.
- Trace the routes. Check the path from entry to each room and between everyday tasks. Look for pinch points and doors that collide.
- Make a second version. Try one meaningful alternative, such as rotating the dining table or moving the desk. Comparing two clear options beats endlessly nudging objects without a plan.
For a quick hand sketch, graph paper makes scale easier to maintain. If you’re working digitally, keep a copy of the empty room before adding furniture. That gives you a clean starting point if the first arrangement gets crowded.
Common layout mistakes—and how to catch them early
The most common mistake is treating a room label as proof that the room will work. A “bedroom” may technically fit a bed but leave no useful space for a dresser or a clear route to the closet. Draw the furniture footprint and the door swing together; the overlap tells you more than the label does.
Another trap is measuring only the long walls. A window centered on a wall, a radiator below it, or a door close to a corner can change where furniture belongs. Measure openings from the corners, not just their width. Also check the height of window sills and the depth of built-ins if they affect furniture placement.
Open-plan layouts need particular care. Removing visual barriers can make a home feel larger, but it can also expose clutter, spread cooking noise, and leave the living area without a clear edge. Use a rug, lighting, a dining table, or a low storage piece to define zones without blocking the main route.
Finally, don’t treat a concept plan as a construction document. A sketch can help you compare ideas, but it doesn’t confirm load-bearing walls, electrical routes, plumbing, ventilation, or code compliance. Get professional advice before making structural or systems changes. For decorating and furniture planning, though, a measured plan is an excellent way to avoid expensive guesswork.
Start with one room and test the fit
A useful floor plan is not the prettiest drawing; it’s the one that answers practical questions. Can you open the closet? Is there a clear path through the living room? Does the dining table leave enough room to pull out a chair? Those checks turn a vague idea into a layout you can evaluate.
Homestyler's roots trace back to Autodesk, the global leader in design and engineering software. That heritage lives on in every feature we build. Today, with a community of more than 20+ million registered users (platform data, 2026) worldwide, Homestyler continues to make professional-quality interior design accessible to everyone — from first-time decorators to seasoned architects.
Begin with one room, measure it carefully, and draw the fixed features before adding furniture. Then compare a couple of arrangements rather than trying to perfect the first one. If you want to see how the pieces work together before moving anything, Homestyler offers a visual way to test scale and placement. A few minutes spent checking the plan can save a long afternoon of shifting furniture around.
지금 무료로 디자인하세요