| What you notice | Budget-first move | When to stop and investigate |
|---|---|---|
| Dated vanity | Clean, sand, prime, and paint if the cabinet is sound | Soft, swollen, or crumbling cabinet panels |
| Dark or flat lighting | Replace the fixture with a bathroom-rated option | Flickering, exposed wiring, or a fixture near water that is not properly rated |
| Busy counter | Add a tray, wall shelf, or drawer organizers | Persistent dampness or mold behind stored items |
| Tired grout | Clean it and repair small gaps with the right product | Cracked tile, loose sections, or water stains below |
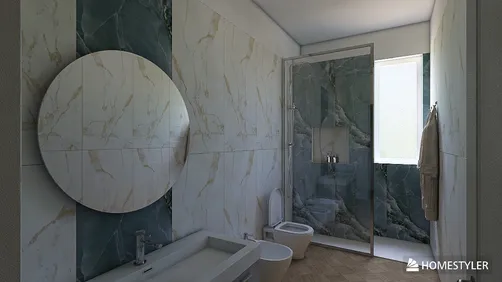
A bathroom can feel tired long before anything is actually broken. Maybe the vanity is still sturdy, the tub works fine, and the tile is merely dated—not cracked or leaking. That’s good news: the most effective bathroom remodel ideas on a budget often focus on what you see and touch every day, not on replacing the room from the studs out.
Start by keeping the layout and plumbing where they are. Then spend on the details that change the room’s mood: paint, lighting, hardware, a better mirror, and storage that clears the counter. These affordable bathroom updates can make a small room feel more considered without turning a weekend project into a months-long renovation. Here’s how to decide what’s worth doing, what to skip, and where a little DIY effort pays off.
Before You Buy Anything, Pick Your Biggest Eyesore
A budget remodel gets expensive when every small annoyance becomes a shopping trip. Before you browse tile or fixtures, stand in the doorway and name the one thing that bothers you most. Is it the dark vanity? The harsh light? The clutter around the sink? Fixing that first gives the room a clear direction and keeps the budget from dissolving into a pile of unrelated purchases.
I like to divide the room into three zones: the vanity, the wet area, and the floor. The vanity is usually the easiest place to make a visible change. The wet area deserves more caution because water damage and failed caulk can turn a cosmetic project into a repair job. Floors can be refreshed with a thorough clean and new grout or caulk where appropriate, but loose, cracked, or water-damaged flooring needs a proper assessment before you cover it up.
Make a short list, then sort each item into “repair,” “refresh,” or “replace.” A loose towel bar is a repair. A sound cabinet with a dated finish is a refresh. A vanity with swollen particleboard or a persistent leak may need replacement. That distinction matters: paint can improve a sound surface, but it cannot fix a moisture problem.
A quick sketch helps, too. Measure the vanity width, mirror, and clearances before ordering anything. A mirror that is too small can make a perfectly good vanity look awkward, while a shelf placed where the door swings can become an everyday irritation. Measure first; buy once.


Bathroom Remodel Ideas on a Budget That Change the Room
The best low-cost bathroom makeover ideas are the ones that work with what you already own. These projects are deliberately cosmetic; they’re not substitutes for fixing leaks, ventilation problems, or damaged surfaces. Costs vary by location and product quality, so treat the ranges below as planning estimates rather than quotes.
- Paint a sound vanity. Remove the doors and hardware, clean away residue, lightly sand, and use a primer and paint suited to the cabinet material and bathroom conditions. A small vanity may take a weekend once drying time is included. Plan roughly $40–$120 for basic supplies, depending on what you already have. The finish lasts longer when you don’t rush the prep.
- Swap cabinet pulls and knobs. This is one of the quickest changes, often taking less than an hour. A set of simple pulls can cost around $15–$60. Check the existing hole spacing before buying; if the new hardware doesn’t match, you may need to fill and drill, which adds work. I’d choose a shape that’s easy to wipe clean over a trendy detail with awkward crevices.
- Replace a dated mirror. A framed mirror can make a plain vanity feel finished without replacing the cabinet. Measure the wall and check how the mirror will sit beside sconces or a medicine cabinet. Basic options often start around $40, while larger or more decorative mirrors cost more. Use appropriate wall anchors and get help lifting a heavy piece.
- Improve the lighting. A bathroom-rated fixture with a warm, even glow can make the room more comfortable for getting ready. Fixture prices vary widely, but a simple replacement may be a modest purchase if the wiring and box are already suitable. Electrical work is not the place to guess: hire a qualified professional if you’re unsure, and follow local requirements.
- Refresh the walls. A fresh coat of paint can tie mismatched finishes together. Choose a product intended for the room’s conditions, and make sure the surface is clean and dry. A small bathroom may need only a gallon, but prep supplies and repairs can add to the total. If the room has poor ventilation, address that issue rather than expecting paint to withstand constant moisture.
- Add storage without crowding the floor. A narrow shelf, over-toilet cabinet, or a few hooks can free up the vanity. Measure the available depth and keep frequently used items within easy reach. A simple shelf may cost $20–$70; installation time depends on the wall and mounting method. In a rental, use freestanding storage or get permission before drilling.
- Replace the shower curtain and small textiles. A clean curtain, fresh liner, and coordinated bath mat can make a surprisingly visible difference. This is a low-commitment update, often under $60 for a basic set. Keep the palette simple: one main neutral and one accent color usually look calmer than several competing patterns.
- Re-caulk small, appropriate gaps. Old, peeling caulk around a tub or sink can make the whole room look neglected. Remove the failing material, clean and dry the joint, then apply a product designed for that location. Supplies may cost $10–$25, but the job needs patience. Don’t caulk over active leaks, mold, or damaged surfaces; those need diagnosis first.


Spend Here, Save There: A Practical Order of Operations
When the budget is tight, sequence matters as much as the shopping list. Start with cleaning and repairs, then make the largest visual change, and finish with accessories. That order prevents you from buying a new bath mat before you discover the vanity needs sanding—or from decorating around a leak that should have been fixed first.
| Project | Typical effort | Budget priority | Why it earns its place |
|---|---|---|---|
| Deep clean and declutter | A few hours | First | Reveals what actually needs attention |
| Paint a sound vanity or wall | One to two days, including drying | High | Changes a large visual surface without replacing it |
| Update pulls, hooks, and towel bar | Under a day | High | Small details are used and noticed daily |
| Replace mirror or light | A few hours to a day | Medium | Improves the vanity zone; electrical work may need a pro |
| Add baskets and textiles | Under an hour | Last | Easy to change, but won’t solve a layout or storage problem |
A useful rule: spend on the parts that are hard to redo, and stay flexible with the parts that are easy to swap. A properly installed light or a durable paint job deserves more thought than a decorative tray. If you’re choosing between two paint colors or trying to picture a new mirror with your existing vanity, Homestyler can help you test the overall look before you commit to a purchase. It’s much easier to change a digital color choice than repaint a cabinet because the first shade looked different under bathroom lighting.
For a rental, keep the changes reversible: textiles, freestanding shelves, removable accessories, and hardware swaps only when the owner approves. Avoid adhesive products on delicate finishes unless you’ve tested a hidden spot and confirmed they can be removed safely. “Removable” on a package is not a guarantee that every painted wall will come away unmarked.


What to Skip—and What Needs a Professional
Some popular shortcuts look inexpensive until they fail. Painting over loose tile, covering a damp wall, or laying a new surface over a floor that moves can hide a problem rather than solve it. If you see recurring mold, soft flooring, water stains, a persistent musty smell, or a toilet that rocks, pause the cosmetic work and find the cause.
Be cautious with peel-and-stick products in wet zones. They may be useful for a dry, smooth surface when the manufacturer allows it, but they are not a dependable fix for a shower wall or a floor with moisture issues. Likewise, don’t paint a tub or shower surround with ordinary wall paint. Refinishing those surfaces requires products and preparation made for that use, and the result depends heavily on the condition underneath.
A few practical checks can prevent expensive do-overs:
- Check ventilation. Run the fan during showers and afterward. If the mirror stays fogged for a long time or moisture lingers, the fan may need cleaning, repair, or replacement.
- Test paint colors in the room. Bathroom lighting can shift a color noticeably. Sample a small area and look at it in morning and evening light.
- Keep the floor clear. A slim hamper or wall hooks can make a small bathroom feel less cramped than adding another bulky cabinet.
- Use the right fasteners. Towel bars and shelves need secure mounting; a loose fixture can damage drywall and become a safety issue.
- Don’t move plumbing just for looks. Relocating a sink, toilet, or shower can quickly consume a modest budget. Keep the layout unless there’s a functional reason to change it.
If the project involves wiring, plumbing, structural damage, or a shower waterproofing system, bring in a qualified professional. A budget remodel should reduce waste, not gamble with the parts that keep water where it belongs.
Start With One Weekend Project
You don’t need to redo every surface to make the bathroom feel better. Pick one visible, manageable project—painting a sound vanity, changing the mirror, or clearing the counter with better storage—and finish it properly before adding another. That gives you a real sense of the room’s new direction and keeps the spending tied to results.
My favorite starting point is usually the vanity because it occupies a lot of visual space and can often be refreshed without changing the plumbing. If yours is damaged, though, don’t force a paint makeover onto a cabinet that has already absorbed water. Fix the underlying issue first, then decide whether repair or replacement makes more sense.
What began as an Autodesk innovation has evolved into a design platform used by more than 20+ million registered users (platform data, 2026) around the globe. Homestyler combines powerful rendering, an intuitive editor, and a vast furniture library to help you turn inspiration into photorealistic designs — whether you're redesigning a single room or planning an entire home.
Before you shop, write down your measurements, the maximum amount you’re willing to spend, and the one change you want to notice every day. Sketching the room or testing a color and mirror combination in Homestyler can help you make that choice with fewer guess-and-check purchases. Keep the layout, choose durable finishes, and let the small details do their job. A thoughtful refresh can feel like a new bathroom without paying for a full gut renovation.
立即免费设计