


Blender stands as a formidable open-source 3D creation suite, offering users the tools necessary to craft impressive 3D models, animations, and visual effects. A particularly intriguing feature of Blender is its capability to transform 2D images into 3D models. Whether you are an artist, a designer, or simply a hobbyist, this conversion can significantly elevate your projects. In this comprehensive guide, we will take you through the step-by-step process of turning an image into a 3D model using Blender. To begin with, you'll want to select a high-resolution image to assure optimal results. Launch Blender and head over to the layout workspace. Within the 3D Viewport, introduce a new image by clicking 'Add', then 'Image', and select 'Reference'. This action will import your image into the 3D environment, providing a visual guide to assist your work. Adjust the image's size and positioning as necessary. Following this, utilize the 'Grease Pencil' tool to trace the image. This feature allows you to draw 2D shapes directly over your image, which you can subsequently convert into 3D geometry. Activate the Grease Pencil tool and begin tracing the outlines of your image. It's advisable to create distinct strokes for various elements to facilitate a smoother conversion process later on. After tracing, convert the Grease Pencil strokes into a mesh. Select your Grease Pencil object, navigate to the Object menu, and choose 'Convert', then 'Convert to Mesh'. This action generates a mesh object from your traced strokes, allowing you to enter Edit Mode for further refinement. You can modify the vertices, extrude, and scale the model to meet your design specifications. Once your model is refined, consider adding depth and intricate details. Employ the 'Extrude' tool to provide thickness to your model, and utilize modifiers such as 'Subdivision Surface' to enhance the smoothness and detail of the geometry. Always check the normals of your mesh to ensure they are oriented correctly, as this influences how light and shadows interact with your model. Subsequently, it's time to introduce materials and textures to your creation. In the Material Properties panel, create a new material to apply colors, textures, and shading settings. You can enhance the realism of your model with image textures or venture into custom shaders for a more personalized touch. Finally, once you are pleased with your model, prepare to render your project. Adjust your camera and lighting to skillfully highlight your model. Make use of the Render Properties settings to select your desired output resolution and quality, and when everything is in place, click the render button to reveal your final creation! In summary, the journey of converting images to 3D models in Blender is both creative and fulfilling, amplifying the quality of your designs. By adhering to these steps, you can seamlessly transition any 2D image into an extraordinary 3D model for your projects. Remember, endless practice will hone your skills, so keep exploring diverse images and techniques for continual improvement in Blender!
Tips 1:
Always opt for high-quality images to achieve superior results. Explore various styles and techniques to discover what resonates best with you while working with tools like Homestyler.
FAQ
welcome to Homestyler

Minimalist Travertine Round Side Table 3D Model

Minimalist Fabric L Shaped Sectional Sofa 3D Model
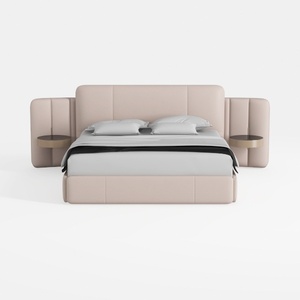
Minimalist Blush Fabric Upholstered King Bed with Attached Side Tables 3D Model
Discover your home's potential with Homestyler! This user-friendly online design platform offers a powerful design tool, stunning 3D renderings, and a wealth of inspiring DIY video tutorials. Create your dream space effortlessly, whether you're a novice or an experienced designer!
Design Now for FREE


