


Transforming orthographic views into three-dimensional models is an essential ability for designers. Whether you’re in interior design, architecture, or simply pursuing it as a hobby, mastering the art of converting your two-dimensional sketches into 3D representations can significantly elevate your projects. Let’s explore the process together!
Comprehending Orthographic Views:
Before we embark on the modeling journey, let’s clarify the meaning of orthographic views. These representations illustrate various sides of an object, commonly including the front, side, and top perspectives. They deliver a detailed outline of your design, though they lack the depth that a 3D model provides.
To successfully create a 3D model from these ortho views, it's vital to assess the proportions, dimensions, and the interrelation of different components illustrated in the views. Are there noticeable patterns? What materials will you choose? Grasping these nuances is an essential initial step.
Essential Tools for 3D Model Creation:
You will require a 3D modeling program to breathe life into your designs. Some commonly used options include SketchUp, Blender, and AutoCAD. Select one that suits your expertise and specific project needs.
Once you have your software set up, utilize the orthographic views as references. If possible, import these images into the program. This practice will aid in maintaining accuracy as you commence your modeling endeavor.
Steps to Transmute Ortho Views into 3D Models:
1. **Initialize Your Workspace:** Launch your 3D modeling application and create a new project. Import your ortho views as images, ensuring they are accurately aligned and proportionate on your workspace.
2. **Begin with the Base Structure:** Start crafting the base outline of your design, primarily referencing the front view. Utilize the extrude feature to add depth to your shapes.
3. **Incorporate Details:** After establishing the fundamental framework, refer to both side and top views to include intricate details such as windows, doors, and furniture. Tools like bezier curves and extrusions can be employed based on the design’s complexity.
4. **Apply Materials and Colors:** Once your 3D model takes shape, it's time to infuse it with textures and colors. This step is crucial as it represents your design intention and animates your model.
5. **Setup Lighting and Environment:** Ensure you configure the lighting appropriately. Well-placed lighting will accentuate your model’s features and grant it a more lifelike quality.
6. **Render Your Creation:** Finally, render your model to produce a high-resolution image. This step marks the transition of your model from a digital design to an impressive visual presentation.
Wrap-Up:
Converting orthographic views into 3D models is not merely gratifying; it also enriches your design presentations. By adhering to these steps, you can effectively bridge the divide between concept and visual representation, particularly when utilizing tools like Homestyler.
Frequently Asked Questions
Q: What software is recommended for converting ortho views into 3D models? A: Popular options include SketchUp for newcomers, while Blender provides extensive capabilities for more experienced users.
Q: How do I ensure precision during the modeling process? A: Make it a habit to double-check your measurements and continuously refer back to the ortho views throughout the modeling phase.

Minimalist Dark Green Fabric Loveseat Sofa with Decorative Pillows 3D Model
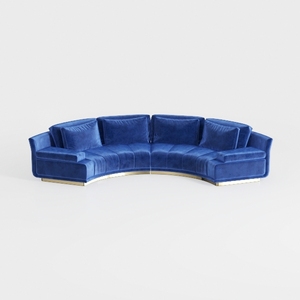
Modern Navy Velvet Gold Base Curved Sectional Sofa 3D Model

Modern Minimalist Fluted Base Glass Top Side Table 3D Model
Discover Homestyler, your go-to online home design platform! With an easy-to-use design tool, stunning 3D renderings, and a wealth of design projects and DIY video tutorials, transforming your space has never been easier. Bring your dream home to life today!
立即免费设计


