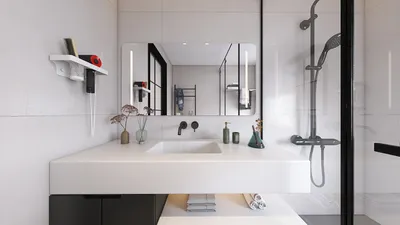


In my early days as a painter, I promised a client I could refresh their townhouse over a weekend — a promise I soon regretted when I discovered that a faulty paint sprayer could turn a hopeful project into a chaotic splatter zone. This experience taught me the importance of mapping out the room, safeguarding surfaces, and even utilizing a 3D floor planner to effectively arrange drop cloths and manage airflow before even picking up the paint. Working in compact spaces necessitates smarter approaches, underscoring the critical role of choosing the right sprayer.
Tackling small spaces can ignite substantial creativity. This article shares five practical strategies I apply in real-life projects to select and utilize the ideal house paint sprayer. We'll discuss insights from seasoned pros, minimal trade-offs, budget-friendly tips, and personal anecdotes to ensure you don’t repeat my earlier blunders.
1. Align the Sprayer Type with the Task: Comparing Airless, HVLP, and Compressed Air
For exterior walls and cabinets, I typically opt for an airless sprayer due to its rapid application and ability to handle thick paints without the need for thinning. The downside? You’ll contend with overspray and require some patience for proper masking to achieve smooth coats.
For items like trim and furniture, I lean towards HVLP sprayers for their precision and superior finish; while they operate at a slower pace, they minimize drips. Compressed-air systems can deliver stunning finishes but they require both an air compressor and added cleanup, making them less practical for weekend warriors tackling DIY projects.
save pin
2. Select the Appropriate Tip and Nozzle for Paint Thickness
Choosing the right tip width is akin to picking the ideal brush — a tip that’s too large leads to wasted paint, while one that’s too small results in sluggish, streaky application. I always keep a variety of standard tips on hand and test spray patterns on cardboard before moving on to the actual walls.
Maintaining tips is a hidden responsibility: cheaper nozzles can clog easily and disrupt your spray pattern during a project. Investing a bit more in high-quality tips will save you time on unclogging and reworking your paint job.
save pin
3. Find the Right Balance of Power and Control: Pressure Settings are Key
One effective technique I use is beginning at a lower pressure and gradually increasing it — this approach reduces splatter and helps prevent drips, particularly on vertical surfaces. When painting indoors, low-pressure settings paired with consistent back-and-forth movements yield a more polished finish.
Increased power can hasten the job, yet it necessitates superior masking and ventilation. If you’re uncertain, it’s wise to practice on scrap materials or inside a cupboard before tackling major areas.
save pin
4. Never Overlook Prep Work, Masking, and Ventilation
During one kitchen refurbishing project, I severely miscalculated drying times, resulting in ghosting marks that took me an entire weekend to remedy. Now, I always ensure to tape surfaces, use plastic sheeting, and operate a small fan for enhanced airflow. Adequate preparation often outweighs the advantages of purchasing the most high-end sprayer.
Good masking can save considerable cleanup time and seems worth the slight initial expense. For indoor projects, I recommend utilizing low-tack painter’s tape and specialized drop cloths designed for painting to cut down on redoing work.
save pin
5. Focus on Cleanup, Maintenance, and Durability
A high-quality sprayer that undergoes thorough cleaning after every use will outlast budget models left to degrade. I rely on straightforward cleaning kits and adhere to a routine: flushing with solvent, disassembling the tip, and storing components in a dry environment. This small investment in time pays off with years of dependable service.
While budget sprayers are ideal for one-off projects, if you’re eyeing multiple tasks ahead, a mid-range model with replaceable parts presents a smarter choice. I also like to incorporate paint selections with renderings from an ai-home-design tool like Homestyler to visualize finishes prior to making final decisions.
save pin
FAQ
Q1: What’s the most effective type of paint sprayer for entire home projects?
Professionals often prefer using airless sprayers for speed and efficiency on whole-house exteriors. For interior spaces, consider a balanced strategy: airless for broader walls and HVLP for detailed trim and cabinets.
Q2: Is paint thinning necessary for my sprayer?
Certain sprayers, particularly HVLP models, typically require some paint thinning. Conversely, airless sprayers generally manage thicker paints without much alteration, but always conduct tests on scrap and adhere to manufacturer recommendations.
Q3: How can I minimize overspray when painting indoors?
Achieve better control by using lower pressure settings, making short passes, and ensuring good masking. Maintain control of your strokes and keep the nozzle perpendicular to the surface for optimal outcomes.
Q4: Are premium sprayers deserving of their price tag?
Higher-end sprayers typically offer enhanced seals, simplified maintenance, and consistent atomization. They’re worth investing in if you frequently paint; however, for occasional DIYers, a reliable mid-range option is often more budget-friendly.
Q5: What’s the best way to clean my sprayer?
Immediately flush the sprayer with the recommended solvent after each use, clean and disassemble the tip and filters, and allow components to dry before reassembling. Regular cleaning not only prevents clogs but also extends the lifespan of your tool.
Q6: Is there a health and safety protocol when spray painting indoors?
Absolutely — wearing an N95 respirator or higher, protective goggles, and ensuring good ventilation in the area are crucial. For detailed safety guidance related to indoor air quality, refer to EPA protocols at https://www.epa.gov.
Q7: Can I effectively use a paint sprayer on furniture and cabinets?
Certainly — HVLP sprayers are favored for applying finishes to furniture and cabinets due to their ability to produce a smooth finish. Key to achieving consistent coverage lies in practice and selecting the correct tips.
Q8: What should I consider when choosing different brands?
Seek models that provide accessible replacement parts, clear and detailed user guides, and positive feedback from users. Additionally, assess warranty and local service availability as they can significantly ease the process if issues arise.
save pin
Discover your design potential with Homestyler! This user-friendly online platform offers an intuitive design tool, stunning 3D renderings, and a wealth of inspiring design projects. Plus, with engaging video tutorials, you’ll have everything you need to create your dream space effortlessly. Start designing today!
Zaprojektuj teraz za darmo
































