Mud rooms are designed to function as pressure valves for your home, efficiently capturing moisture, dirt, bags, and noise before they invade your living areas. A thoughtfully designed mud room minimizes everyday hassle and protects the interior finishes of your home. In the wake of renovations post-2020, many clients are increasingly requesting enhanced storage, improved ventilation, and designated pet areas—elements that are predominantly addressed through the floor plan layout. Tools like Homestyler can assist in visualizing these features within your design.
Maximizing space efficiency is crucial; it's not just about having more square footage. As per the NKBA guidelines, the main pathways in utility spaces must maintain a clear width of at least 36 inches (915 mm) to accommodate easy movement with bags or laundry. For optimal lighting, I adhere to IES recommendations, ensuring task areas receive 300–500 lux illumination with a color temperature ranging from 2700 to 3500K to create a calm yet practical atmosphere. Moreover, maintaining good air quality is critical for health: projects aligning with WELL v2 guidance prioritize active exhaust systems in entry zones and utilize finishes that are easy to clean, aiding in the containment of pollutants and moisture. Research from Steelcase indicates that environmental friction, which interrupts flow, increases stress; the same principle is applicable at home—the removal of obstacles in the mud room can significantly alleviate stress for inhabitants.
Design Steps: Entry → Drop Zone → Clean Area → Storage → Exit
Effective mud rooms adhere to a consistent sequence of use. I typically configure circulation starting from the primary entry—usually the garage or back door—directly to a drop area, then transition to a cleaning station (with shoe scrapers/mats and benches), followed by storage (hooks, lockers, cabinets), and finally a clear exit path that leads into the house. For those experimenting with different door swings or bench lengths, using a design tool such as Homestyler can quickly reveal any potential pinch points or door conflicts before final decisions are made.
Essential Measurements for Smooth Movement
- Circulation: Ensure a minimum of 36 inches clear path; 42 inches is comfortable for two individuals to pass with gear.
- Bench height/depth: Ideal dimensions are 17–19 inches high and 15–18 inches deep, accommodating 48–60 inches of bench space for 2–3 users.
- Hook height: Position the top hook at 66–70 inches; consider a lower hook at approximately 42 inches for children's access.
- Tall storage: Lockers should be 15–18 inches deep; increase to 24 inches deep if hanging winter coats front-facing.
- Shoe storage: Shelves need to be 12–14 inches deep, with vertical spacing of 7–8 inches for adult shoes.
- Pet area: Dimensions should be 24–30 inches deep and 18–24 inches wide; incorporating a hose bib and floor drain can facilitate pet bathing.
- Laundry pass-through: Maintain 30 inches of clearance in front of appliances; allow a 1 inch side clearance based on manufacturer specifications.
Three Effective Mud Room Designs
1) Single-Wall Configuration (Minimum Width)
Suitable for narrow entries, this setup places a bench with cubbies below and hooks above along a single long wall, with tall storage at one end. Ensure the door swings toward the wall devoid of storage. Add a walk-off mat at the threshold and a second mat post-bench to effectively collect any remaining dirt.
2) Galley Style with Opposing Functions
This layout features two parallel runs: one side dedicated to drop-off, benches, and hooks, while the opposite side offers enclosed storage and a utility sink. It’s important to maintain a 36–42 inch aisle width, separating wet activities from clean processes and accommodating families with varied movement speeds.
3) L-Shaped Corner Design
Utilize corner space for storing tall items like brooms or vacuums, or as a pet niche. Position the bench along the longer leg of the L, with tall storage on the shorter leg. The L shape naturally reduces sightlines to the rest of the home while providing a clear transit route.
When adjusting appliance placements or modifying walls, employing a layout planner can simulate door clearance, bench length, and stroller maneuvers within minutes, ensuring a smooth design experience.
Durable Flooring and Finishes for Everyday Life
- Flooring: Ideal choices include porcelain tile with R10–R11 slip resistance, dense quarry tile, or sealed concrete. Matte surfaces effectively conceal scuffs, and large-format tiles reduce grout lines. To trap dirt, a recessed walk-off mat at the entrance is recommended.
- Grout: Opt for epoxy or high-performance urethane grout to enhance stain resistance.
- Walls and Bases: Utilize a 6–8 inch coved base if spills are expected; consider semi-gloss or scrubbable matte finishes for walls.
- Millwork: Choose HPL or thermofoil materials for durability; marine-grade plywood is advisable in high-moisture areas.
- Hardware: Select full-extension, soft-close features; double-hooks rated for 35–50 pounds effectively hold backpacks.
Light, Air, and Sound Control
- Lighting: Aim for 300–500 lux at benches and sinks; adding motion sensors can aid in hands-full entries. Maintain a color temperature within the 3000–3500K range for accurate color rendering of outdoor attire and mud levels.
- Glare Management: Utilize diffused lens lighting and wash perimeter walls to read surfaces without hot spots.
- Ventilation: Incorporate dedicated exhaust systems or link to nearby bathroom exhaust for enhanced air quality. A transfer grille toward exterior doors can help prevent pressure traps.
- Acoustic Treatments: Since mud rooms typically lack soft surfaces, consider adding a washable runner and acoustic ceiling tiles or wood slats with acoustic backing to dampen noise when items are dropped.
User-Centric Ergonomics and Behavioral Cues
- Flow Sequence: Placing the bench before the hooks encourages seated shoe changes and promotes organization.
- Child Accessibility: Lower hooks and open cubbies foster ownership among children and minimize clutter.
- Visual Organization: Position daily-use items at eye level while storing seasonal gear in closed upper cabinets.
- Color Psychology: Neutral earth tones and subdued greens foster relaxation; a vibrant accent near the drop area subtly directs individuals to the intended landing spot.
Storage Solutions That Work for You
- Personalized Daily Bins: Each person should have a 12–14 inch wide by 10–12 inch high, labeled, breathable bin.
- Vertical Tool Storage: A narrow cabinet with a perforated panel and rails is ideal for organizing mops and sports equipment.
- Separating Dirty and Clean: Implement one closed cabinet for muddy items and another for clean linens and supplies.
- Concealed Charging Areas: Build 120V outlets inside a cubby for e-bikes, gloves, or pet trackers, with necessary ventilation for electronics.
Integrating Laundry, Pets, and Power Needs
- Laundry: Either position side-by-side with a 24-inch folding counter above or stack them with a tall pantry adjacent. Ensure a floor drain is available if allowed by building codes.
- Pet Washing Station: Design with a 6–8 inch curb, a hand shower, and wall protection up to 48 inches. Choose slip-resistant mosaic tiles for the pan to enhance grip for pets.
- Smart Technology: Implement motion sensors alongside a manual override, weather station display, and heated drawers for gloves in colder climates.
Focus on Resilience and Sustainability
- Moisture Management: Implement a sloped floor at the entry (1/8 inch per foot) directed towards the threshold or drain.
- Durable Core Materials: Whenever feasible, specify substrates that are formaldehyde-free and moisture-resistant.
- Recycled Products: Opt for porcelain that includes verified recycled materials, alongside low-VOC sealants.
- Maintenance Strategy: Incorporate a nearby hose connection or utility sink, as well as storage for cleaning supplies, which helps maintain tidiness months post-move-in.
Final Checklist Before Confirming Your Design
- Verify which door constitutes the primary daily entry point.
- Outline the drop–clean–store sequence on your design plan.
- Check for a clear aisle width of 36–42 inches after accounting for all door swings.
- Position the bench first, followed by hooks, with a designated shoe area below.
- Ensure adequate task lighting of 300–500 lux and an exhaust system is in place.
- Select slip-resistant flooring and stain-resistant grout for longevity.
- If required, create a niche for pets or utilities.
- Provide electrical outlets where charging will occur.
Frequently Asked Questions
Q1: What is the minimum width for a practical mud room?
A1: A width of 5 feet (60 inches) is workable if storage is confined to one wall, leading to a 36-inch passage along with 12–15-inch deep storage.
Q2: How much lighting is necessary?
A2: Target 300–500 lux illumination at benches and sinks using fixtures with color temperatures of 3000–3500K to ensure comfortable and accurate visual rendering of colors; this aligns with common IES task lighting standards.
Q3: Are lockers superior to open hooks?
A3: For families, a hybrid approach is most effective: utilize hooks and benches for quick access, while designating closed lockers for visual calm and seasonal storage.
Q4: Which flooring is most durable for mud and snow?
A4: Porcelain tile or sealed concrete with a slip-resistant surface are ideal selections. Utilize epoxy or urethane grout to prevent staining from de-icing agents and dirt.
Q5: Is ventilation necessary in a mud room?
A5: Absolutely. A timed exhaust system or a connection to an adjoining bathroom exhaust is essential for drying wet gear and mitigating odors. Projects that follow WELL v2 guidelines emphasize the importance of exhaust and ease of cleaning in entry transition areas.
Q6: What should be the depth of shoe storage?
A6: For adult shoes, aim for 12–14 inches of depth with 7–8 inches of vertical space per pair; allow for a deeper shelf of up to 16 inches for boots.
Q7: Can I incorporate laundry facilities within a compact mud room?
A7: With 6 feet of linear wall space, a stacked washer and dryer can fit alongside a 30-inch clearance in front, complemented by a shallow folding counter or a wall-mounted drop surface.
Q8: What color strategy is most effective?
A8: Use mid-tone neutrals for larger surfaces to disguise marks, then add an accent color in the drop area for visual guidance. Muted greens and earth tones help mitigate stress during transitions.
Q9: At what height should hooks be positioned for children?
A9: Hooks should be set around 42 inches from the floor to ensure children can easily reach their designated spots; adult hooks can be set at 66–70 inches high.
Q10: Do you have any recommendations for controlling noise?
A10: Implement a washable runner, soft-close hardware, and acoustic ceiling tiles or slatted wood with acoustic backing to minimize noise from dropped items.
Q11: Where should wet umbrellas and skis be placed?
A11: Allocate a cabinet with a drip tray and waterproof liner, along with a small drain if feasible; if not, consider using a metal tray on a lower shelf featuring ventilation slots.
Q12: What kind of heating is suitable for wet items?
A12: A hydronic toe-kick heater or a small radiant panel situated beneath the bench will aid in drying; ensure clearances and ventilation are managed as per manufacturer's guidelines.
Built on technology originally developed at Autodesk, Homestyler empowers anyone to design beautiful, realistic spaces in minutes. Join over 20+ million users who have already discovered a smarter way to plan, visualize, and bring their dream homes to life — all from the comfort of a browser.

Nicetree Shoe Storage Organizer with 2 Flip
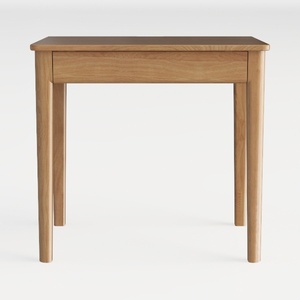
Minimalist Solid Oak Wood Single Drawer Side Table 3D Model

Minimalist Japandi Oak Rattan 6 Drawer Dresser 3D Model
Looking to transform your home with ease? Try Homestyler! This fantastic online platform offers an intuitive design tool, stunning 3D renderings, a wealth of inspiring design projects, and helpful DIY video tutorials. Bring your creative ideas to life effortlessly and start your design journey today!
Diseño ahora GRATIS