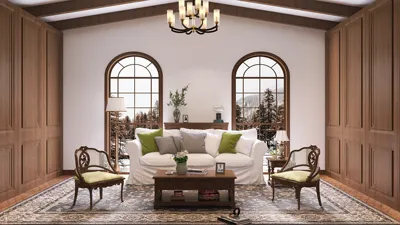


In my experience, I've worked with a client who envisioned a grand farmhouse stove in a compact 350 sq ft studio—she even chose curtains to match the stove's ember color. Initially, I was hesitant, but I conceptualized a compromise involving a smaller stove with specified clearances and a well-thought-out layout. This design not only kept the space cozy but also prioritized safety. This project highlighted how managing small spaces can ignite remarkable creativity, and a well-structured plan is paramount in avoiding panic-driven decisions. When planning for heat in confined spaces, it’s crucial to begin with a detailed small-space floor plan to steer clear of common beginners' pitfalls. Integrating tools like Homestyler can be valuable for creating that effective layout.
Choose a compact, certified stove
Tip: Before purchasing, measure doorways and the intended route for the chimney. I once made the mistake of ordering a stove that wouldn’t fit through the hallway, leading to costly adjustments above the stove’s price.
save pin
Consider placement focused on safety and flow
Placement is critical: avoid situating a stove where air circulation could be hindered or near flammable materials. I typically create a circulation plan that maintains at least 36 inches of clear space in front of the stove, ensuring proper side clearances while allowing the stove to serve as a central feature. This strategy ensures warmth is effectively distributed wherever needed while keeping the area functional.
Sometimes, placement must harmonize visual appeal with practicality—you may sacrifice some floor space, but in exchange, you achieve an impressive visual centerpiece and improved heat distribution.
save pin
Incorporate heat-retaining materials and clever surfaces
Implementing stone, tile, or a thermal mass bench behind the stove can capture heat and then release it gradually. This approach proved effective in a small apartment, where a tiny stove was supported by a thermal bench, maintaining warmth overnight. This not only minimizes frequent reloads but also leads to gentler temperature fluctuations. However, do remember that the added weight and expenses necessitate checking floor load capacities beforehand.
save pin
Thoughtfully integrate storage with functionality
Wood storage can be both aesthetically pleasing and functional. I often prefer recessed compartments or vertical log racks that also serve as design features. For open-plan kitchens, plan for efficient storage that complements a streamlined cooking area—an optimized kitchen layout enhances the feeling of space and ensures the stove remains a focal point rather than an afterthought.
Be realistic about the amount of wood you plan to store indoors; cramming too much wood next to the stove can create a cluttered atmosphere and complicate maintenance.
save pin
Ensure proper ventilation and fresh-air supply
In compact homes, a stove can sometimes limit the room’s combustion air supply, prompting me to design a specific fresh-air intake or ensure that mechanical ventilation adequately supports the stove. Correctly sizing the flue and maintaining a clear chimney route are essential; addressing these aspects upfront can prevent smoky evenings and related performance issues.
To visualize challenging duct paths or chimney offsets, I frequently create quick models, allowing clients to understand how the vents integrate into the overall plan—one of the best methods for this is utilizing 3D room visualization tools like Homestyler to illustrate complex clearances effectively.
save pin
FAQ
Q1: Are wood stoves safe to use in tight spaces?
Yes, if installed according to regulations with the correct clearances, certified models, and appropriate ventilation. I've consistently recommended hiring a certified installer and ensuring local inspections to validate safety.
Q2: What are the clearance requirements for a wood stove?
Clearance requirements can vary based on the stove model and surrounding materials; typical minimum distances range from 12 to 36 inches from combustible surfaces. Always consult the manufacturer’s specifications and local building codes for compliance.
Q3: Is it feasible to install a wood stove in an apartment?
It may be possible, but you must obtain permission from your landlord, ensure a safe chimney or flue system, and comply with relevant codes. In multifamily buildings, stricter regulations often apply concerning ventilation and emissions.
Q4: How can I maintain indoor air quality?
Use stoves that are EPA-certified and burn seasoned wood. It's prudent to install a carbon monoxide detector and ensure adequate ventilation. The U.S. EPA's Burn Wise program offers solid recommendations for low-emission appliances and safer burning practices: https://www.epa.gov/burnwise.
Q5: Do I need a special hearth pad or flooring?
Yes, non-combustible hearth protection is generally required and recommended; this safeguards floors from excessive heat and stray embers, and simplifies cleaning processes.
Q6: What is the cost of a compact certified stove?
Costs can vary significantly; generally, you can expect higher expenses for certification and compact engineering. Don’t forget to include installation, flue work, and any necessary floor reinforcements in your overall budget for a realistic cost estimation.
Q7: Can a wood stove effectively heat an entire small house?
Sometimes, it depends on insulation levels, spatial layout, and stove BTU ratings. I’ve seen successful heating in well-insulated tiny homes, but larger or poorly insulated spaces typically require additional heating solutions.
Q8: Where can I design and test my layout virtually?
I suggest starting with a comprehensive plan and visual model to evaluate sightlines, clearances, and furniture arrangements. Developing a small-space floor plan early, especially with assistance from tools like Homestyler, has helped me and my clients dodge expensive errors.
save pin
Homestyler is your go-to online home design platform, perfect for anyone looking to create stunning interiors. With an intuitive design tool, impressive 3D renderings, and a wealth of DIY video tutorials, you can easily transform your design ideas into reality. Start your home makeover today!
Concevez maintenant gratuitement
































