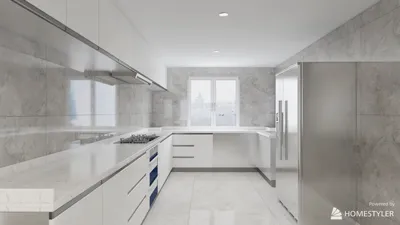


Seven years ago, I installed my first sensor tap in a bustling family kitchen, and the enhancement in cleaning and efficiency became immediately apparent. With hands often covered in dough or raw meat, the touchless functionality ensures the faucet remains clean and the workflow uninterrupted. Through various residential and small hospitality projects, I’ve come to realize that the effectiveness of a sensor tap depends on precise beam alignment, fine-tuning the response, and integrating a water delivery and drainage strategy that meets real-world messes.
Measured results substantiate the benefits of this upgrade. The WELL v2 Standard highlights the importance of hands-free fixtures in food preparation areas, effectively minimizing touchpoints and thus lowering the risk of pathogen transfer. Research from Steelcase also indicates that frictionless interactions lead to improved task flow—this translates into less time fiddling with controls and more time on cooking. Such principles are directly applicable in kitchen work zones, where every second counts during preparation, cooking, and cleaning.
Beam accuracy plays a crucial role in durability and lighting considerations. According to IES lighting standards, the relationship between ambient light and reflective surfaces can affect the performance of infrared sensors. In brightly-lit kitchens with shiny surfaces, sensors may misinterpret reflections, so it’s essential to manage glare, maintain a balance of vertical and task lighting, and select faucets equipped with adaptive or shielded sensors. The guidelines from the Human Factors & Ergonomics Society also advocate for minimizing awkward reaches and wrist deviations; ensuring proper spout placement and basin depth can alleviate strain during extensive washing tasks.
What Sensor Taps Actually Address
Touchless faucets are effective at breaking the chain of contamination, especially when dealing with raw ingredients like meat or flour. They simplify multi-step cooking processes: rinse fruits, switch pans, clean knives—all without halting to adjust a lever. In households with children or multiple generations, maintaining consistent temperature settings minimizes the risk of burns while enhancing ease of use. For small professional kitchens or chef stations, sensor taps help keep up with demands even when both hands are engaged.
Core Design Principles I Employ
1) Zoning: I position sensor taps strategically in the primary prep sink or the island where foot traffic is highest, reserving a manual faucet in a secondary utility sink for larger pots. When planning the layout, I use a room layout tool like Homestyler for quick checks on reach, circulation, and sight lines.
2) Basin Design: A deeper basin (9–10 inches) minimizes splashing when sensors frequently turn on and off. A rounded back and centered drain accommodate varying stream angles effectively.
3) Spout Height and Reach: I align spout height with the clearance of cookware, usually placing it between 8 and 10 inches above the sink rim to avoid excessive splashing. Pull-down sprayers are invaluable, but it's important to ensure they offer automatic shut-off features that respect different spray modes.
4) Sensor Field Adjustments: Narrower activation zones help avoid accidental triggers from shiny countertops or bright windows. I prefer models that allow for sensitivity adjustments and feature a manual override as a backup.
Water, Power, and Safety Measures
Hot water delivery must never exceed safety limits to prevent scalding. Using thermostatic mixing valves and locked presets keeps the water temperature within safe ranges. In several projects, I incorporated GFCI-protected outlets for the tap controller under the sink; if the system operates on batteries, I make sure battery compartments are easily accessible and track replacement schedules. For homes susceptible to power outages, manual override levers become essential.
Lighting Considerations and Sensor Reliability
Managing glare is crucial. Under-cabinet lighting should be diffused (using frosted lenses) to prevent hotspots that could confuse infrared sensors. I typically set task illuminance between 300 and 500 lux while ensuring vertical lighting remains balanced, allowing hands to be recognized without interference from reflected glare. Matte or low-sheen countertop finishes near the tap help minimize erroneous readings. In brightly lit areas, using angled sensor windows or side-mounted sensors proves more effective than front-facing emitters.
Ergonomics: Hands, Wrists, and Reach
In kitchens with heavy usage, I ensure the faucet aligns with the center of the basin and that there’s sufficient clearance to keep wrists straight when maneuvering heavy pans. For shared spaces, I calibrate the activation zone considering the average hand trajectory—typically 2 to 3 inches below the spout and 1 to 2 inches forward—so users of varying heights can operate it easily. Incorporating mixed-height stations, like a slightly lower prep sink for washing, can further lessen strain.
Material and Finish: Hygiene and Durability
Opting for stainless steel and PVD finishes helps prevent corrosion and withstand regular cleaning. Porous materials should be avoided near high-splash areas. I recommend laminar flow aerators to minimize atomization and backsplash, particularly with frequent sensor on/off activity. If a client prefers matte black, I check the finish for durability and cleanability since grease stains are more visible on darker surfaces. If there are wooden counters near taps, they require robust finishing systems to resist minor splashes.
Behavioral Patterns and Sensor Placement
Observe real movements: where do hands linger, where do pans settle, and where do cutting boards move? I typically install the sensor tap where these actions occur—often on the prep side of the sink instead of the drainboard side. In double-bowl setups, the sensor serves the prep bowl while a manual faucet is designated for rinsing. In compact kitchens, reducing the activation zone size can prevent accidental runs when someone walks by with a tray.
Acoustics and Flow Comfort
In open-concept homes, the rapid cycling of sensor taps can create noise. I mitigate this by lining cabinet cavities with soft materials and selecting quieter solenoids when available. Flow rates between 1.5 and 1.8 gpm strike a balance between effective cleaning and maintaining a quieter environment. Should water hammer arise, I integrate arrestors and adjust valve cycling settings.
Maintenance Essentials
All faucets require some upkeep. For sensor taps, I recommend scheduling quarterly cleanings for sensor windows, aerators, and filters. It's beneficial to have an accessible service loop underneath the sink and label the locations of power and mix valves. In kitchens with frequent baking activities, flour dust may cloud sensors—soft microfiber cloths provide quick cleaning without scratching. It’s important to instruct every user on how to use the manual override.
Situations Where I Don’t Advocate for a Sensor Tap
In ultra-budget renovations where electrical access is unfeasible, or in historic kitchens where maintaining an authentic aesthetic requires traditional bridge faucets, sensor taps might not be suitable. Additionally, in gleaming show kitchens with harsh daylight glare, sensors may misfire unless the lighting is appropriately adjusted.
Cost Versus Value
While sensor taps carry a higher initial cost, the improvements in hygiene and workflow make them worthwhile in busy kitchens. When it’s time for replacements, I recommend selecting brands that offer modular components and reliable local service. The greatest benefits come from correctly pairing the tap with the appropriate basin design, lighting solutions, and scald protection systems.
Quick Integration Checklist
- Verify power supply: Ensure GFCI outlet access or an easily reachable battery tray.
- Install a thermostatic mixing valve with a temperature lock feature.
- Adjust sensor sensitivity and configure feasible auto-off timers (8–15 seconds is optimal for rinsing hands).
- Balance task lighting to minimize glare and reflections around the faucet area.
- Opt for laminar aerators and try to design the basin to minimize splashes.
- Clearly label manual overrides and document maintenance schedules.
- Confirm circulation efficiency utilizing an interior layout planner like Homestyler or similar tools.
Frequently Asked Questions
Absolutely. Decreasing touchpoints helps reduce the risk of cross-contamination, a principle endorsed by hands-free fixture guidelines outlined in the WELL v2. In practice, I observe a significant reduction in greasy fingerprints and cleaner controls after extensive food preparation.
Indeed, they can. Addressing glare in accordance with IES lighting standards and selecting taps with adjustable sensitivity or shielding can resolve most common issues.
For basic hand rinsing, setting timers for 8–15 seconds is sufficient; for filling pots, using the manual override or a longer continuous mode, if available, is advisable. Short timers also help minimize water wastage.
Yes, they are, especially with secure temperature presets and scald protection features. This allows children to rinse effectively without needing to learn lever control.
Flow rates between 1.5 and 1.8 gpm strike a good balance between cleaning ability, splash control, and noise levels. Pairing with laminar aerators further enhances stream quality.
Hardwired systems with GFCI are the most dependable option for heavily used kitchens. Battery-operated systems work well too, provided that the tray is easily accessible and the replacement schedule is meticulously tracked.
Typically, yes. Verify the hole count, deck thickness, and availability of power connections. If you have a limited number of holes, opt for a single-hole model that includes an integrated sprayer.
Many models do. Ensure the sensor systems can recognize spray modes and consistently maintain activation without shutting off prematurely during repositioning.
Utilize a deeper basin, laminar aerators, moderate flow rates, and adjust the stream direction towards the middle of the bowl. Fine-tune the sensor to avoid unnecessary on/off cycling.
Plan for quarterly cleaning of sensor windows and aerators, perform an annual check of filters and mixing valves, and immediately replace batteries when performance decreases.
Yes, particularly for islands where extensive prep occurs. Ensure the lighting setup avoids direct glare, and position the activation zone aligning with where hands naturally pass.
Not always necessary. Opt for a timeless silhouette with a warm metallic finish to blend in beautifully. Concealing the control module and minimizing visible components will enhance the aesthetic.
Homestyler is your go-to online home design platform, perfect for creating stunning spaces! With its user-friendly design tool, breathtaking 3D renderings, and a wealth of DIY video tutorials, you can easily turn your design dreams into reality. Start designing today!
Concevez maintenant gratuitement
































