


Having redesigned a multitude of compact party halls, I’ve discovered that the keys to success lie in three essential elements: a well-defined spatial intent, effective lighting control, and a thoughtful layout that facilitates a natural flow for guests. Even smaller venues can exude an elevated atmosphere rather than feeling overcrowded—this can be achieved when there’s a clear path from entry to stage, a strategic use of vertical space, and lighting that enhances the overall ambiance. Designs from tools like Homestyler can further assist in visualizing these spaces effectively.
Two key insights guide my design process. Firstly, brighter ceilings compared to walls and floors can create a perception of increased space. The Illuminating Engineering Society recommends a balance of vertical and horizontal brightness, aiming for 200–300 lux for social environments, with more intense lighting in activity zones (source: IES). Secondly, the mood can change drastically with varying color temperatures; warmer light (between 2700–3000K) fosters social interactions, whereas cooler lighting heightens alertness—findings aligned with WELL v2 Light concepts which focus on supporting circadian rhythms and glare management (source: WELL v2). I often look to workplace circulation research by Steelcase and Gensler for broader planning insights, particularly when designing multifunctional areas evolving from ceremony spaces to dining and dancing.
Create a Well-Defined Spatial Narrative
In smaller halls, crowding isn’t merely about numbers—it’s about spatial ambiguity. I focus on three key points: the entry area (where guests first arrive), the central activity zone (like the stage or dance floor), and service areas (including the catering line and bar). Establishing a clear narrative—arrive, orient, engage—ensures that energy remains concentrated and that guest movement does not interfere with seating. Utilizing a lightweight interior layout planner allows for visualization of sightlines and aisle widths; a practical room layout tool can efficiently simulate guest movements and table arrangements without any commitment: room layout tool.
Optimize Seating Density Without Cramping
I typically maintain 915–1000 mm (36–40 in) between tables in main aisles and 760–815 mm (30–32 in) for secondary aisles. For banquet tables that measure 1520 mm (60 in) in diameter, I accommodate 8–10 guests, although I often restrict this to 8 in smaller spaces to enhance comfort and minimize noise. For rectangular tables, a size of 760 mm x 1830 mm (30 x 72 in) works well with 6 seats. It's crucial to keep at least 1200 mm (47 in) of space from the edge of the dance floor to the nearest chair back to ensure unobstructed movement for guests and staff.
Lighting to Enhance Space, Accents to Celebrate
Effective lighting can significantly alter the perception of a room without needing to change the layout. I recommend a layered lighting approach: 1) soft, indirect uplighting to illuminate the ceiling (200–300 lux ambient), 2) vertical wall grazing or washing to elongate the perceived space, and 3) 3000–3500K accent lighting on key features—such as the cake, stage backdrop, or floral arrangements. Address glare with carefully shielded fixtures and dimmable options; WELL v2 emphasizes minimizing high luminance contrasts to reduce visual strain during extended events.
Leverage Color Psychology in Compact Venues
In confined spaces, bold wall colors can make the venue seem oppressive. I prefer to begin with a light neutral palette complemented by warm undertones, layering color in critical areas such as tabletops, floral arrangements, and vertical features. Warm tones (like amber, coral, and soft terracotta) encourage social interactions, while cooler colors (like sage and dusty blue) help to visually recede and calm the atmosphere. Ensuring that ceilings are a shade lighter than the walls can also help to create an illusion of height. For events focused on branding, I recommend using vibrant colors on movable elements—such as drapes and lighting gels—allowing for easy adjustments without the need for repainting.
Manage Acoustics for Intimacy Without Excessive Noise
Sound can quickly become an issue in small halls with hard surfaces. To manage this, I recommend using a mix of soft seating, thick table linens, and strategic drapery. If the venue features a hard floor for dancing, adding area rugs can help mitigate early sound reflections. Placing speakers close to listeners and directing sound appropriately can prevent audio from bouncing off walls; this allows background music levels to remain comfortable in social areas while ensuring announcements are clear.
Staging, Backdrops, and Vertical Space Utilization
When floor space is limited, vertical solutions can provide a significant visual impact. Utilizing a layered backdrop with a buildout depth of 250–300 mm (10–12 in) enhances presence without reducing seating availability. Employ matte finishes to prevent glare during photography and integrate cable management systems within the vertical setup for a cleaner aesthetic. Utilizing florals or greenery that diminish in size towards the edges can help soften corners and alleviate the “boxy” feel that small rooms can often exhibit.
Service, Buffet, and Bar Areas Planned to Avoid Congestion
Strategically placing service points near natural pause areas—like columns or recesses—helps to avoid bottlenecks. A single buffet line accommodating 100 guests can take 20–30 minutes; implementing dual-sided buffets or two identical stations can cut down perceived wait times significantly. Ensure at least 1200 mm (47 in) clearance around buffet tables and a minimum of 1500 mm (59 in) near bars to allow for smooth traffic flow. Position the bar queue out of sight from the main entry to provide a more pleasant initial experience for arriving guests.
Adaptable Floor Plans for Various Event Types
Given that small venues often cater to diverse event formats, I advise establishing three standard configurations: Ceremony (focused towards the front with a central aisle), Dinner (dense seating arrangement with a main aisle), and Party (fewer tables to maximize dance floor space). Storing additional chairs on rolling dollies behind decorative draperies can assist in quick transitions. Prior to event day, utilize a layout simulation tool to ensure staff can reconfigure the setup within 15–20 minutes: layout simulation tool.
Select Materials for Lightness, Durability, and Ease of Cleaning
Selecting mid-sheen laminates or high-pressure surfaces for bars and service areas can reflect light effectively without producing harsh glares and are easy to maintain. For upholstery, performance fabrics rated for over 50,000 double rubs ensure that seating remains visually appealing throughout frequent use. Choosing warm woods or wood-like materials with subtle grain patterns can add a calming aspect; pairing these with satin brass or blackened metal elements maintains visual interest without overwhelming the space.
Crucial Wayfinding and Micro-Details
Implementing discreet signage at eye level is vital for keeping guests oriented; consistent iconography and contrasting elements can enhance visibility in low-light conditions. Concealing storage in wall compartments or under-stage areas also helps maintain appearance. Ensure dimmer controls are accessible from both the front-of-house and back-of-house to facilitate seamless transitions between different event phases without requiring additional setups or crossing through crowded areas.
Real-World Steps I Implement On-Site
1) Use low-tack tape to mark essential clearances on the floor. 2) Establish the focal point (such as stage or cake) first, then layout the main aisle, followed by table arrangements. 3) Aim and adjust lighting prior to decor placement to avoid chasing reflections later. 4) Conduct sound checks while the room is near full capacity to gauge clarity and volume. 5) Walk through the guest experience—starting from entry to seating, to the bar, and then to restrooms—to identify and rectify any potential issues with flow.
Common Questions
Aim for an ambient light level of 200–300 lux on tables with warmer color temperatures ranging from 2700–3000K for optimal social comfort. Increase the light intensity to 300–500 lux on focal points like the stage or cake while minimizing glare with shielded fixtures. This approach aligns with IES guidelines for social environments and adheres to WELL v2 standards for visual comfort.
For aisle widths, 36–40 in (915–1000 mm) is suitable for primary aisles, while 30–32 in (760–815 mm) is sufficient for secondary aisles. Maintain a distance of at least 47 in (1200 mm) from the dance floor to the nearest seat for optimal movement.
Round tables facilitate conversation and smoother movement around corners, while rectangular tables can help to increase capacity along walls. In particularly tight spaces, a balanced mixture of round tables centrally and rectangular tables along the perimeter can often enhance both flow and seating capacity.
Utilize perimeter drapery, plush table underlays, soft lounge seating, and directionally aimed speakers for an optimal acoustic experience. Whenever feasible, limit hard parallel surfaces to reduce echo.
Utilize light, warm neutrals on walls with a brighter ceiling to enhance the sense of height. Assign bolder colors to movable items like drapes and lighting instead of fixed elements to streamline potential updates for branding purposes.
Establish three preset configurations and practice transitions to ensure readiness. Store excess chairs on dolly carts behind decorative drapes. Employ a pre-tested interior layout planner to verify that staff can adapt the setup within 15–20 minutes.
Keep service areas discreetly positioned off the main entry visual line. For gatherings exceeding 100 guests, consider implementing two smaller serving stations or a dual-sided buffet. Ensure a clearance of 47–59 in (1200–1500 mm) around all service points.
When planning, allocate about 1.8–2.3 sq ft (0.17–0.21 sq m) per dancer, not per guest. For an estimated 40 dancers, a minimum space of 72–92 sq ft (6.7–8.5 sq m) is advisable; consider expanding this if music is the event’s focal point.
Incorporate 3000–3500K spotlights with a high Color Rendering Index (CRI of 90+) and aim at a 30–45 degree angle. Ensure that backgrounds are slightly darker than the subjects to create depth and avoid direct uplighting on faces.
Designate a 36 in (915 mm) service corridor behind decorative drapes, include cable management solutions in backdrops, and stage any bussing areas near exits, ensuring they are out of sight from guests.
Mock up your intended stage height and backdrop width using tape and foam core, then validate seating paths and sightlines with a room design visualization tool to ensure every guest has a view of key moments.
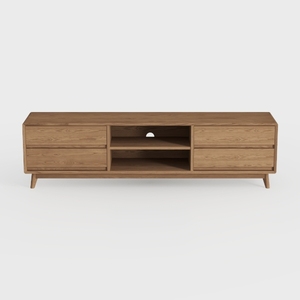
OKD TV Stand for 75+ Inch TV, Mid Century Modern
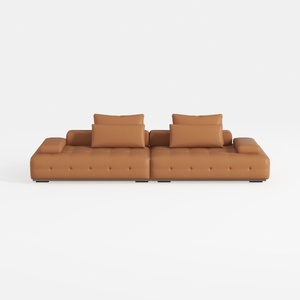

Modern Tufted Leather Oversized Sectional Sofa 3D Model
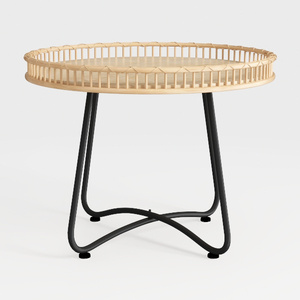
Minimalist Rattan Metal Round Side Table 3D Model
Homestyler is your go-to online platform for transforming home design dreams into reality. With its user-friendly design tool, stunning 3D renderings, and an array of inspiring design projects and video tutorials, you'll create beautiful spaces effortlessly. Unlock your creativity with Homestyler today!
지금 무료로 디자인하세요
































