


Over the last ten years, I’ve made significant strides in designing and optimizing numerous compact hotel rooms. The most successful small spaces exude a sense of intentionality, tranquility, and a surprising sense of space—where every detail is meticulously planned. In the hospitality sector, this planning should be rooted in data-driven insights: research by Steelcase highlights a link between environmental control and spatial clarity to enhanced guest satisfaction and ease in completing tasks. Moreover, WELL v2 underscores the importance of measurable outcomes in light, air, and acoustic comfort, factors that profoundly affect guests' sleep and overall mood. For room dimensions, I rely on NKBA guidelines for bathroom clearances and IES standards for lighting, ensuring that compact designs still fulfill essential functional needs.
Two critical metrics inform my design process from the outset. Firstly, IES suggests an ambient lighting level of 100–200 lux in hotel rooms, with bedside and vanity areas requiring 300–500 lux for effective task lighting. These specifications guide my choice of fixtures and dimming strategies. Secondly, NKBA’s recommendations for bathroom clearances, such as maintaining a minimum of 30 inches in front of fixtures, ensure that even micro-baths are both accessible and practical. To enhance behavioral comfort, research from Verywell Mind indicates that using blue-green tones can significantly reduce heart rate and stress perception. This information is crucial when selecting a compact color palette that promotes relaxation without being overly stark. Additionally, studies from Herman Miller consistently link ergonomic design—like user-friendly work surfaces—to a sense of control and satisfaction, principles that are directly applicable to creating multifunctional guest workspaces.
Planning the Space: Ratios and Sightlines
Begin by establishing the room’s long axis. A width-to-length ratio of 1:1.6 to 1:2 tends to create a balanced appearance and allows uniform furniture depth on one wall. Ensure your main circulation path remains clear with dimensions between 30 and 36 inches from the door to the window. When the entrance aligns with windows, guests can quickly orient themselves, and the influx of natural light enhances the perception of space. If you want to explore different layouts, a room layout tool can help visualize bed arrangements, wardrobe door swings, and luggage placements before making any permanent choices.
Wall Bed Layout: Space-Saving Storage Solutions
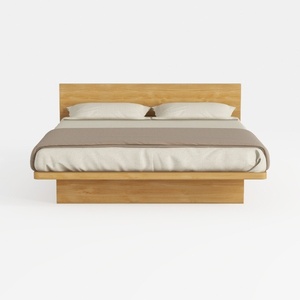
I favor using a platform bed featuring a 3–4 inch shadow reveal at the foot, which helps lessen the visual weight of the piece. Implementing recessed shelving of 6–8 inches within the headboard can hold items like drinks and phones, thus minimizing the need for bulky nightstands. A streamlined 30–36 inch closet niche with sliding doors is preferable to two narrow swinging doors, as the latter can clash with luggage placement. Additionally, use a slender bench measuring 12–14 inches deep underneath the window; it serves dual purposes for seating and suitcase storage. Maintain electrical outlets and USB hubs at an elevation of 18 inches above the finished floor on both sides to keep cables neatly managed and out of sight.
Workspace Integration: Ergonomic Design
Compact hotel rooms thrive on versatility and functionality, making the integration of a 20–24 inch deep wall-mounted console essential for seamless transitions between work and dining. I strive for a work surface height of 28–29 inches, paired with an ergonomic chair that offers lumbar support and a seat height of 16–19 inches, adhering to best practices for shorter stays to prevent fatigue. Ambient lighting should be set to 150–200 lux, accompanied by a localized task lamp providing 400–500 lux at a color temperature between 2700 and 3000K, ensuring a warm tone that promotes reading and relaxation.
Lighting Techniques: Atmosphere and Control
Incorporate light layers: soft cove ambient lighting at 150–200 lux, bedside reading lights with focused beams to reduce glare (300–400 lux for reading), and accent lighting on artwork or textured walls (50–100 lux). Ensure a consistent color temperature between 2700 and 3000K throughout the rooms to maintain visual coherence. Dimmers with preset options (Relax/Read) simplify user choices; compatibility with WELL v2 highlights the importance of lighting control and glare management for enhancing sleep quality. Strategically position switches based on user expectation: near the entrance, beside the beds, and adjacent to the desk area.
Color Schemes and Materials: Durable and Calming
Given that compact layouts amplify visible surfaces, choosing a subdued color palette is crucial. Neutral mid-tone walls (LRV 50–65) help reduce visual contrast fatigue, whereas accents in blue-green—supported by insights from Verywell Mind on color psychology—promote tranquility. Opt for matte finishes to minimize specular glare, especially in tighter spaces. For durability, utilizing high-pressure laminate on surfaces, stain-resistant textiles with a double rub rating exceeding 30,000, and slip-resistant bathroom tiles with an R10 rating ensures that maintenance remains manageable. Incorporating acoustic fabrics behind the headboard can effectively dampen echoes without increasing thickness.
Bathroom Optimization: Fitting Within 5 Square Meters
In a compact 5–6 m² bathroom, establishing direct-line circulation is vital. A 900 mm walk-in shower with a single-pane glass door simplifies cleaning and avoids swing issues associated with framed enclosures. Choosing a wall-mounted vanity with a depth of 450–500 mm enhances toe clearance and visual openness, while overhead lighting should reach 300–500 lux at face level to minimize shadows. Position towel hooks at a height of 1,400–1,500 mm, ensuring they are outside the splash zones. Whenever possible, implement pocket doors to conserve 700–800 mm of swing space.
Noise Management: Essential for Restful Sleep
Compact rooms often amplify external noises. Ensure the use of solid-core doors leading to corridors, along with perimeter seals to reduce sound transfer. Treat the wall behind the headboard with acoustical panels or soft textile wraps (NRC 0.3–0.5) to help minimize sound reflections. HVAC grills shouldn't be directly visible from the bed to lessen any drafts or abrupt noise spikes. Incorporating carpeting or acoustic LVT underlay can dampen footfall while maintaining cleaning standards.
Smart Storage Solutions: Practical and Intuitive
It's vital for guests to have obvious locations for their belongings such as bags, shoes, and jackets. An open shelf measuring 600–700 mm high beneath the console keeps these everyday items easy to spot. A compact vertical niche designated for an iron and ironing board, concealed behind a flush panel, effectively eliminates awkward hallway closet issues. Opting for full-extension drawers that fully open can also prevent partial visibility challenges in tighter spaces.
Window Treatments: Combining Sheers and Blackouts
Utilize a sheer curtain for managing daytime glare in conjunction with a dedicated blackout curtain. The sheer will help mitigate the contrast, providing a visual comfort that signals day, while the blackout option needs to feature side channels or weighted hems to eliminate light leaks—this is particularly important for guests adjusting to new time zones.
Wayfinding and User Experience
Clearly label power outlets with icons; include a universal outlet and dual USB-C ports at the workspace. Position the luggage rack in a readily visible location, typically beneath the window bench, to eliminate any unnecessary searching. Hooks placed at a height of 1,600 mm by the doorway are perfect for hanging coats and bags, helping to keep floors clear and pathways unobstructed.
Layout Testing: Validate Designs Before Construction
In smaller floor plans, a seemingly minor error can disrupt flow. I conduct three layout simulations: aligning the bed with the window, offsetting the bed with the console opposite, and rotating the bed for a corner headboard that enhances circulation. Using a layout simulation tool allows for validation of clear access, sightlines, and door swings, while evaluating the placement of lighting fixtures and furniture arrangements.
Case Study: Transforming 18 m² into a Tranquil Retreat
Recently, during an 18 m² retrofit, relocating the wardrobe into a sliding niche created an extra 250 mm of corridor width. Installing a wall-hung vanity added toe space, while moving the HVAC return vent further from the bed reduced perceived noise levels. Adjusted lighting presets (Relax set to ~150 lux overall; Reading set at ~350 lux) significantly decreased guest complaints. The window bench not only served as a seat but also as luggage storage, and a compact blue-green feature wall created a centered focal point that enhanced visual calmness.
Essential Dimensions and Clearances
- Circulation: A clear path of 30–36 inches from the entrance to the window.
- Console: Should be 20–24 inches deep and 28–29 inches in height.
- Bench: Ideally 12–14 inches deep.
- Shower: Minimum size of 900 mm x 900 mm for comfortable movement.
- Closet: Require a clear hanging depth of 24 inches; sliding doors are preferred.
- Bed platform: Maintain a shadow reveal of 3–4 inches to create a sense of lightness.
Research Bases for Design Decisions
In order to back my design choices with solid data, I refer to WELL v2 guidelines on light, sound, and overall comfort, which translate effectively to hotel environments. Steelcase's research offers insights into how a sense of control and clarity in the environment influences user satisfaction—valuable findings that resonate in the design of compact guest quarters.
Frequently Asked Questions
Aim for lighting levels of 300–500 lux at the reading area, using warm 2700–3000K bulbs to minimize glare while facilitating relaxation and readability.
A color selection of mid-tone neutrals (LRV 50–65), complemented with carefully chosen blue-green accents, can significantly help in reducing stress levels, affirming findings from the field of color psychology as highlighted by Verywell Mind.
Utilize solid-core doors for corridor access, complemented by perimeter seals, textile-covered headboards (NRC 0.3–0.5), acoustic underlays beneath flooring, and ensuring HVAC returns are relocated away from the sleeping areas.
Incorporate a wall-mounted console ranging from 20 to 24 inches in depth and set at a height of 28 to 29 inches, facilitating its use as both a desk and dining surface while addressing ergonomic needs without occupying unnecessary floor space.
Aligning the bed with the window axis enhances spatial orientation and perceived spaciousness; it's crucial to validate this with a layout planning tool to eliminate potential conflicts with wardrobe positioning and door swings.
Implement a range of lighting strategies: use cove lighting at 150–200 lux, pinpoint bedside beams, and adopt matte finishes to curb any reflections. Keeping color temperatures uniform at 2700–3000K is key to a cohesive visual experience.
Consider implementing pocket or sliding doors, as they eliminate swinging complications and can free up between 700 to 800 mm of circulation space without compromising privacy.
Strategically place dual outlets and USB-C ports next to each bedside (approximately 18 inches above the finished floor), a universal outlet at the work desk, and clearly marked outlet spots near the console for easy access to kettles or chargers.
Maintain a primary circulation width of 24–30 inches on one side, and ensure at least 18 inches on the opposite side; smaller dimensions can be manageable with integrated storage solutions in the headboard.
Certainly. A true blackout option with side channels or weighted hems can effectively prevent light leaks, enhancing sleep quality, especially for guests adjusting to new time zones.
Employ under-bench storage for luggage, recessed compartments in the headboard, and fully extending drawers to maximize space efficiency. Implement sliding doors in closets to avoid conflicts with luggage and improve circulation.


Homestyler is an exceptional online home design platform perfect for anyone looking to transform their space. With its user-friendly design tool, stunning 3D renderings, and a wealth of inspiring design projects and video tutorials, you can effortlessly create your dream home—whether you're a novice or an experienced designer!
Concevez maintenant gratuitement


