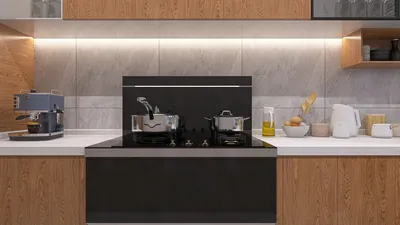


Having designed and remodeled numerous compact kitchens in studio apartments, I find that the most effective designs combine meticulous planning with thoughtful choices in materials and lighting. In these small spaces, every inch must serve multiple functions while still maintaining a serene and welcoming atmosphere. Several research-backed principles guide my process: for instance, the WELL v2 standard recommends task lighting with an illuminance of 300–500 lux in kitchens to alleviate visual fatigue, while the Illuminating Engineering Society (IES) advises around 300 lux for general work areas. I use these benchmarks to optimize layered lighting, ensuring countertops are bright yet free from glare. Moreover, research from Steelcase indicates that minimizing visual clutter enhances concentration; this principle is equally applicable to home kitchens, where streamlined sightlines and concealed storage can significantly reduce cognitive load.
Equally important as aesthetics are ergonomic considerations. The National Kitchen & Bath Association (NKBA) advocates for a minimum clearance of 36 inches (915 mm) in aisles for solo kitchens. For studios with limited space, I scale down cabinetry and appliances to ensure safe access and ample elbow room. Color is also crucial: evidence from Verywell Mind suggests that lighter shades can create a perception of increased space by reflecting more light, while warm tones enhance comfort without making the area feel cramped. I leverage these insights to harmonize bright, light colors with warm accents, fostering a psychologically comforting environment. For authoritative standards on lighting and well-being, the WELL v2 and IES guidelines are invaluable references you can use while planning.
Establish the Envelope First
Prior to selecting cabinetry, it’s essential to define the envelope: light reflectance, acoustic properties, and electrical configurations. I strive for high Light Reflectance Value (LRV) paint options—soft whites or pale greiges—to enhance ambient luminosity. If your studio combines living and sleeping spaces, incorporating sound-absorbing materials (like matte cabinet fronts, cork underlayment, or a rug runner) can mitigate noise. It’s also wise to create two 20A circuits for small appliances and to strategically position outlets to minimize cord clutter in prep areas.
Select a Layout That Acknowledges Movement
Efficient kitchen designs favor straightforward geometries. A linear kitchen layout with a length of 60–72 inches can accommodate a sink, cooktop, and under-counter fridge, provided the arrangement follows a logical sequence (with prep space adjacent to the sink and the cooktop slightly offset for safety). For slightly larger studio flats, an L-shaped layout naturally forms a work triangle without sacrificing floor space. Utilizing a room layout tool, like Homestyler, can help you visualize clearances and appliance placements before making final decisions.
room layout tool
Optimize Appliance Size
Tailor your appliances to your cooking habits. A 24-inch cooktop is usually sufficient; induction options maintain cooler countertops and offer a sleek, flush surface for additional prep space when not in use. Look into under-counter refrigerators with 24-inch widths featuring compact freezer drawers, or consider an all-in-one washer/dryer tucked away in a tall pantry if permitted by your building regulations. A combination microwave-convection oven can save space while providing versatility. Ensure ventilation is effective but discreet; a recirculating hood with a robust carbon filter can suffice if ducts aren’t available—just remember to change the filters regularly.
Cabinetry That Hides—and Functions
Full-height cabinets create a striking vertical aesthetic while providing substantial storage. I position heavy-use zones between 24–60 inches from the floor for easy access. It’s beneficial to integrate a slim pull-out pantry (9–12 inches wide) close to the cooktop for oils and dry goods. Shallow upper cabinets (12 inches) help keep the area feeling open, complemented by a single open shelf for everyday dishes—just enough display to add a personal touch without contributing to clutter. Features like soft-close hardware and full-extension drawers help alleviate strain and make limited space feel more ample.
Work Surfaces with Intelligent Material Choices
Opt for countertops with medium-matte finishes to reduce glare from task lighting. Engineered quartz in light shades not only performs well but also reflects light beautifully. If you're on a budget, high-pressure laminate with clean edges is a practical choice that’s easy to maintain. For backsplashes, choose large-format tiles or continuous slabs to limit grout lines—this visual simplicity aids in making compact spaces feel more expansive. Pair these with either a deep stainless or composite sink along with a pull-down faucet for efficient washing.
Lighting Layers for Precision and Calm
Incorporate ambient, task, and accent lighting thoughtfully. For ambient purposes, a low-glare linear fixture or a dimmable ceiling light should achieve around 300 lux throughout the area. For task lighting, LED strips or pucks installed under cabinets set to 4000K can provide color accuracy during food preparation, delivering 300–500 lux on the counter per WELL v2 and IES recommendations. Accent lighting can consist of a warm (2700–3000K) wall wash or pendant fixtures to soften edges in the evening. Maintain a Color Rendering Index (CRI) of 90+ for natural ingredient and finish color representation. Dimmers can adjust the ambiance from energizing daytime lighting to a relaxing evening tone.
Color Psychology to Enhance Space
I prefer light, low-saturation colors for larger surfaces to create an illusion of volume, subsequently layering subtle warmth with elements like pale taupe cabinets, sand-hued backsplashes, and a walnut chopping board or café-style seating. Verywell Mind mentions that cool colors like blues and greens can promote calmness, but in kitchens, I favor soft neutrals with warm touches to avoid a sterile ambiance.
Storage Solutions That Maximize Space
Utilize vertical space and customize your storage options. Install adjustable shelves, a pegboard within a tall pantry for pots and pans, and narrow dividers for trays. Hang utensils on a minimal rail instead of cluttering drawers. Utilize toe-kick drawers for storing baking sheets or cleaning supplies. A fold-down counter extension can offer an extra 10–12 inches of prep space when required, disappearing when not in use.
Ergonomics and User-Centric Design
Respect reach zones and adhere to safe sequences. Store knives away from the main pathway; position spices near the cooktop but not directly above to avoid heat exposure. If aisle widths fall below the NKBA's guideline of 36 inches, avoid protruding handles—opt for integrated pulls or edge profiles instead. Install microwaves between 42–48 inches high to lessen shoulder strain. Anti-fatigue mats are helpful if prolonged standing is common; use them sparingly to maintain a clean visual field.
Acoustic Comfort in Open-Plan Living
In studios, kitchens share acoustic space with the rest of the unit. Employ soft-close hardware, felt pads beneath bar stools, and a runner with underlay to absorb noise. When hosting, a fabric partition or hanging curtain can provide visual and acoustic separation for the kitchen while adding design interest.
Versatile Dining Without Taking Up Space
Consider a wall-mounted drop-leaf table or a small café set to enable dining without permanent bulk. Nesting stools can be tucked away under countertops. If you often cook with friends, a mobile cart on locking casters can increase surface area and storage, then can be stowed under a counter when not in use.
Visual Balance and Rhythm
Maintain a calming visual flow. Align the tops of upper cabinets, use consistent handle styles, and select two primary finishes with one accent to avoid overly busy designs. A tall cabinet at one end can ground the overall look, with lighter upper cabinets balancing the visual weight across the span.
Sustainability and Healthy Material Choices
Focus on low-VOC paints and cabinetry that meets carb2/TSCA Title VI standards. Opting for energy-efficient LED lighting contributes significantly to both health and energy conservation. If you’re interested in enhancing well-being through building features, I highly recommend exploring the WELL v2 framework—it offers a thorough approach worth considering.
Essential Studio-Kitchen Enhancements I Recommend
- Flush-mounted induction cooktops for additional prep space when not in use
- Under-cabinet LED strips with a continuous diffuser to eliminate visible dotting
- A pull-out pantry measuring 9-inches with adjustable shelving
- Toe-kick drawers for easy access to trays and cloths
- Wall-mounted or drop-leaf dining surfaces for flexibility
- A mobile cart with locking wheels for extra workspace
- Integrated pulls or J-profile fronts to minimize protrusions
- Light walls with high-LRV colors complemented by a single warm wood accent
FAQ
Q1: What’s the best layout for a small kitchen in a studio?
A: A single-wall configuration is ideal for ultra-compact spaces, while an L-shaped design works well in corners, creating zones without sacrificing functionality. Sequence the positioning of the sink, prep area, and cooktop logically, ensuring safe clearances and utilizing an interior layout planner, like Homestyler, to confirm appliance compatibility and ease of movement.
Q2: What’s the ideal brightness for kitchen lighting?
A: Aim for approximately 300 lux for general ambient lighting and 300–500 lux over countertops for task work, using high-CRI LEDs. This approach aligns with IES standards and WELL v2 recommendations for comfort and visual efficiency.
Q3: Which colors make a small kitchen appear larger?
A: Light neutrals with a high LRV for larger surfaces, accented by subtle warm tones. These lighter shades improve light reflection and expand the perceived space, while warm elements add an inviting touch.
Q4: Are 24-inch appliances sufficient?
A: Yes, for most studio kitchens. A 24-inch induction cooktop, an under-counter refrigerator, and a combined microwave-convection oven can provide comprehensive functionality without encroaching on valuable space.
Q5: How can I minimize visual clutter in an open studio?
A: Utilize full-height cabinetry, integrated pulls, concealed trash and recycling solutions, and a single curated open shelf to maintain clean sightlines. Research suggests reduced visual noise enhances focus, translating to a calmer home environment.
Q6: What’s the appropriate aisle width for safety?
A: The NKBA recommends aiming for at least 36 inches in width for a one-person kitchen. If space is limited, consider shallow cabinets, integrated pulls, and avoid positioning appliances across from one another.
Q7: How can I enhance acoustic comfort?
A: Employ soft materials like a runner with underlay, soft-close mechanisms, and felt pads under furniture to diminish noise levels in a single-room living space.
Q8: What’s the best color temperature for task lighting?
A: A temperature range of 3500–4000K works well for prep areas, striking the right balance between brightness and comfort. Incorporate dimmable, warmer ambient lights (2700–3000K) for relaxing evenings.
Q9: Is a backsplash necessary in a small kitchen?
A: Absolutely—opt for large-format tiles or slabs to facilitate easy cleaning and minimize visible lines. Using continuous materials between countertops and backsplashes fosters visual simplicity.
Q10: What sustainable upgrades should I prioritize?
A: Focus on low-VOC paints, cabinetry compliant with carb2/TSCA regulations, and energy-efficient LED lighting to significantly impact health and energy savings in smaller spaces.


Homestyler is your go-to online home design platform! With its easy-to-use design tool, stunning 3D renderings, and a wealth of DIY video tutorials, you can effortlessly bring your home vision to life. Unleash your creativity and transform your space today!
Concevez maintenant gratuitement
































