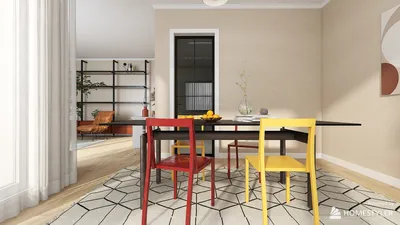


Having crafted numerous dining tables, I find that farmhouse legs are among the most sought-after features. When designed correctly, they not only enhance visual appeal but also exude warmth and a welcoming sense of stability. The key lies not only in achieving an attractive shape; it's crucial to ensure that the proportions, materials, and ergonomic factors are perfectly aligned to create a table that feels grounded and comfortable for everyday use.
Before engaging in cutting or turning processes, I take into account the working height and the necessary knee clearance. According to WELL v2, sitting work surfaces should typically range from 28 to 30 inches to encourage a neutral posture, aligning well with the typical dining table height of about 30 inches. Research by Steelcase indicates that sustained comfort is closely linked to adequate leg clearance and proper posture alignment—ideally, a minimum of 24 inches of knee space depth beneath the apron will prevent discomfort during extended meals. These simple guidelines ensure that your farmhouse table remains inviting rather than overwhelming.
Acoustics play a surprisingly significant role in dining experience. Studies by Herman Miller reveal that hard, reflective surfaces can intensify conversation noise in social environments. Therefore, when designing farmhouse tables, it’s beneficial to combine sturdy hardwood legs with softer finishes—such as oiled surfaces and woven fabrics—as this can help mitigate sound reflections and allow voices to carry comfortably, especially in open cooking spaces. A well-thought-out leg design is crucial not only for aesthetics but also for enhancing the sensory experience around the table.
Understanding the Proportions of Farmhouse Legs
Farmhouse tables depend heavily on a harmonious leg-to-top ratio. Typically, table tops range from 1 to 1.5 inches in thickness, with legs measuring from 3.25 to 3.75 inches square striking a balance between substantiality and sleekness; for larger tables exceeding 84 inches in length, a 4-inch square leg may be more appropriate. I generally maintain the apron depth between 3 and 4 inches; deeper aprons can appear cumbersome and reduce knee clearance. Should you prefer turned legs, tapering the final third can lighten the visual weight and avoid a bulky appearance.
Selecting Materials: Beauty, Stability, and Sustainability
My preferred leg woods include hard maple, white oak, and ash; these materials are stable, durable, and easy to finish. While softwoods like pine can lend themselves to rustic designs, it's essential to reinforce joints and manage seasonal changes. When harmonizing the table's top with its legs, prioritizing dimensional stability is key—while combinations of different species can be visually stunning, they should not be mismatched based on their seasonal movement. To leave a lighter environmental footprint, consider materials that are FSC-certified or sourced from reclaimed wood; choosing materials mindfully contributes to sustainability without sacrificing strength.
Durable Joinery for Everyday Use
The mortise-and-tenon joint remains the benchmark for leg-to-apron connections. For those using basic tools, loose tenon options—like domino or router-influenced joints—provide consistent strength. It’s advisable to incorporate corner blocks within the aprons to resist racking, especially for longer tables, and use glue paired with mechanical fasteners to allow the joint to age gracefully. I prefer to steer clear of metal brackets in visible areas; they can imply movement and detract from the farmhouse aesthetic.
Profiles: Turned, Tapered, and Square
• Turned legs: A defining element of classic farmhouse style. I recommend keeping the upper third bulkier for visual balance while tapering gently towards the mid-section. A slight bead or cove can add depth without overwhelming the design.
• Tapered legs: A contemporary staple in farmhouse design. A two-sided taper (on the inner faces) lends a slim appearance while maintaining solid form from the outside.
• Square legs: Simple yet robust and versatile. A slight chamfer or rounding of the outer edges can enhance touch and soften visual sharpness.
Prioritizing Ergonomics and Everyday Comfort
Comfort during meals revolves around ease of movement of feet and adequate knee space. Maintaining at least 18 inches of clearance between the inner faces of the legs on shorter ends is essential to avoid cramping. For tables meant to accommodate eight or more people, check spacing along the sides; I typically plan for 24 inches per diner to prevent knees and chairs from clashing with the legs. These minor adjustments greatly enhance the table's functionality during long dining experiences.
Creating Durable Farmhouse Finishes
Oil-based finishes not only enhance grain visibility but also impart a warm feel to the wood. Waterborne polys, on the other hand, provide superior scratch resistance and reduced VOC emissions. I often gently burnish edges before applying the finish to replicate subtle wear. For painted legs, I recommend a high-build primer followed by satin enamel; this finish obscures minor blemishes and remains easy to clean. If matching a reclaimed top, a rubbed wax applied over oil can yield a soft glow and a natural touch.
Maintaining Sound, Light, and Color Balance at the Table
Farmhouse settings greatly benefit from layered lighting: a warm pendant light around 2700 to 3000 Kelvin above the center, complemented by dimmable lighting around the perimeter to minimize glare. IES guidelines recommend softer, diffuse illumination for dining comfort; aim for an even distribution of light, avoiding overly bright spots. For colors, muted earth tones can create a calming atmosphere, while darker stains on the legs can visually stabilize the table. Be cautious with contrasting colors—a high contrast between dark legs and a light top may appear top-heavy unless the space is large enough.
Strategic Layout for Your Table
Correct positioning of your table minimizes collisions and safeguards your legs—both literally and aesthetically. Ensure at least 36 inches of circulation space around the edges so chairs can move freely. If you’re designing a new dining area, map out traffic flows from the kitchen and patio doors before finalizing the table’s footprint. To visualize spacing and experiment with leg sizes and placements effectively, consider using an interior layout planner tool such as this Homestyler application for enhanced planning precision.
Step-by-Step DIY: From Raw Stock to Finished Legs
1) Define measurements: Height, square leg dimensions, apron depth, and clearances.
2) Mill stock: Joint, plane, and square up. Strive for perfectly straight grains to minimize seasonal twists.
3) Mark profiles: Lay out beads and tapers for turned legs; for tapered legs, indicate cuts on the inner faces.
4) Cut joinery: Start with mortises, then create apron tenons. Dry fit all components together before final assembly.
5) Shape: Use a lathe with a steady rest for turning or taper with a jig for consistent results.
6) Sand and smooth edges: Begin with 150–180 grit, then progress to 220; soften areas for user comfort.
7) Assemble the base: Glue tenons, clamp for squareness, and add corner blocks for stability.
8) Finish: Seal, stain, or paint, and then apply a topcoat. Use figure-eight fasteners or elongated slots to attach the tabletop, allowing for natural wood movement.
Common Pitfalls and My Prevention Tactics
• Oversized aprons that compromise knee space—keep near 3 to 4 inches.
• Thin legs for heavy tops—opt for 3.25 to 3.75 inches square legs for most builds.
• Rigid connections for tabletops—always allow room for expansion and contraction.
• High-gloss finishes in bright kitchens—glare can cause visual fatigue; satin finishes are preferable.
Sustainable Sourcing and Care Over Time
Choose hardwoods that are sustainably harvested and verify the chain-of-custody when possible. For upkeep, refresh oil finishes once a year and lightly sand and spot coat paint as necessary. Tighten all hardware each season and be attentive to early signs of racking; prompt maintenance will ensure joints remain sturdy and quiet.
Expert Notes
For insights on ergonomics and comfort relative to posture and seating arrangements, consult resources from Steelcase and Herman Miller. Additionally, the WELL v2 guidelines offer valuable advice on seated work height, correlating with typical dining table dimensions. Discover workplace and spatial behavior studies through Steelcase Research and health-centric design concepts at WELL v2.
Frequently Asked Questions
Q1. What height is recommended for a farmhouse dining table?
A1. Approximately 30 inches is suitable for most dining scenarios, aligning with WELL v2's comfort recommendations. Ensure chair seat heights are between 17 to 19 inches.
Q2. What leg thickness offers the best stability?
A2. For tops measuring between 1 and 1.5 inches thick, legs sized at 3.25 to 3.75 inches square maintain both structural integrity and visual appeal. For tables over 84 inches, consider using 4-inch square legs.
Q3. Are turned legs inherently stronger than tapered legs?
A3. The strength predominantly relies on the joinery and wood species used. Both turned and tapered legs can be reinforced effectively with solid mortise-and-tenon joints and stable hardwoods like maple or oak.
Q4. Which finish is most durable for a busy kitchen-dining area?
A4. Waterborne polyurethane delivers excellent abrasion resistance and minimal VOC levels. For a softer farmhouse appearance, consider using hardwax oil and maintain it through periodic re-oiling.
Q5. How can I prevent wobbling in the long run?
A5. Use snug tenons, include corner blocks within the apron, and routinely inspect fasteners. Allow the tabletop to have freedom of movement with figure-eight clips or elongated slots.
Q6. What spacing should I allow for comfortable seating?
A6. Ideally, allow 24 inches per diner along the sides and at least 36 inches of space around the perimeter of the table. Keep the apron depth between 3 to 4 inches to ensure ample knee room.
Q7. Can I paint the legs while keeping the top in its natural wood state?
A7. Absolutely. Painted legs in satin enamel can harmonize beautifully with oiled or waxed tops. Opt for muted colors to avoid harsh contrasts unless the space is particularly large.
Q8. What woods are best for creating budget-friendly DIY legs?
A8. Ash and maple are both cost-effective and durable. Pine can be used for rustic projects; just be sure to reinforce joints and consider a harder finish to handle potential dents.
Q9. How do lighting choices influence the farmhouse ambiance?
A9. Warm, dimmable lighting at 2700 to 3000 Kelvin enhances comfort and minimizes glare while accentuating grain patterns. Following IES suggestions for diffuse dining light contributes to a cozy environment.
Q10. What’s the most effective way to visualize leg profiles before finalizing designs?
A10. Create mockups using cardboard or MDF and position them in place. For assessing flow and clearances, consider utilizing an interior layout planner like Homestyler for precise visualization.
Homestyler is an amazing online home design platform that empowers you to create stunning interiors effortlessly. With its user-friendly design tool, impressive 3D renderings, and a wealth of DIY video tutorials, you can transform your home ideas into reality with ease!
Desain sekarang Gratis
































