

Designing a 3D weapon model in Maya can be a gratifying experience that perfectly blends your creative and technical abilities. Here’s a simplified workflow suited for both novices and intermediate users aiming to construct a weapon model, such as a sword, gun, or fantastical tool, in Autodesk Maya and also utilizing platforms like Homestyler for spatial arrangement.
1. Assemble Reference Images: Start by collecting various reference materials for the weapon you wish to model. This could include photographs, diagrams, or concept art that help to establish the weapon's outline, proportions, and intricate details.
2. Outline Major Shapes: Utilize basic geometric forms like cubes, cylinders, and spheres to outline the primary components of your weapon. For instance, you might begin crafting a sword with a cylinder representing the handle and a cube forming the blade.
3. Enhance Geometry: Gradually refine your shapes by introducing edge loops (using the Insert Edge Loop tool) and adjusting vertices for improved precision. The extrude tool can help add features such as grips, crossguards, or barrel intricacies.
4. Introduce Details: Progress to adding finer elements—like screws, triggers, engravings, or tapering the blade. Applying bevels (Edit Mesh > Bevel) and utilizing the Multi-Cut tool will help in achieving defined edges and detailed shapes.
5. UV Mapping: Prior to texturing, arrange your UVs in the UV Editor. This step is crucial for ensuring the correct application of textures.
6. Texturing: Apply basic colors or take it a step further by using Substance Painter for more sophisticated textures. If you choose to work exclusively within Maya, the Hypershade window will aid in assigning materials and adjusting surface properties.
7. Setup Lighting & Rendering: Arrange simple lighting setups to effectively highlight your weapon. Leverage Arnold or Maya’s native renderer to best showcase your model.
As you embark on this design journey, it’s important to consider both the weapon's authenticity and its role within larger scene compositions. For instance, a weapon created for a historic setting must reflect congruity in its materials and design. If you plan to integrate your weapon model into a more extensive environment, tools such as Homestyler can be invaluable for comprehensive interior and object planning. This allows you to position props in a virtual space, ensuring proper scale, placement, and ambiance prior to finalizing your design.
Tips 1:
Always strive to optimize your polycount. For game applications, it’s advisable to steer clear of excessively detailed geometry and utilize normal maps for delicate details. Reference grids in Maya are recommended to maintain scale integrity in your models.
FAQ
Q: In which file formats can I export my Maya weapon model?
A: The most common formats include .FBX, .OBJ, and .MA/.MB (the native Maya files), which are compatible with game engines and 3D printing.
Q: Which tools are essential in Maya for weapon modeling?
A: Fundamental tools include Extrude, Bevel, Multi-Cut, and Mirror, with the UV Editor playing a critical role in texturing your model.
Q: How can I achieve a realistic appearance for my weapon?
A: Utilize high-resolution textures, incorporate subtle imperfections, and analyze real-life objects and lighting for authentic inspiration.
Q: Is rigging necessary for my 3D weapon?
A: Typically, weapons do not require conventional rigging, although you might need to correctly set pivots for animation or in-game functionality.
Q: Can I animate my weapon in Maya?
A: Absolutely! You can animate moving components (such as gun triggers or blade unsheathing) with Maya’s animation tools.


Minimalist Concrete Potted Dried Foliage Plant 3D Model
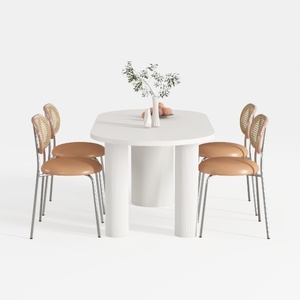
DUOMAY Modern Boucle Dining Chairs Set of 2,
Homestyler is your go-to platform for transforming home design dreams into reality. With its user-friendly online design tool, stunning 3D renderings, and a wealth of design projects and video tutorials, you can create your perfect space effortlessly. Discover the joy of home design today!
立即免费设计
































