


If you're aiming to refine a 3D model, you are stepping into the vibrant world of digital design. An enhanced 3D model can considerably elevate your project's attractiveness, whether it's intended for animation, gaming, or product visualization. But how can you achieve that striking appearance? Let's delve into the essentials.
Grasping the Fundamentals of 3D Model Refinement
Firstly, comprehending the structure of your 3D model and the materials being utilized is paramount. Are you preparing it for rendering, gaming, or even 3D printing? Each use case can dictate the approach to refining the model.
1. **Inspect Geometry**: Initiating the refinement process involves verifying that the geometry of your model is sound. Eliminate any extraneous vertices and faces that could lead to complications during rendering or printing. Many 3D software programs offer a 'Merge' function to help streamline your geometry efficiently.
2. **UV Mapping**: Effective UV mapping is crucial for applying textures appropriately. Ensure that your UV layouts are accurately arranged to prevent stretching or distortion in your textures.
Texturing Methods for Enhanced Models
Once the geometry is refined, shift your focus to texturing. The polished appearance often arises from the finesse in the textures employed.
1. **Utilize High-Resolution Textures**: Employ high-resolution textures to capture intricate details in your renderings effectively. Use bitmap images or procedural textures as necessary.
2. **Bump and Normal Mapping**: Integrate bump maps or normal maps to impart depth to your model without modifying the geometry. These mapping techniques can significantly uplift the visual quality.
Rendering for the Finishing Touches
Ultimately, rendering holds the key to achieving that polished aesthetics. Pay close attention to both lighting and material configurations in your rendering engine.
1. **Lighting Arrangement**: Effective lighting can showcase the surfaces of your model, bringing its details to light. Consider employing three-point lighting to enhance your model’s features.
2. **Post-Processing Techniques**: After rendering, think about adding post-processing effects such as bloom or ambient occlusion to further enrich the final output.
Key Tip:
Always keep your textures and geometry at the forefront of your considerations as you progress. Consistent reviews and balances will help you avoid overlooking elements that are crucial for achieving a high-quality end product.
Frequently Asked Questions
Q: Which software is best for 3D modeling?
A: Some popular options include Blender, Maya, 3ds Max, and Cinema 4D, all tailored to various requirements and skill levels.
Q: How can I ensure my model is suitable for printing?
A: Confirm that your geometry is manifold, devoid of non-manifold edges, and properly scaled for your printer to prevent complications.
Q: Is it possible to achieve excellent textures without high resolution?
A: While high-resolution textures are preferable, optimizing your UV mapping and employing techniques like normal mapping can significantly enhance the texture quality.
With tools like Homestyler, crafting and polishing your 3D models has never been easier, as they offer intuitive interfaces and resources for both beginners and experts alike.

Rustic Solid Oak Square Coffee Table with Geometric Inlay Pattern 3D Model
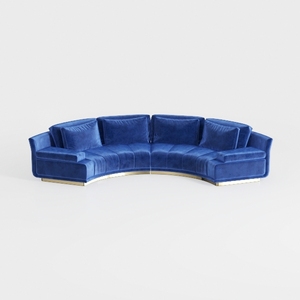
Modern Navy Velvet Gold Base Curved Sectional Sofa 3D Model

Round Coffee Table,29.52IN Wooden Coffee Table,Mid
Homestyler is the ultimate online home design platform for anyone looking to transform their space. With its intuitive design tool, stunning 3D renderings, diverse design projects, and helpful DIY video tutorials, you’ll effortlessly create your dream home with no design expertise needed!
Progetta ora GRATIS


