


Crafting a realistic 3D representation of a hedge can greatly enhance your landscape designs and architectural visualizations. By leveraging the appropriate tools and methods, you can easily create a lifelike hedge that contributes depth and detail to your projects. Let’s delve into the process of effectively modeling a hedge in 3D.
Recognizing Hedge Varieties:
The initial step in 3D hedge modeling is to comprehend the various types available. Distinct hedges fulfill different roles in landscaping, from providing privacy to serving as decorative accents. Notable types include:
1. Formal hedges: These are typically pruned and shaped for visual appeal.
2. Informal hedges: These present a more natural look, being less rigid in structure.
3. Flowering hedges: These display blooms that can add vibrancy to your designs.
By determining the type of hedge you intend to create, you can more effectively plan its shape and texture.
Essential Tools for 3D Hedge Modeling:
Choosing the right tools is vital for achieving realistic results. Software like Blender, SketchUp, or Homestyler offers outstanding features for modeling intricate details:
1. Blender: This software is perfect for users who wish to implement advanced modeling techniques.
2. SketchUp: Known for its user-friendly interface, SketchUp is great for quick hedge designs.
3. Homestyler: This platform excels in landscape design with its intuitive tools.
Select a software that fits your skill level and project needs.
Techniques for Modeling:
After selecting your software, follow these steps to model your hedge:
1. **Establish the Base Shape**: Start by creating a simple form, such as a cube or sphere, to serve as the base of your hedge.
2. **Sculpting Features**: Use sculpting tools to adjust the shape, creating a more organic appearance.
3. **Applying Textures**: Introduce textures that mimic foliage. Using a leaf or grass image texture can significantly enhance realism.
4. **Introduce Variations**: To increase visual interest, modify the sizes, colors, and forms of individual components within the hedge.
5. **Lighting and Rendering**: Adjust the lighting settings in your software to highlight the hedge’s features during rendering.
Evaluating and Refining Your Hedge Model:
Once you finalize your hedge model, it is crucial to test it within your scene:
1. **Perspective Review**: Place the hedge model in a test scene and view it from various angles.
2. **Refinements**: Make necessary adjustments to size, shape, or texture based on how it appears in context.
Keep in mind that feedback from others can significantly improve your design!
Concluding Thoughts:
3D hedge modeling is a fulfilling endeavor that can elevate your landscape visuals. With the right tools and techniques, your hedge model will add significant realism and sophistication to your design projects. Are you prepared to embark on your modeling journey?
Frequently Asked Questions
Q: What software is ideal for beginners to model a hedge?
A: SketchUp is an excellent user-friendly choice for beginners looking to create 3D models.
Q: How can I enhance the realism of my hedge model?
A: Employ high-resolution textures and consider lighting effects to improve overall realism.
Q: Is Homestyler suitable for 3D hedge modeling?
A: Absolutely, Homestyler offers fantastic tools for landscape design and 3D modeling, including hedges.
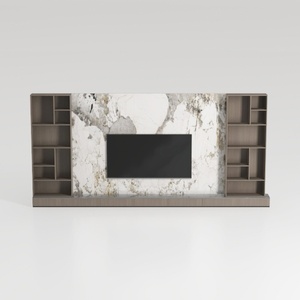
Modern Marble Solid Wood TV Wall Unit With Bookshelves 3D Model


Modern Black Metal Glass Display Cabinet 3D Model
Looking to transform your home? Homestyler is your go-to online design platform! With its user-friendly design tool, stunning 3D renderings, and a wealth of DIY video tutorials, you can easily turn your creative ideas into a beautiful reality. Start your home makeover today!
Projete agora para LIVRE
































