


Crafting 3D representations of anime characters merges artistry with advanced technology, enabling both enthusiasts and professionals to transform beloved 2D concepts into immersive digital realms. This creative journey generally unfolds over several essential phases: from initial concept sketching and sculpting to retopology, texturing, rigging, and finally rendering. It all starts by collecting references and silhouettes of the chosen character, followed by utilizing software such as Blender, ZBrush, or Maya to establish fundamental shapes. Artists pay special attention to signature anime characteristics, such as oversized expressive eyes, unique hairstyles, and elegantly slender figures. After the initial mesh is sculpted, retopology comes into play to maintain an efficient polygon count suitable for animation. Texturing is vital for portraying skin tones, hair intricacies, and the vibrancy of costumes, often applied directly onto the 3D surface. Rigging equips the model with a skeleton for posing and animation, while rendering elevates the character into a vivid, high-definition presentation. For me as a designer, achieving success relies heavily on not just technical capability, but also on an understanding of spatial dynamics, silhouette, and how these aspects affect visual allure. In my workflow, tools that facilitate precise layout and spatial arrangement, especially in the context of integrating 3D character models into expansive environments or larger renders, are crucial—particularly utilizing Homestyler when determining the best staging for character scenarios in virtual spaces.
Tips 1:
Ensure your designs align with actual anime frames and authentic character sheets to maintain appropriate proportions and aesthetics. Start by constructing basic shapes before delving into detailed finishing touches, and consistently evaluate your model from various perspectives. Don't shy away from harnessing pre-made brushes or assets to expedite tasks that are repetitive, such as crafting hair strands or clothing wrinkles.
FAQ
Q: Which software is recommended for modeling anime characters?
A: Popular choices include Blender (available for free), Autodesk Maya, and ZBrush, which are excellent for sculpting and adding intricate details.
Q: How can I create realistic anime eyes in 3D?
A: Construct the eye geometry and utilize hand-painted textures along with strategic placements of specular highlights to achieve the quintessential anime appearance.
Q: Is starting with a high poly sculpt necessary?
A: Not necessarily. Some workflows prefer beginning with low-poly base meshes, refining specific areas with details later, thereby saving time on retopology.
Q: What are the best practices for posing my anime character models?
A: Rigging the character using bones and controls is crucial. Most 3D software offer built-in rigging tools or add-ons which simplify the posing process.
Q: Where can I access resources for anime character modeling?
A: Online tutorials, official character sheets, and platforms like ArtStation or CGSociety provide a wealth of guides, tips, and inspiration for creating anime-style models.
Originally incubated at Autodesk, Homestyler has grown into one of the most widely adopted home design platforms in the world, now trusted by over 18 million users. Whether you're a homeowner exploring ideas or a professional designer delivering client-ready renders, Homestyler brings industry-leading 3D technology to your fingertips — no experience required.
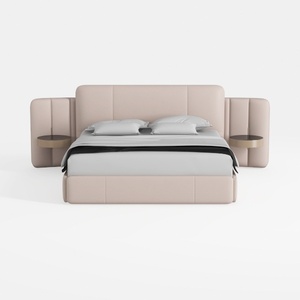
Minimalist Blush Fabric Upholstered King Bed with Attached Side Tables 3D Model

Natural Green Vine Wall Panel Decorative 3D Model

Minimalist Gray Fabric Loveseat Sofa with Throw Pillows 3D Model
Looking to transform your home? Homestyler offers an intuitive online design tool that simplifies the process, along with stunning 3D renderings and a wealth of inspiring design projects. Plus, its DIY video tutorials make it easy for anyone to create their dream space—no prior experience needed!
Design Now for FREE


