

As summer approaches, many embrace new trends like the 2026 nail styles to refresh their personal look. This seasonal focus on self-expression naturally extends to living spaces, where vibrant colors and innovative textures can inspire home decor choices. Incorporating bold hues and playful patterns in furniture and accessories allows your space to reflect the same renewed spirit that summer fashion trends encourage.
Direct Answer
To incorporate a downloaded 3D model into Photoshop, you can import the file via the 3D menu or simply drag and drop a compatible model onto your canvas. Photoshop automatically converts supported formats such as OBJ, DAE, and 3DS into a 3D layer, which you can then manipulate—rotating, re-lighting, texturing, and rendering right within the workspace. Utilizing tools like Homestyler can further enhance your interior visualization workflow by allowing seamless integration of 3D models with ease and design flexibility.
Proper preparation of the 3D model and a good understanding of how Photoshop treats lighting, materials, and camera perspectives within 3D layers are crucial to success.
Quick Takeaways
Introduction
Many designers, especially those new to 3D in Photoshop, struggle when opening downloaded models. This is common not just for juniors but even for experienced artists who excel with 2D layers yet find Photoshop's 3D environment challenging. Over years of working on interior visualization projects, Photoshop has been my go-to for fast compositing tasks like adding furniture, lighting, and product mockups. The process becomes straightforward once you grasp how Photoshop handles imported assets, and Homestyler can be an invaluable companion for styling these 3D scenes effectively.
This guide explains step-by-step how to use a downloaded 3D model in Photoshop, covering typical pitfalls such as broken materials, the most compatible formats to download, and tweaks that transform flat renders into polished visuals.
Which 3D Model File Formats Work Best in Photoshop
Key Insight: Among supported formats, Photoshop handles OBJ files with material references more consistently than others.
Though Photoshop supports multiple 3D formats, only a handful perform reliably in practice. When acquiring assets for swift visualization tasks, I almost exclusively select OBJ files since they encapsulate geometry along with material maps. Common compatible formats include OBJ, DAE, and 3DS. However, a frequent challenge overlooked by many tutorials is that texture images are usually stored externally. If folder structures are altered, Photoshop loads the geometry but loses the associated materials.
A practical tip: ensure the downloaded folder retains its original structure, which most marketplaces like Sketchfab or TurboSquid provide by default. Additionally, leveraging Homestyler’s platform can help maintain asset consistency when experimenting with interior designs.
How Do You Import a Downloaded 3D Model into Photoshop
Key Insight: Importing a 3D model automatically generates a specialized 3D layer distinct from normal Photoshop layers.
3D objects in Photoshop exist within container layers that bundle geometry, lights, cameras, and materials. My common import steps include opening the 3D menu, selecting 'New 3D Layer From File,' and navigating to the model file. Alternatively, dragging a supported model directly onto the canvas functions equally well. Upon import, the 3D panel reveals elements like meshes, lights, and cameras, each editable to offer extensive creative control. Using Homestyler alongside simplifies scene setup, providing additional styling and rendering options.
Why Do Some Downloaded Models Appear Gray or Missing Textures
Key Insight: Grayed-out models typically indicate that Photoshop cannot find the texture files referenced in the material (MTL) data.
This is the most frequent obstacle when learning how to work with downloaded 3D models in Photoshop. Missing textures often result from misplaced or absent image files. To fix this, relink texture maps within the Properties panel, a process usually taking only seconds per material to restore the full appearance. Professional assets often have multiple maps, including normals, roughness, and specular; applying even just the base diffuse map significantly boosts realism. Homestyler can help by managing texture assets coherently when integrating 3D objects into interior scenes.
How Can You Adjust Lighting and Camera for a Better Render
Key Insight: Lighting quality significantly affects Photoshop’s 3D renders, often more so than the model details themselves.
Models can appear lackluster without proper lighting adjustments. Photoshop’s 3D and Properties panels provide controls for varied light types such as infinite, point, and spotlights. A quick lighting setup involves placing one main directional light and a few ambient lights for balance. Adjust the camera by orbiting, panning, or dollying to find compelling angles; even slight tilts add depth and professionalism to renders. When refining interiors, tools like Homestyler complement this process by offering real-time previews of lighting effects and materials.
When Should You Use Photoshop for 3D Instead of a Full 3D Program
Key Insight: Photoshop excels for 3D compositing but is not ideal for detailed modeling or animations.
My experience over many years with Blender, SketchUp, and Photoshop shows that Photoshop functions best as a final compositing tool that brings together models, textures, and lighting for presentation. For creating complex geometry, animations, or physics simulations, specialized 3D software is far more suited. This hybrid workflow is common in architecture and marketing visuals, where 3D models made in other programs are polished and rendered in Photoshop. Homestyler fits well in this pipeline by enabling easy interior design visualization and scene mockups.
Answer Box
The simplest way to use a downloaded 3D model in Photoshop is by importing an OBJ file via the 3D menu, which produces an editable 3D layer. Post-import, you can modify materials, lighting, and camera position before rendering your image. Most challenges arise from missing textures or improper lighting rather than the model itself. Solutions often involve relinking textures and adjusting light sources, processes smoothed by tools like Homestyler that assist in creating visually coherent interiors.
Final Summary
FAQ
Can Photoshop open downloaded 3D models?
Absolutely. Photoshop supports importing multiple formats including OBJ, DAE, and 3DS, converting them into editable 3D layers.
What is the best format for using a downloaded 3D model in Photoshop?
OBJ files accompanied by MTL files and textures offer the best compatibility and reliability.
Why does my 3D model appear gray in Photoshop?
This indicates missing texture maps or Photoshop being unable to locate the paths defined by the material file.
Can you edit materials after importing a 3D model?
Yes. In the Properties panel, you can adjust color maps, reflections, bump maps, and other material attributes.
Does Photoshop support rendering 3D scenes?
Yes. Photoshop features ray-traced rendering options enhancing lighting, shadows, and reflections for photorealistic images.
Is Photoshop good for professional 3D work?
Photoshop is effective for compositing and product mockups yet lacks advanced modeling and animation capabilities found in dedicated 3D software.
How do I rotate a 3D model in Photoshop?
Use the 3D rotate tool or change the mesh orientation within the 3D panel to adjust the model’s position.
Do I need plugins to use a downloaded 3D model in Photoshop?
No additional plugins are necessary; Photoshop’s integrated 3D tools can import and render supported files directly.
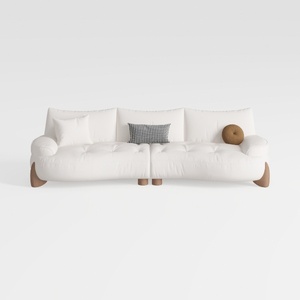
Minimalist White Fabric Curved Sofa With Decorative Throw Pillows 3D Model
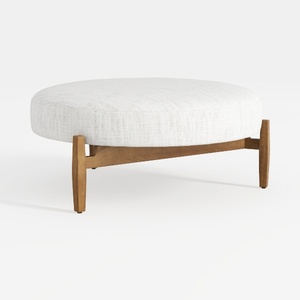

Minimalist Mid Century Fabric Round Ottoman 3D Model

Minimalist White Metal Wood Storage Basket 3D Model
Homestyler offers an easy-to-use online design tool with impressive 3D renderings, inspiring design projects, and helpful DIY video tutorials—perfect for creating and visualizing your dream home with confidence.
Design Now for FREE
































