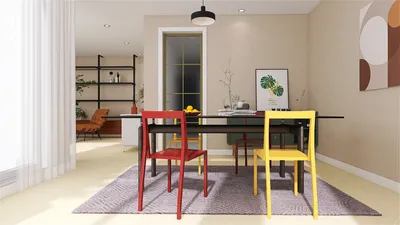


Creating a 3D model of your dream house can be an exhilarating journey, enabling you to visualize your ideal living space before it's constructed. Regardless of whether you are an experienced designer or an enthusiastic DIYer, mastering the art of 3D house design can enhance your interior design skills significantly. Below are the steps to embark on your 3D design adventure. 1. **Select Suitable Software**: Start by picking a 3D design tool that meets your requirements. Programs such as Homestyler, Homebyme, or Planner 5D provide intuitive interfaces and extensive libraries filled with furniture and decorative items to help you kick off your project. For example, Homestyler gives you access to a plethora of models and templates, simplifying the process of crafting distinctive interiors. 2. **Develop a Floor Plan**: Before diving into the 3D modeling phase, it’s vital to establish a comprehensive floor plan. Use the design software to draft a blueprint that details your house's layout. Keep in mind aspects such as room sizes, door placements, and the flow of spaces. A thoughtfully constructed floor plan serves as the foundation of your design. 3. **Construct Walls and Framework**: After finalizing your floor plan, proceed to build the walls. Most design applications enable you to easily position walls, adjusting their height and width to reflect your vision. Be sure to add elements like windows and doors to achieve a realistic appearance. 4. **Add Furnishings and Decor**: With the structural framework set, it's time to outfit your space. Explore the vast collection of furniture and decorative items in your selected software. Feel free to combine various styles to craft a personalized aesthetic that showcases your individual flair. 5. **Play with Colors and Textures**: One of the major benefits of working in 3D is the ability to experiment with color schemes and materials visually. Test different wall hues, flooring choices, and textures to find the ideal combination that enhances your home's appeal. 6. **Assess and Adjust**: Once you've finalized your initial design, take a moment to evaluate your work. Identify any areas that may require tweaks, such as moving furniture or adjusting room arrangements. Most software programs facilitate easy modifications, so feel free to fine-tune your design. 7. **Render Your Creation**: After achieving satisfaction with your layout and decor, it’s time to render your design. This step produces high-quality images of your 3D model, providing you with a lifelike representation of how your home will appear. Homestyler offers impressive rendering capabilities that beautifully illustrate the details of your design. 8. **Showcase Your Work**: In conclusion, share your finished design with friends, family, or online design communities. Numerous design software platforms include features for sharing your work effortlessly, allowing you to showcase your efforts and gather feedback from other design lovers. This can be a fantastic way to gain valuable insights and inspiration for your future projects.
Tips 1:
Stay open to exploring different design trends and styles to keep your home design exciting and innovative. Don't hesitate to experiment with diverse layouts and color schemes!
FAQ
Q: Is prior design experience necessary to utilize 3D design software? A: Absolutely not! Most 3D design tools are designed to be user-friendly, accommodating both beginners and seasoned professionals.
Q: Can I access my design from various devices? A: Yes! Many contemporary design software options, including Homestyler, offer cloud-based functionality, enabling you to work on your projects across multiple devices.
welcome to Homestyler

Minimalist Travertine Top Solid Wood Round Coffee Table 3D Model

Minimalist Solid Wood Round Stool Set 3D Model
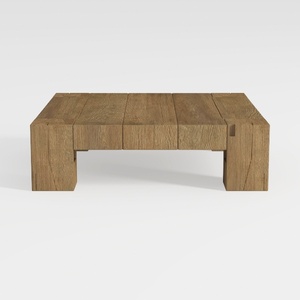
Rustic Solid Oak Wood Coffee Table Minimalist Living Room 3D Model
Homestyler is an exceptional online home design platform perfect for anyone looking to create stunning spaces. With its user-friendly design tool, impressive 3D renderings, and a wealth of inspiring design projects and DIY video tutorials, you can effortlessly transform your home into a masterpiece!
Zaprojektuj teraz za darmo
































