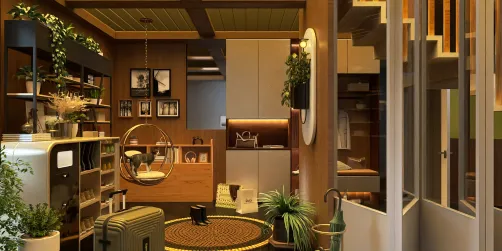

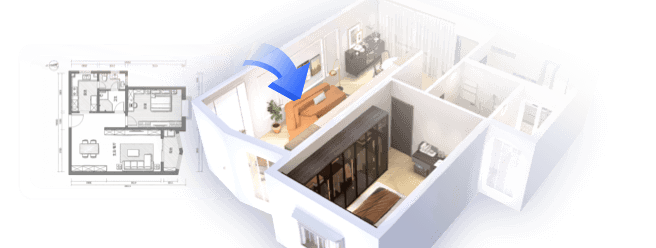
I have designed dining tables for everything from cozy city apartments to expansive family homes. The distinction between a table that merely "exists" and one that facilitates countless memorable gatherings hinges on proportions, ergonomics, and the careful selection of materials. An excellent DIY plan encompasses more than just precise joinery; it involves understanding human factors, optimizing light and acoustics, and recognizing how the table integrates into your daily routines. Utilizing a tool like Homestyler can significantly enhance your design process by helping you visualize these elements better.
Prior to putting pencil on paper, I establish the desired seating capacity and ergonomic benchmarks. The standard height for seating typically hovers around 18 inches, paired with a table height ranging from 28 to 30 inches, adhering to common residential codes; this 10 to 12-inch gap ensures sufficient legroom. Research from Steelcase has repeatedly highlighted the significance of ergonomic fit for maintaining comfort, while the WELL v2 standard brings attention to glare control and visual comfort as critical factors for wellbeing, especially when dining is a visually demanding activity—whether you're reading labels, plating meals, or maintaining eye contact. Furthermore, I rely on an essential data point: the advised illuminance for dining surfaces often ranges from 100 to 300 lux, depending on the ambiance, emphasizing careful glare management in line with IES standards to ensure a comfortable dining experience.
I begin with a scaled drawing along with a detailed cut list. For dining rooms under 120 square feet, a rectangular tabletop measuring 60 to 72 inches generally accommodates 4 to 6 people comfortably, while round tables with a diameter of 42 to 54 inches can save precious circulation space. It's vital to maintain a minimum clearance of 36 inches from walls or cabinetry for easy access—42 inches is advisable if you plan on frequent service or wheelchair access, complying with universal design principles. To visualize seating arrangements and chair movement, employing an interior layout tool is beneficial in testing pushback and clearance widths.
Choosing the Right Wood Species and Finish
The selection of materials greatly influences both durability and aesthetic appeal. White oak is renowned for its exceptional wear resistance and timeless grain, while maple is sturdy and light-colored; walnut adds warmth with its finer pore structure ideal for high-end finishes. If you're on a budget, consider a plywood core with hardwood edging—it’s stable and cost-effective. Softwoods are typically avoided in high-traffic family settings unless accompanied by durable finishes. Opt for sustainably sourced, FSC-certified lumber whenever feasible, and choose low-VOC finishes. A catalyzed waterborne polyurethane offers outstanding abrasion resistance with quick curing times and lower odors; oil finishes enhance grain visibility but demand regular upkeep. Don’t overlook edge profiles: a 1/8 inch eased edge is sufficient to prevent chipping while maintaining a sharp, contemporary appearance.
Proportions: Top Thickness, Overhangs, and Leg Clearance
Visual balance significantly impacts perceived quality. I target a top thickness of 1 to 1.5 inches for solid wood or a 1-inch veneered substrate with a 1.5-inch buildup around the edges to reduce weight while preserving a substantial appearance. Typical overhangs of 10-12 inches on trestle or pedestal bases allow space for knees; for four-legged designs, an 8-10 inch overhang beyond the apron minimizes thigh contact. The apron itself should be about 3-4 inches tall, with its bottom edge positioned 24 inches above the floor to safeguard legroom. When developing pedestal bases, ensure the footprint is roughly one-third the width of the tabletop to guarantee stability and prevent tipping.
Joinery That Survives Seasons
Wood undergoes dimensional changes, necessitating thoughtful planning. Implementing breadboard ends on solid tops can help manage cupping while allowing for expansion via elongated mortises and drawbored pegs. For attaching legs to aprons, I prefer the traditional mortise-and-tenon method fortified with mechanical reinforcement via screwed corner blocks to prevent racking. If you opt for metal brackets, position them within the apron structure and ensure slotted holes are present for top fasteners (like figure-eight fasteners or Z-clips) to permit movement without splitting the wood. Avoid the practice of fully gluing the top to the base.
Acoustics and Dining Comfort
Hard surfaces tend to amplify sound; this explains why large, completely wooden rooms can become noisy. The findings from Steelcase’s workplace acoustics research can be applied here: introducing sound-absorbing materials—such as a rug beneath the table, upholstered chairs, or fabric wall art—can significantly decrease reverberation and enhance conversational clarity. For spaces with high ceilings, pendant lights equipped with acoustic liners or felt baffles above the dining area can contribute to a more tranquil dining atmosphere.
Lighting the Table Without Glare
The temperature and distribution of light play crucial roles in setting the mood. I strive for a warm-white glow ranging from 2700 to 3000K above dining tables, incorporating dimming capability and a pendant that casts a broad, soft light. Position the pendant 30 to 36 inches above the table for even luminance, ensuring that the light source is shielded to prevent direct glare. The WELL v2 standards stress the importance of visual comfort and glare reduction, while IES guidelines advocate for layered lighting—combining ambient illumination and the pendant—to avoid harsh contrasts.
Color Psychology: Setting the Tone
Color can subtly influence appetite and mood. An overview of color psychology suggests warm shades like terracotta and muted reds promote sociability, while harmonious neutrals (such as warm grays, oat, and mushroom) keep focus on food and faces during meals. I often introduce color through chair upholstery or wall paint instead of the tabletop, ensuring the table maintains a neutral tone that allows for timelessness and finish versatility.
Step-by-Step Build Outline
1) Confirm dimensions: width, length/diameter, height, apron heights, and leg setbacks. Utilize an interior layout planner for accurate clearances in compact rooms.
2) Create a cut list: legs (1.75-2.5 inch square), aprons (3-4 inches tall), and top panels (glue-up boards). Ensure lumber is milled flat and square, allowing a full day for acclimation.
3) Joinery: shape mortises and tenons; dry-fit aprons to legs; incorporate corner blocks for stability.
4) Top glue-up: align the grain direction, alternate patterns, and use cauls to ensure flatness; scrape excess glue prior to complete curing.
5) Sanding: progress through grits of 120 to 150 to 180; raise the grain with waterborne finishes and sand it back down.
6) Painting: apply a seal coat; build up 2 to 3 topcoats with light sanding in between; allow for curing according to manufacturer instructions.
7) Assembly: attach the base; use figure-eight fasteners or Z-clips to ensure proper attachment; ensure the table is leveled and resistant to racking.
8) Protection: place felt pads under the feet; avoid positioning near direct heat sources or sunlight to prevent fading.
Spatial Ratios and Seating Strategy
For rectangular tables, allocate 24 inches of width per diner and 12 to 15 inches of depth for plates. A table measuring 72×36 inches comfortably accommodates six diners; moving to 84×40 offers additional elbow room. Round tables foster a more sociable environment—48 inches seats four, 54 inches accommodates five, and 60 inches can host six. For regular gatherings of eight, consider a table size of 96×42 on a trestle base for added stability. When floor space is limited, benches on one side can reduce visual bulk and slide completely under the table for better circulation. A room design visualization tool can effectively assist in assessing chair spacing and traffic flow.
Finish Durability and Care
Dining tables are subject to heat, moisture, and wear. Waterborne polyurethanes provide strong resistance to chemicals and dry quickly, while hardwax oils offer a natural touch but require more frequent maintenance. I recommend using placemats for everyday meals and felt-backed trivets for hot items. Regularly re-oil if employing penetrating oils; for film finishes, a gentle cleaning with diluted, pH-neutral soap maintains sheen.
Small-Space Tactics
Drop-leaf or gateleg designs can adapt to changing needs. A table measuring 36×36 can expand to 36×60 with leaves—ideal for studio apartments. Utilizing light-colored woods and matte finishes helps diminish visual heaviness; tapered legs create a streamlined effect, contributing to a sense of openness. Furthermore, strategically placing mirrors adjacent to the dining area can enhance perceived space and brightness.
Safety and Stability
It's crucial to check for racking stability. Gently apply pressure to opposite corners; any wobble indicates the need to revisit the apron-to-leg connections and corner blocks. Ensure the center of gravity remains low, as heavy tabletops paired with narrow bases can result in tipping. If a pedestal design is utilized, either distribute ballast or widen the base. To minimize injury risks in tighter spaces, consider rounded corners.
Budget and Timeline
Expect to spend two full weekends on a solid wood four-leg construction, including finishing time. Material costs can vary significantly; typically, domestic hardwood for a six-person table falls within a moderate price range compared to engineered surfaces. If you plan to outsource the milling for your table, ensure you account for lead times.
Authority References
For insights on ergonomics and other considerations, I frequently consult Steelcase’s comprehensive research library and the WELL v2 guidelines regarding visual comfort and effective lighting design:
Steelcase research
WELL v2
FAQ
Q1: What table height is optimal for comfort?
A: Strive for a height of 29 to 30 inches, coupled with an 18-inch seat height. This 11 to 12-inch difference accommodates legroom and promotes a neutral arm angle.
Q2: How much clearance should I allow around the table?
A: A minimum clearance of 36 inches from walls and furniture is recommended; 42 inches is ideal if frequent passage or enhanced accessibility is anticipated.
Q3: What is the appropriate pendant height above the table?
A: Position pendants 30 to 36 inches above the tabletop. Opt for warm lighting (2700-3000K) with diffusers to mitigate glare, in line with WELL v2 visual comfort principles.
Q4: How thick should my tabletop be?
A: Solid tabletops typically have a thickness of 1 to 1.5 inches. Veneered versions can be 1 inch thick with a perimeter build-up to create a thicker appearance without adding excessive weight.
Q5: Which wood species offer a good balance between strength and cost?
A: White oak and maple are robust and reasonably priced; walnut is a more premium option. For budget-conscious projects, consider a plywood core with hardwood edging.
Q6: How many individuals can a 72×36 inch table accommodate?
A: It comfortably seats six, allowing for about 24 inches per person. For additional elbow room, an 84×40 table can serve six and even accommodate up to eight with careful leg placement.
Q7: What joinery is most effective in preventing wobbling?
A: Mortise-and-tenon joints between legs and aprons, complemented by corner blocks, provide excellent resistance to racking. Always use figure-eight fasteners or Z-clips to allow for natural movement of the top.
Q8: How can I reduce noise during meals?
A: Incorporate a rug under the table, select upholstered chairs, and consider using acoustic shades. These strategies effectively absorb sound reflections and enhance speech clarity.
Q9: Which finish is most resistant to family wear and tear?
A: Waterborne polyurethane is highly resistant to abrasion and stains, with a minimal odor. Hardwax oils create a natural touch but require more frequent refreshing.
Q10: Is a round or rectangular table better for smaller spaces?
A: Generally, round tables with diameters between 42 and 48 inches tend to fit smaller rooms more effectively, facilitating circulation while avoiding sharp corners.
Q11: How do I plan layouts prior to construction?
A: Utilize a layout simulation tool to analyze circulation patterns and chair pushback zones. Confirm all clearances before making any cuts to your wood materials.
Q12: Is it permissible to mix wood and metal bases?
A: Absolutely. Metal bases provide a sleek profile and exceptional stability; just ensure that you incorporate slotted top fasteners to accommodate natural wood movement.
Homestyler's roots trace back to Autodesk, the global leader in design and engineering software. That heritage lives on in every feature we build. Today, with a community of more than 20+ million registered users (platform data, 2026) worldwide, Homestyler continues to make professional-quality interior design accessible to everyone — from first-time decorators to seasoned architects.
Homestyler is your go-to online platform for home design! With its user-friendly design tool, stunning 3D renderings, and extensive library of DIY video tutorials, you can effortlessly create and visualize your dream spaces. Unleash your creativity and transform your home today!
Design Now for FREE