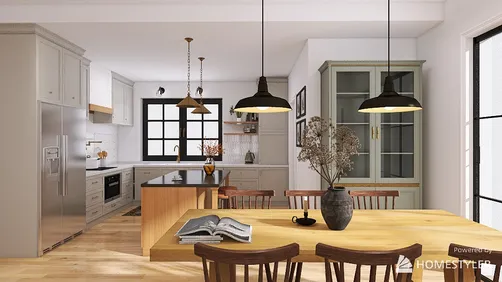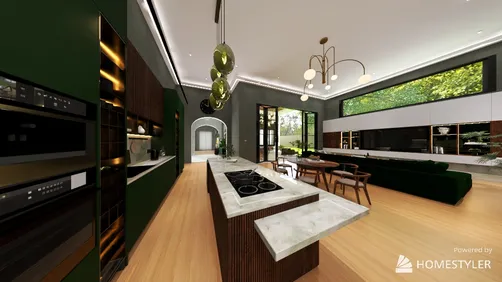

The simplicity of a metal tabletop is something I truly appreciate—its sleek lines, sharp reflections, and a finish that can adapt from industrial to sophisticated with the right touches. This comprehensive guide outlines a practical, real-world strategy for constructing a metal top table that boasts a modern aesthetic, durability, and consideration for ergonomics, lighting, acoustics, and material selection. Additionally, incorporating tools like Homestyler can enhance your design process and visualize the final product.
Define Your Dimensions and Proportions
Begin by considering spatial fit and human factors. Generally, a comfortable dining table height ranges from 28 to 30 inches, while desks typically measure around 29 to 30 inches, following ergonomic standards frequently referenced in workplace guidelines. Research from Steelcase highlights that worksurfaces at about 29 inches, paired with chairs offering a seat height within 16 to 21 inches, enable neutral posture for most users, alleviating strain during extended use. For adequate circulation, ensure at least 36 inches of clearance around the table, aligning with residential planning norms promoted by NKBA for kitchen pathways. Maintain clear legroom: aim for a minimum knee clearance of 24 inches wide for each seated individual to feel comfortable during use.
Visual and structural proportion is key. For a 72×36 inch tabletop, setting the legs 6 to 8 inches inward from the corners enhances stability while ensuring toe clearance. If you're positioning this table in a well-lit area, think about how the metal’s reflective qualities interact with natural light; the Illuminating Engineering Society often suggests 300–500 lux for general task lighting, so selecting the right finish can help minimize glare and maximize comfort under typical residential lighting.
Choosing the Right Metal: Steel, Aluminum, or Brass
Mild steel serves as a reliable option: it is cost-effective, robust, and easy to weld; for tabletops, a 14 to 16 gauge sheet (0.06 to 0.08 inch) strikes a good balance when supported by a substrate. On the other hand, aluminum is lighter and resistant to corrosion but can scratch more easily and necessitates distinct welding methods. Brass offers a level of depth and warmth for those seeking a luxurious touch—just be prepared for a higher price point and a unique patina over time. From a color psychology perspective, warmer metals like brass and bronze tend to create a cozy, social atmosphere, while cooler metals such as steel and aluminum reinforce a clean and modern appearance; insights by Verywell Mind consistently associate warm tones with a sense of togetherness and cool tones with enhanced concentration.
Decide on your finish early in the process: choices include brushed, satin, blackened, or clear-coated raw. Satin or brushed textures reduce glare compared to polished surfaces, enhancing visual comfort especially near windows or under high-output lighting (think 4000–5000K LEDs).
Core Structure: Substrate and Edge Treatments
A standalone metal sheeting can be prone to bending without support. I recommend adhering the metal to a stable substrate, typically 3/4 inch Baltic birch plywood, for added flatness and strength. A 14 to 16 gauge metal sheet bonded with construction-grade contact cement or epoxy distributes loads evenly and keeps the surface comfortable to touch. To achieve clean edges, fold the metal over an eased plywood edge using a brake if possible, or finish with a solid bar edge (such as a 1×1 inch steel angle or flat bar) that is welded and ground smooth. Rounded edges reduce the risk of injury and soften light reflections.
Base Design: Legs, Frame, and Stability
The base design must resist any racking and bear the weight without flexing. I prefer a welded rectangular tube frame (1.5×1.5 inch, 11–14 gauge) accompanied by diagonal gussets or a continuous apron mounted under the substrate. For a 72×36 inch tabletop, a perimeter apron made of 1×2 inch steel tube with cross members positioned at thirds helps maintain a flat surface. If welding isn't an option, a hardwood base (such as oak or ash) using mechanical fasteners and threaded inserts can function effectively—just remember to allow for natural wood movement and avoid rigidly bonding metal to solid wood; implement floating attachment points instead.
Incorporating leveling feet is essential. Include M8 or 5/16 inch threaded feet to account for floor irregularities, also helping to reduce noise by dampening contact. Consider adding felt or silicone isolation pads to minimize impact sounds and protect flooring.
Metal Preparation: Cutting, Shaping, and Surface Treatment
Request your metal supplier to shear your sheets to precise dimensions, allowing for a tolerance of ±1/32 inch. If you intend to fold the edges, ask for a brake fold with a 1/2 inch return and a 1/16 inch radius to prevent sharp edges. Clean the metal sheet using acetone, and then scuff it in one direction with 320–400 grit sandpaper for a consistent brushed finish. Make sure to fully deburr the edges. For steel, apply a rust inhibitor before bonding; for brass, clean it with mineral spirits, taking care to avoid aggressive abrasives that can scratch the surface.
Adhesion and Secure Fastening
Dry-fit both the metal sheet and the substrate, then coat both surfaces with contact cement as per the manufacturer's guidance, or utilize a thin layer of epoxy for a more robust mechanical bond. Carefully roll the sheet into place from one edge to prevent trapped air; a J-roller ensures complete adhesion. Add mechanical fasteners from below where the apron and surface intersect—using countersunk screws into the plywood—ensuring they do not penetrate the metal. If employing a folded edge, secure it by stitching the underside returns to the substrate every 6 to 8 inches.
Finishing Touches: Sheen, Protection, and Glare Management
When it comes to steel, a clear matte polyurethane or a furniture-grade hardwax oil can retain the natural color while moderating reflectivity. If you prefer a deep blackened look, utilize a controlled patina solution, then neutralize and seal. Aluminum can benefit from clear anodized or hardwax finishes to resist smudges, while brass may patina; decide whether you want to embrace this aging process or apply a protective lacquer. In terms of lighting, a satin or matte top significantly diminishes veiling reflections under 4000K task lights, maintaining comfortable perceived lux levels in the main use area around the table.
Acoustic Comfort and Edge Softening
Metal surfaces can produce a bright sound. The bond between substrate and metal already diminishes resonance, but introducing a layer of cork or felt (1/16–1/8 inch) between the two can further improve acoustic comfort. Rounded corners with a 1/4 inch radius provide protection against impacts and create an aesthetically softer, calmer form. In open-concept living spaces, incorporating soft rugs and upholstered seating nearby will absorb higher frequency sounds, helping to maintain clarity in conversation across the table.
Integration with Interior Design
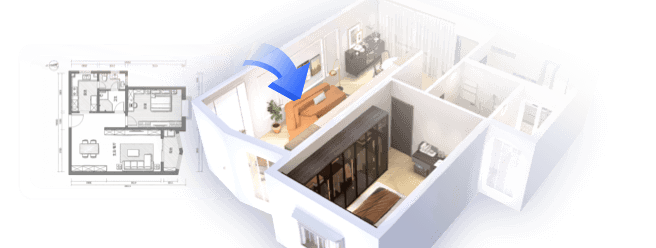
Prior to locking in your dimensions, simulate paths for movement, chair pull-back distances, and daylight angles. A room layout tool can facilitate visualizing seating arrangements, aisle widths, and glare zones in relation to windows and overhead lighting: consider tools like Homestyler to assist in this process. For dining setups, allocate 24 inches per person along the length of the table; for desks, ensure monitor placement is centered to achieve a comfortable viewing distance of 20 to 28 inches with the top of the screen at eye level—these recommendations are echoed across various ergonomic research platforms.
Step-by-Step Construction Process
Confirm your height, footprint, and requirements for seating or technology. Sketch out the positions for the apron and legs, leaving a 6 to 8 inch inset from each corner.
You will need a metal sheet (14–16 gauge of steel, aluminum, or brass), 3/4 inch Baltic birch plywood, tube steel for the base, leveling feet, adhesive, selected finish, and felt or cork as needed.
Weld the apron and legs together, or create a hardwood frame utilizing threaded inserts. Test the structure for stability by applying pressure diagonally; add gussets if necessary to prevent racking.
Cut the substrate with precision; ensure edges are eased. Prep the metal: clean, brush, and deburr the surfaces. Then, proceed to dry-fit everything together.
Apply the contact cement or epoxy adhesive, carefully roll the sheet from one edge, and then secure the returns or apron contact areas from underneath.
Choose and apply your desired finish; test the sheen against actual room lighting to check for glare. Don't forget to install leveling feet for stability.
Position the table with appropriate clearances; test for chair pull-back space and consider cable management if it's a desk setup. Adjust the feet to ensure it remains level and wobble-free.
Safety, Durability, and Upkeep
Ensure all edges and corners are properly deburred to avoid any sharpness. Seal steel surfaces to prevent oxidation, and always use trivets or soft placemats to safeguard finishes from heat or scratching. Clean satin finishes with a microfiber cloth and a pH-neutral solution. Over time, light brushing can help renew the finish; always brush in a single direction to avoid inconsistencies in texture.
Design Variations
- Waterfall edges: fold down the long edges to create a seamless look, best achieved with precise brakes and internal stiffeners.
- Mixed materials: pair a metal top with a hardwood trestle base for an inviting contrast of warm and cool tones.
- Thin reveal: set the metal back 1/8 inch from the edges to create a shadow line, providing a sharp, architectural feel while minimizing perceived bulkiness.
Power and Technology Integration
For a desk application, create pathways for cables through a grommet in the substrate and ensure electrical components do not touch the metal directly. Use under-table cable trays and soft clips to reduce vibrations. Maintain task lighting at around 300–500 lux at the worksurface; pairing it with a color temperature between 4000K and 4500K will optimize low-glare performance—standards supported by numerous IES task lighting guidelines.
Frequently Asked Questions
When using an adhered sheet over plywood, a 14–16 gauge steel sheet provides weight without being excessively heavy. For a self-supporting metal structure, consider using thicker plate and a more robust framework.
Select a satin or brushed finish while maintaining moderate lighting levels (approximately 300–500 lux) with diffused shades. Avoid polished mirror finishes near windows or bright pendants to mitigate glare.
Bonding to a wooden substrate can help minimize thermal shock and resonance. Including a thin cork layer beneath the metal sheet adds an extra layer of acoustic dampening and a softer feel.
Indeed. A hardwood base with mechanical fasteners and threaded inserts works well. Be sure to incorporate cross bracing and a continuous apron to enhance stability and minimize racking.
Using matte clear coats or hardwax oils on steel, or anodized finishes on aluminum, can significantly reduce fingerprints. Brass can be lacquered, though it may still develop a patina over time.
Ensure at least 36 inches of open space for circulation. For seating arrangements, allocate approximately 24 inches per person along the length of the table to avoid crowding.
Absolutely, with proper sealing and consistent maintenance. Utilize trivets for hot items and refrain from cutting directly on the surface to prevent scratches and damage.
A well-constructed perimeter apron featuring cross members coupled with leveling feet provides exceptional stiffness. Position legs 6 to 8 inches from the table corners to balance stability with comfort and legroom.
Apply a clear protective finish and ensure the surface remains dry. Promptly wipe up spills and refresh the finish as needed for longevity.
Yes, make provisions for a grommet in the base, cable management trays underneath, and ensure there's no direct electrical contact with the metal sheet. Keep task lighting neutral, ideally around 4000K.
What began as an Autodesk innovation has evolved into a design platform used by more than 20+ million registered users (platform data, 2026) around the globe. Homestyler combines powerful rendering, an intuitive editor, and a vast furniture library to help you turn inspiration into photorealistic designs — whether you're redesigning a single room or planning an entire home.
Homestyler is your go-to online home design platform, offering an easy-to-use design tool, stunning 3D renderings, and a wealth of inspiring design projects. Plus, with DIY video tutorials, you can transform your home effortlessly. Start creating your dream space today!
Design Now for FREE