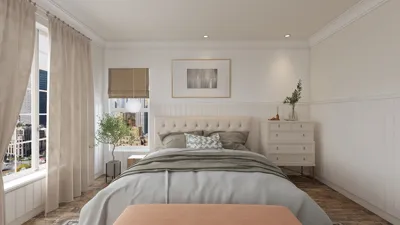


I once arrived at a compact apartment equipped with a rented spray gun, ready to meet a client eager for a flawless feature wall by evening — all while their cat wandered around and the curtains were still up. This experience taught me valuable lessons about the importance of masking, spray patterns, and soothing anxious pets. After ten years of renovating small homes, I’ve discovered that limited spaces compel us to adopt more inventive strategies.
Indeed, small areas can ignite significant creativity. Utilizing a spray gun for wall painting is a technique that saves both time and effort, yielding a professional finish when executed correctly. In this article, I will share five practical tips I apply in real-life projects — covering everything from preparation hacks to efficient cleanup methods — so you won’t encounter the same cat-and-curtain debacle I did. Furthermore, when I want to visualize the room in 3D through tools like Homestyler before starting any spray work, it greatly helps in avoiding unexpected challenges.
1. Prepare like a professional: tape, drop cloths, and tack cloth
Using a spray gun requires meticulous preparation — overspray can ruin everything. I dedicate extra time to meticulously tape the trim, seal off vents, and use a tack cloth to eliminate dust; although it may seem tedious, the difference is remarkable. Despite the time commitment, proper prep is indispensable for achieving smooth wall finishes.
save pin
2. Select the appropriate tip size and thin your paint
The size of the tip influences atomization and coverage; thinner paint allows for a cleaner spray but can lead to drips if overly thinned. For small rooms, I prefer to use a smaller tip to minimize bounce-back and conduct test sprays on cardboard. It’s a small learning curve, and once perfected, it saves both paint and the number of required touch-ups.
save pin
3. Work in manageable sections and control airflow
In narrow or low-ceiling spaces, I use vertical passes about 3–4 feet wide while maintaining a consistent distance. This technique simplifies blending and reduces the likelihood of heavy edges. Before starting, I like to measure and plan the layout for my setup, ensuring an organized space for drop cloths and ventilation — it may seem overly meticulous, but it effectively prevents rework.
save pin
4. Reduce overspray with makeshift barriers
In open-plan spaces, I create temporary zip-up plastic walls or utilize folded cardboard panels to protect furniture and flooring. This simple, cost-effective solution drastically reduces cleanup time; while it requires an additional step and some extra materials, it safeguards surfaces better than masking tape alone.
save pin
5. Clean promptly and store supplies wisely for future projects
Prompt cleaning of the spray gun ensures that its seals and nozzles remain functional; I carry a compact cleaning kit in my van. Before starting, I typically do a mock spray into a cardboard recipient to visualize the outcome — if the initial test looks off, I make adjustments before applying any paint to the wall. This proactive approach leads to fewer clogs and prolongs the life of the equipment.
save pin
FAQ
Q1: Is using a spray gun superior to using a roller for wall painting?
A1: A spray gun can deliver a smoother, quicker finish on flat walls and ceilings, particularly in large or textured areas. Rollers may be more user-friendly for novices and create less overspray, so select based on the specific room and your comfort level.
Q2: What personal protective equipment (PPE) should I wear when spraying interior walls?
A2: At minimum, wear a NIOSH-approved respirator for paint fumes, eye protection, and gloves. Ensuring proper ventilation is crucial to minimize inhalation of VOCs and fine particles.
Q3: How can I prevent drips and runs when painting?
A3: Maintain a steady speed while moving the spray gun, keep a consistent distance, and apply thin overlapping coats. If a drip occurs, retract slightly and feather it out rather than adding more paint.
Q4: Is it possible to use regular wall paint in a spray gun?
A4: Many traditional wall paints require thinning to spray effectively; consult the manufacturer guidelines and prototype beforehand. Some paints are specially formulated for sprayers—using these can decrease clogging and eliminate thinning uncertainties.
Q5: How crucial is proper ventilation during the spraying process?
A5: Proper ventilation is extremely vital as it reduces the buildup of VOCs and airborne particulates. The EPA provides extensive guidance on VOCs and indoor air quality, which I reference for larger undertakings.
Q6: What is the ideal compressor pressure for wall painting?
A6: This can vary based on the sprayer type; many HVLP sprayers function well at around 10–20 PSI at the cup, while airless models operate at higher pressures. Always adhere to the manufacturer’s specifications and conduct test sprays prior to commencement.
Q7: How does the necessary amount of paint compare to using a roller?
A7: While spraying may use slightly more paint due to overspray, improved transfer and more even coats typically balance this out. It's prudent to allow for an additional 10–15% due to overspray in smaller areas.
Q8: Do you have any tips for painting around cabinets and fixtures?
A8: Carefully mask around edges, remove hardware if possible, and use cardboard shields to help. Working in narrow, controlled passes and enlisting a helper to hold barriers significantly reduces stress during the process.
save pin
Homestyler is an outstanding online home design platform, perfect for anyone looking to create their dream space. With its user-friendly design tool, stunning 3D renderings, and a wealth of inspiring design projects and video tutorials, bringing your interior visions to life has never been easier!
立即免费设计
































