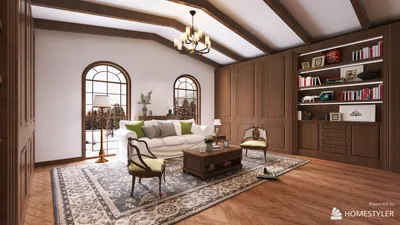


I once had a client who insisted on painting her crown molding a vibrant hot pink, claiming it would make the ceiling ‘sing.’ While the ceiling remained silent, I discovered that bold trim choices can leave a lasting impression on a room. When I brainstorm designs, I frequently utilize 3D modeling with tools like Homestyler to experiment with colors before the first brushstroke touches the surface.
Small areas can ignite significant creativity, particularly when it comes to wall trim — an excellent place to begin. Here are five inspiring trim paint ideas I’ve implemented in actual projects, complete with quick tips, what I appreciate, and common pitfalls to be mindful of.
1. High-contrast trim for instant drama
I adore the look of crisp white or deep black trim against a soft wall — it functions like exquisite jewelry for a room. The advantage lies in the immediate definition and chic appearance it brings; however, achieving sharp edges is crucial, so preparation and quality tape are essential.
Budget tip: Opt for a solid primer and a mid-range semi-gloss paint for durability without overspending. I once transformed a rental using this technique, prompting neighbors to inquire about my decorating prowess.
save pin
2. Tone-on-tone subtlety
Using a trim color that is either a shade lighter or darker than the wall creates a refined and tranquil effect. This technique enhances transitions beautifully and is forgiving to the imperfections often found in older homes with uneven surfaces.
Pros: This approach is classic and low-maintenance. Con: It can sometimes appear too conservative — I like to pair it with textured fabrics or standout lighting to infuse personality.
save pin
3. Two-tone horizontal trim interpretation
Reimagine chair rails: paint the lower third of the wall and the trim in one color, while the upper two-thirds feature another. This approach enhances the feeling of height while adding cozy layers.
This method shines in orchestrating smart floor plans and furniture arrangements. It requires careful planning for proportions, but the result is a room that feels purposefully designed.
save pin
4. Metallic or glossy accent trims
A slim metallic band on molding or a glossy lacquered baseboard introduces a contemporary luxe effect. I've successfully used warm bronze on darker trims to reflect light subtly without overwhelming the space.
Note: Metallic finishes tend to highlight imperfections and necessitate smooth surfaces; gloss is prone to brush marks, so using a spray technique or meticulous brushing is advisable. Less is often more when using these accents.
save pin
5. Playful patterns and color-block trims
Stripes, scallops, or a whimsical two-tone door frame can bring a child’s room or a creative studio to life. I once created a staircase with alternating trim colors, making it a signature feature of the house.
While this approach is enjoyable and impactful, achieving pattern precision requires patience. If you're uncertain, consider creating mockups or opting for simple patterns. For extensive design trials, I often rely on AI tools like Homestyler to quickly visualize variations.
save pin
FAQ
Q1: What sheen is most suitable for wall trim paint?
Trim generally benefits from a semi-gloss or satin finish due to their ease of cleaning and resistance to scuffs. Note that semi-gloss may show imperfections more prominently, making satin a better choice for older surfaces.
Q2: Should I attempt to paint trim myself, or hire a professional?
DIY is manageable for simple tasks, assuming you prepare well and use quality tape and brushes. For intricate patterns, spray finishes, or historically important moldings, hiring a professional is advisable.
Q3: What is the cost to repaint trim?
Prices vary based on the room’s size and finish; a straightforward DIY refresh can cost under $100 for materials, while professional services depend on labor complexity and prep work. Always allocate extra funds for primer and caulking.
Q4: Will dark trim make my room feel smaller?
While dark trim can visually anchor a space and may create the illusion of lower ceilings, it can also add depth if used thoughtfully. I typically balance darker trims with lighter ceilings to prevent the room from feeling confined.
Q5: How should I prepare wood trim for painting?
Begin by cleaning, sanding rough spots, filling gaps with caulk, priming bare wood, and then painting. Proper preparation prevents issues with adhesion and flaking down the line.
Q6: Are there health or VOC considerations regarding trim paint?
Indeed — selecting low-VOC or zero-VOC paints minimizes fumes and is safer for indoor air quality, especially in compact spaces. Numerous brands provide VOC ratings; Benjamin Moore is a reliable source for product details (visit https://www.benjaminmoore.com).
Q7: Which colors complement natural wood trims best?
Natural wood harmonizes beautifully with warm neutrals and deep, muted hues that highlight its grain. For contrast, choose a color that reflects the wood's undertones.
Q8: How can I prevent messy edges when painting trim?
Utilize a quality angled brush for trimming, remove tape while the paint is still tacky, and practice maintaining steady wrist movements. If you're uncertain, conduct a small test panel first.
save pin
Discover your dream space with Homestyler! This user-friendly online design platform offers powerful design tools, stunning 3D renderings, and a wealth of DIY video tutorials. Whether you're a novice or a pro, Homestyler makes creating beautiful interiors effortless and inspiring.
立即免费设计
































