


In the field of architectural design, especially when using software like Revit, the incorporation of clay roof tiles can substantially enhance both the aesthetic and practical aspects of your projects. These tiles are not only visually striking but also offer remarkable durability and eco-friendliness, making them an excellent selection for contemporary architecture. This detailed guide will walk you through the process of creating a Revit family tailored for clay roof tiles, adding depth and authenticity to your designs using tools such as Homestyler.
Exploring Clay Roof Tiles
Clay roof tiles come in a variety of colors, shapes, and profiles, each providing distinct benefits. Known for their exceptional lifespan and resistance to various weather conditions, these tiles not only offer structural advantages but also allow for diverse architectural expressions. It’s essential to assess the specific requirements of your design: will flat, curved, or interlocking tiles best suit your project? Understanding these options is vital for effective modeling in Revit.
Building the Revit Family
Begin by launching the Revit Family Editor, where you will create the components necessary for your clay roof tiles. Follow these methods to guarantee precision and high quality:
Inside the Family Editor, choose the 'Generic Model' template to initiate a new family.
Construct the geometry of your clay tile by shaping a solid form that matches the dimensions and designs of actual clay tiles.
Incorporate parameters that enable precise control over tile characteristics such as thickness, width, and height, ensuring optimal representation accuracy.
To replicate the natural texture of clay, make use of the material options available in Revit, enhancing the surface details effectively.
Integrating the Level of Detail (LOD) into your design is key to achieving realistic visualizations. Will you opt for intricate profiles, or will simpler designs suffice for your objectives?
Utilizing the Family in Your Project
Once your clay roof tile family is complete, load it into your project. Use the 'Roof' tool in Revit to establish your roofing structure, selecting your newly designed clay tile family to apply it correctly. This procedure ensures that all tiles fit seamlessly and align with your design vision.
Final Adjustments
After integrating the tile family, examine the properties within your project setting to confirm that all dimensions and parameters are properly configured. For a conclusive evaluation, consider utilizing realistic rendering features to see how the clay tiles interact with varying lighting conditions. How significantly do these tiles boost the visual appeal and functionality of your architectural design?
Frequently Asked Questions
Q: What are the advantages of using clay roof tiles in architecture? A: Clay roof tiles are renowned for their durability, energy efficiency, and their ability to convey a timeless aesthetic that complements many design styles. Q: How can I modify the texture of the tiles in Revit? A: You can adjust textures by changing the material settings in Revit, which allows alterations in color, finish, and tactile properties to better match the characteristics of genuine clay tiles.

Minimalist Black Stone Coffee Table Unique Irregular Shape 3D Model
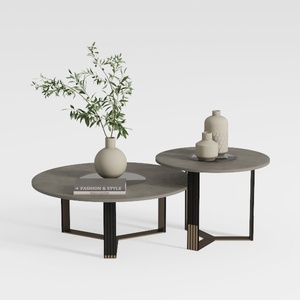
Modern Concrete Metal Nesting Coffee Table 3D Model

Discover the creative potential of your space with Homestyler! This user-friendly online home design platform offers a powerful design tool, stunning 3D renderings, a wealth of design projects, and engaging video tutorials. Whether you're a beginner or a seasoned designer, bring your vision to life effortlessly!
Design Now for FREE


