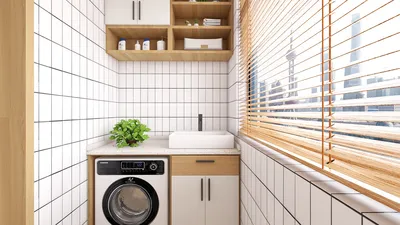


Vinyl records have a unique ability to introduce texture, shadow, and a sense of nostalgia into any environment. An expertly arranged record wall serves as a personal gallery, merging a musical collection with an artistic statement. Achieving the right balance between preservation and visual harmony is essential, ensuring that your albums are not only visually stunning but also safeguarded from light, heat, and physical stress. Utilizing tools like Homestyler for layout can enhance this process.
Two key considerations inform my methodology. Firstly, glare control and proper lighting are crucial: the Illuminating Engineering Society (IES) recommends ambient lighting levels of 200–300 lux for comfortable residential settings, emphasizing the importance of diffused light sources to minimize glare. Overly bright lighting can lead to unsightly reflections and fading of album covers. Secondly, the WELL v2 standard emphasizes visual comfort and circadian-friendly lighting, recommending warmer color temperatures in living areas during the evening to promote relaxation. These criteria shape my decisions regarding fixture placements and color temperature selection around vinyl displays—guidelines that can be further explored in the WELL v2 framework along with the IES standards.
Designing the Layout
A vinyl record wall reaches its full potential through rhythmic design. I typically plan grids with uniform modules—often centered around 12.5–13 inches—to perfectly fit 12-inch LPs while providing necessary space between frames or covers. If you wish to explore different layouts, a room design tool like Homestyler can assist in visualizing spacing and sight lines before making any permanent decisions. Focus on establishing a primary viewing area at eye level: for the average adult, this comfort zone lies between 57 and 63 inches from the floor, ensuring that the most eye-catching album covers are easily visible without straining the neck.
Choosing a Display Option: Frame, Shelf, or Direct Mount
Display options can be categorized as protective frames, shelf ledges, or direct mounts. Frames effectively guard against dust and reduce handling; selecting UV-filtering acrylic helps minimize fading risks. Ledge shelves, featuring a ¾–1 inch lip, enable you to rotate albums and create visual depth, which is ideal for dynamic living spaces. Direct mounts offer a sleek aesthetic; it’s important to use supports that won’t damage the records or jackets and to avoid adhesives on older prints. I personally prefer powder-coated steel ledges for their minimalist design and durability.
Safeguarding Your Vinyl: Light, Heat, and Humidity Management
Vinyl records are sensitive to extreme conditions. Keep display areas away from direct sunlight; even UV-filtered windows can lead to dangerous light exposure over time. It’s vital to maintain a relative humidity level of 40-55% and keep room temperatures between 68-72°F to prevent warping. Using warm-white LED lighting (2700-3000K) with a high CRI (90+) ensures the cover art remains true to life without emitting harmful UV rays. Arrange fixtures to provide grazing light on the wall, which helps reduce glare on shiny sleeves. Dimmable lighting controls are beneficial for adjusting evening illumination levels to around 200 lux for a comfortable ambiance.
The Psychology of Color: Influencing Mood with Album Covers
The art featured on albums conveys emotional resonance. Cluster cooler colors (like blues and greens) to create serene spaces; use vibrant reds and oranges to infuse energy in areas such as bars or media rooms. Research in color psychology highlights that blue fosters stability and focus, while yellow is tied to optimism. To maintain visual balance in varied collections, incorporate neutral-toned covers every third or fourth row, especially in tighter spaces where maintaining visual clarity is crucial.
Grids versus Organic Layouts
Rectangular grids impart a contemporary and orderly feel, while organic clusters present a more dynamic and gallery-like ambiance. I examine both methods and navigate the room to assess movement and flow. If you prefer an eclectic vibe, create small clusters—like a trio followed by a quad—ensuring uniform spacing within groups to preserve coherence. Be mindful of contrast: bright covers tend to stand out against lighter walls, while muted tones are more pronounced against darker shades. Utilizing a design planner, such as Homestyler, can assist in visualizing how these layouts interact with doorways, media centers, and viewing angles from various seating positions.
Selecting Mounting Hardware and Materials
Choose wall anchors suitable for your wall type: drywall anchors should support at least 20-30 lbs per shelf, while toggles work for plaster walls. For flush mounting of frames, low-profile French cleats are ideal for easy adjustments. Opt for stainless steel fasteners to prevent rusting, and powder-coated shelves to resist scratches. Emphasizing sustainability, seek out FSC-certified wooden options and low-VOC finishes, which are particularly important in smaller spaces where air quality is a concern.
Consider Ergonomics and Reach Zones
Store albums that you frequently rotate at shoulder height—ideally between 48-60 inches. Heavier collections should be housed lower to enhance safety during loading. If your wall extends into a listening nook, position seating 8-12 feet away from the feature wall to maintain a balance between acoustics and visual comfort. Avoid cluttered corners; displaying a narrow vertical strip of sleeves can anchor taller spaces without obstructing flow.
Acoustics: Harmonizing Sound and Surroundings
Records provide a subtle sound diffusion. Combine them with a soft rug and cushioned seating to absorb mid-to-high frequencies, particularly if your media wall is adjacent to glass surfaces or masonry. Keep reflective frames clear of initial reflection points, usually found on the walls next to speakers. If the display is positioned behind a turntable, ensure there is a clearance of 6-8 inches above the equipment to prevent interference from heat and to facilitate cable management.
Lighting Design for Display Areas
Employ a blend of ambient and accent lighting: Track lights angled at 30-35 degrees help minimize glare and shadows on sleeves, while wall-washers create delightful gradients that accentuate grids. It’s essential to maintain consistent beam spreads (20-30° for targeted highlights and 40-60° for broad washes). Choose dimmable, flicker-free drivers to ensure visual comfort. Warmer light temperatures in the evening align with WELL v2 recommendations for circadian-friendly spaces, complementing the inviting atmosphere that vinyl music promotes.
Organizing Workflow: Phased Installation
Phase 1: Use painter’s tape to outline modules and test spacing for a week. Phase 2: Install anchors and hardware starting from the center of your design and progress outward. Phase 3: Curate your collection—start with your key albums at eye level, then balance the layout vertically by filling both up and down. Capture photos of the wall in natural and nighttime lighting; tweak lighting angles to eliminate any harsh reflections on glossy covers.
Preservation Techniques for Collectors
Store original vinyl records vertically in protective inner sleeves (poly-lined preferred) away from heat sources. If you choose to frame originals, be sure to utilize acid-free matting and UV-filtering acrylic. For routine rotations, consider displaying alternative jackets or high-quality reproductions while keeping your prime condition covers safely stored.
Styling Surrounding Elements
Add context around your record wall with elements like a slim console featuring a few music-related books, a pleasing plant to soften the overall look, and a small tray for record brushes and adapters. Utilize matte finishes in surrounding décor to prevent competing reflections. Additionally, ensure that there’s enough negative space—intentional voids—so the display can breathe and remain visually appealing.
Identifying Common Mistakes and Solutions
Avoiding overcrowding is key; too many elements can turn beautiful artwork into visual chaos. Reassess spacing and include neutral-toned sleeves. Steer clear from direct sunlight and intense spotlights; if you notice fading, switch to UV-filtering acrylic and dim the lights. Should warping occur, take records off the ledges and restore proper conditions before attempting playback.
Frequently Asked Questions
Keep your focal albums centered around 57–63 inches to promote ergonomic viewing. For multi-row grids, maintain the primary level within this height band and adjust other rows accordingly based on ceiling height.
Utilize warm-white LEDs (2700–3000K) with a high CRI and diffused optics. Aim for ambient illumination near 200–300 lux as per IES residential standards, while avoiding direct sunlight exposure.
Yes, if daylight reaches the area; use UV-filtering acrylic in frames and consider applying window films to mitigate exposure over time.
You can utilize various display methods, but ensure you apply non-invasive supports that won’t distort the vinyl or damage jackets. Frames or shelves are preferable for preserving records.
Begin by marking a level centerline, using a laser level to ensure consistent measurements (12.5–13 inches apart). Start the installation from the center and work outwards to accommodate minor wall irregularities.
To some extent, yes—jackets provide diffusion. Combine with a rug and soft furnishings to better balance sound reflections, particularly in proximity to speakers.
Using ledge shelves facilitates record rotation. Keep frequently played albums within reachable height (48–60 inches) while archiving delicate covers to preserve their quality.
Implement modular clusters: group like sizes together or frame small formats within larger mats to ensure visual cohesiveness.
WELL v2 emphasizes glare reduction and suitable color temperatures for home relaxation; coupling this with IES guidelines for ambient lighting enhances your overall setup.
If the display area is exposed to direct daylight, shift it slightly, utilize UV films or shades, and switch to framing for covers with UV-resistant acrylics. Ensure originals are stored away from heat sources.


If you're looking to transform your home with ease, Homestyler is the ideal online design platform. Featuring an intuitive design tool, stunning 3D renderings, and a wealth of DIY video tutorials, it empowers you to create and visualize your dream spaces effortlessly!
Zaprojektuj teraz za darmo
































