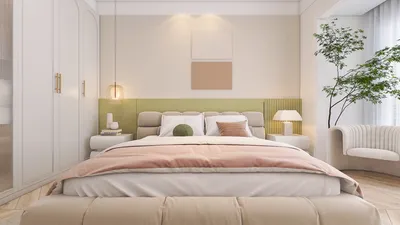


I once had a client who wanted a paint rage room installed in a studio apartment—right next to their sofa. It turned out to be both amusing and a bit nerve-wracking. After utilizing an AI-enhanced design tool to visualize space containment and organization, we successfully completed the project without permanently altering the living room into an art installation.
Compact areas can ignite grand ideas, and a designated splatter zone is a prime example. In this article, I will explore five practical inspirations I incorporate into actual projects, each rooted in thoughtful layout, safety considerations, and budget realities. Homestyler makes it simple to visualize these transformations.
1. Temporary Splatter Corner
Transform an unused section into a flexible splatter area with floor coverings, detachable wall panels, and a collapsible easel. The advantages include low expense and adaptability—everything can be tucked away when guests arrive. However, it does require setup time and the need for secure seals to safeguard nearby surfaces.
Tip: Implement layered waterproof liners and Velcro panels so walls can be removed easily like band-aids. I once did this for a tenant using economical PVC frames, and it survived one fun-filled summer without damage.
save pin
2. Closet Studio Conversion
Convert a deep closet or niche into a compact rage room. Installing an exhaust fan and a door sweep can help contain smells and splatters. This setup offers excellent sound and sight isolation, though challenges include ensuring proper ventilation and preventing fume buildup during lengthy sessions.
Budget tip: Repurpose shower curtains as wall coverings and utilize a low-cost fan with ducting for airflow—a surprisingly effective choice for tighter budgets.
save pin
3. Customizable Modular Panels
Freestanding modular panels provide a versatile structure that can be tailored for various sizes and purposes. I often create a small room design first to determine panel layout and access points, which minimizes trial and error while streamlining cleanup.
Advantages include being reusable, portable, and perfect for renters. On the downside, panels must be stable or anchored to prevent tipping during enthusiastic painting activities.
save pin
4. Pop-Up Containment Booth
For messy techniques like paint explosions or splatter walls, a pop-up containment booth with a zipper entrance and removable floor tray is an excellent solution. It acts as a temporary paint shed—easy to set up and straightforward to clean outside, if building rules allow it.
Caution: Always check regulations regarding indoor usage of strong solvents or aerosol paints. Sometimes, the easiest solution is to take the project outside if weather and access permit.
save pin
5. Digital Mockups and Practice Runs
Before committing plywood and paint to a wall, it’s wise to create a scaled mockup and conduct a brief practice round. I initially use paper and tape for a mockup, followed by a controlled session to refine angles and protective setups. For those favoring digital previews, a 3D mockup with Homestyler can predict splatter trajectories and airflow.
Conducting small tests helps save time and funds—and avoids those regrettable moments that I’ve encountered on various jobs.
save pin
FAQ
Q1: Is it safe to create a paint rage room indoors?
With proper ventilation, using non-toxic paints, and respirators when necessary, indoor painting sessions can be safe. Always prioritize air circulation and avoid aerosol or solvent-heavy products unless you have professional-grade ventilation.
Q2: What types of paint work best for a rage room?
Water-based acrylics and washable tempera are my preferred options due to safety and easy cleanup. They feature low VOCs, rinse off easily from tarps, and are readily available at art or hardware stores.
Q3: How can I cheaply protect my floors and walls?
Lay down heavy-duty contractor plastic or painter’s drop cloths on floors and employ removable panels or shower curtains on walls. Secure edges using gaffer tape—it adheres well and removes cleanly compared to duct tape.
Q4: Is special ventilation necessary?
Yes—adequate ventilation reduces fumes and accelerates drying time. Consider using a window or inline exhaust fan to expel air and potentially run a HEPA-capable air purifier afterwards. For additional information on indoor VOCs and air quality, refer to EPA resources on Volatile Organic Compounds (VOCs) and Indoor Air Quality.
Q5: Can renters set up a paint rage room?
Renters can create one, but should opt for temporary and non-invasive arrangements like pop-up booths or freestanding panels. Always seek landlord approval for any modifications that might leave marks or necessitate other equipment such as exhaust fans.
Q6: What safety gear should participants wear?
At the very least, wear goggles, gloves, and clothing that can be sacrificed. For extended sessions or spraying, consider a respirator rated for paint particles and vapors.
Q7: What is the cost of setting up a basic rage room at home?
A basic pop-up setup can cost under $100 using tarps, curtains, and inexpensive frames; a more solid modular booth could run between $300 and $800 based on materials. Consider ongoing expenses for replacing tarps and other consumables.
Q8: How can I minimize cleanup time?
Pre-line all surfaces, work from the top down, and keep dedicated cleanup buckets and rags close at hand. Quick tests help identify which techniques are messiest, allowing you to focus protection efforts and lessen post-session cleanup.
Homestyler is your go-to online home design platform! With its user-friendly design tool, stunning 3D renderings, and a wealth of inspiring design projects and video tutorials, you can effortlessly create and visualize your dream spaces. Unleash your creativity today!
立即免费设计
































