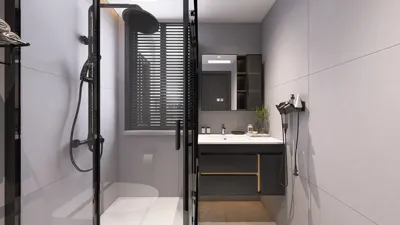


A compact drop-in kitchen sink is essential for creating an efficient cooking area. I consider these sinks to be multi-functional workstations, capable of handling prep, washing, and drying tasks within a limited footprint. Achieving the best results involves combining smart accessories with sleek designs, ergonomic spaces, and surfaces that not only manage water but also control light and sound. Incorporating tools like Homestyler can help visualize and optimize these features seamlessly.
When planning the use of space and ergonomics, it's important to follow guidelines rather than estimate. The NKBA suggests maintaining at least 24 inches (610 mm) of counter space adjacent to one side of the sink and 18 inches (457 mm) on the opposite side to ensure an efficient prep flow. In very small kitchens, I often employ foldable or sliding accessories to achieve this when fixed surfaces are not feasible. Proper reach and posture are crucial; keeping countertop heights around 36 inches (914 mm) promotes neutral wrist angles for users, minimizing fatigue during repetitive tasks. This approach aligns with ergonomic principles and the WELL v2 standard, which emphasizes ergonomic designs to mitigate awkward postures during daily activities.
Workflow efficiency is as critical as quantifying measurements. Research from Steelcase shows that clear, obstacle-free workflows enhance productivity. Applying this principle to kitchen design means organizing tasks around the sink intuitively – from dirty to clean, and prep to cooking – to avoid collisions with hot pots or raw ingredients. I position dish drop zones to the left for right-handed users, place drying racks to the right, and keep trash bins conveniently close to minimize spills and unnecessary movements. The WELL v2 emphasizes good task lighting and glare management; therefore, I recommend fitting under-cabinet lighting at 300–500 lux near the sink, using warm-neutral tones of 3000–3500K to ensure accurate representation of food colors without harsh brightness.
Fundamentals of Designing Small Drop-In Sinks
I begin with a thorough evaluation of the kitchen space, including cabinet width, plumbing configurations, and anticipated dish quantities. For tight kitchen designs, a 22×18 inch drop-in sink footprint is often ideal. Selecting sinks with rounded inside corners facilitates easier cleaning, while a low-profile rim minimizes the gathering of crumbs and water. If your cabinet base is 24 inches, consider a single-bowl design that maximizes usable counter space while allowing for a large cutting board insert to transform the sink into an effective prep area. Utilizing digital tools like Homestyler can enhance this planning phase significantly.
Strategic Layouts for Limited Spaces
In compact environments, the functionality surrounding the sink becomes paramount. I prefer a linear design that transitions from dirty to clean: placing the dishwasher next to the sink, having a pull-out trash bin opposite it, and setting the prep area with a cutting board and knife block within easy reach. When designing your cabinets and appliances, utilizing a room layout tool can assist in visualizing clearances, door swings, and ease of movement before installation.
Everyday Ergonomic Features
Designing for comfort requires precise measurements. Target a basin depth between 8–10 inches to ensure splash control without compromising reach, as overly deep basins may cause back strain over time. The faucet spout should be sufficiently high for large pots without being excessively tall to avoid overspray; a height of 12–14 inches above the rim is advisable. Side-mounted levers are more convenient for wet hands compared to top-mounted toggles, and pull-down sprays with dual modes minimize wrist torsion. Moreover, aligning the sink’s center with under-cabinet task lighting helps to eliminate shadows in the workspace.
Managing Glare, Light, and Color Perception
The reflective qualities of water and metal surfaces can contribute to glare issues. I advocate for using matte or satin finishes and ensuring that under-cabinet lighting has a high Color Rendering Index (CRI) to soften reflections. In smaller kitchens, maintaining a color temperature of 3000–3500K provides warmth without misrepresenting food hues. Achieving balanced lighting enhances visibility for cleaning tasks, while WELL v2 emphasizes the importance of sufficient task lighting along with glare management. Insights from color psychology suggest that cool tones convey cleanliness, whereas warm colors foster comfort; for compact spaces, I utilize a soft warm neutral on walls and slightly darker countertops to provide depth and visually ground the sink area.
Acoustic Considerations and Material Selection
In small kitchens, noise can become amplified. Opting for stainless steel sinks with noise-reducing pads can lessen clattering, while composite granite sinks are even better at absorbing sound. Additionally, pairing these with soft-close hardware helps mitigate the noise produced by thin cabinetry. For an eco-conscious choice, look for stainless steel made with recycled content or responsibly sourced composites; antimicrobial finishes can also enhance hygiene without adding maintenance headaches.
Understanding Drainage, Edges, and Profiles
The rim design is crucial for drop-in models. A narrow rolled edge reduces splash-back and simplifies the cleaning process. I frequently select an offset drain design, which maximizes under-sink storage for pull-out bins and filters while improving stacking efficiency in the basin. Incorporating a slight slope (1-2%) towards the drain prevents puddles from forming around dishware.
Functional Accessories for Increased Versatility
Adding over-sink drying racks, colanders, and cutting boards substantially increases counter utility. A reversible cutting board that fits securely on the rim offers a sturdy surface for food prep; using it alongside a clip-in colander enhances rinsing and chopping efficiency. Magnetic knife strips mounted on the splash zone keep cooking tools handy while maintaining counter space. I also recommend incorporating a small soap dispenser and hand towel bar within easy reach to keep surfaces tidy and dry.
Maximizing Storage and Organization Below the Sink
Optimizing the under-sink area is essential. An offset drain allows for additional storage options, such as vertical filters or compact trash bins. Implement pull-out trays with adjustable dividers to prevent cleaning supplies from interfering with plumbing components. A shallow drawer positioned above the door can accommodate sponges and gloves, ensuring the sink area is reserved for its primary function: managing dishware.
Hygiene, Heat, and Water Considerations
For smaller kitchens, point-of-use water filtration systems can significantly reduce mineral deposits on stainless surfaces. Investing in anti-scald valves is a minor cost that pays off, especially when the sink is close to the cooktop. Keeping a microfiber drying cloth stored under the sink allows for quick clean-ups; maintaining a matte finish adds to the visual spaciousness and keeps the sink looking intentionally styled.
Achieving Visual Cohesion and Proportionality
In compact kitchen settings, it's crucial for the sink, faucet, and backsplash to appear as a cohesive visual ensemble. Align the faucet's centerline with cabinet handles and maintain even spacing between the sink and surrounding appliances. A proportional relationship of 2:3 between the sink width and adjacent counter space creates a balanced feel and prevents the impression of oversized fixtures. In cases of peninsulas or short countertops, focus visual weight around the sink area with darker fixtures or framed backsplashes, leaving adjacent counters lighter.
Trends for 2024-2025 in Compact Sink Stations
Integrated workstation sinks outfitted with slide-over accessories continue to gain popularity; however, a noticeable trend is emerging towards slimmer rim designs and more discreet pull-down sprays, reducing visual clutter. Satin brass and graphite stainless finishes add a warm touch without glare. The focus on sustainability persists, leading to choices like recycled steel, low-VOC coatings, and water-conserving aerators that maintain pressure without compromising flow.
Common Pitfalls to Avoid
It's common to encounter several mistakes, such as selecting a basin that is too large for a narrow countertop, neglecting dish drop zones, positioning the dishwasher too far from the sink, and relying on bright, reflective lighting that creates harsh reflections. To optimize design, ensure clearances are accurate, edges are gentle, and task lighting is practical rather than showroom glamor.
Frequently Asked Questions
For a 24–27 inch base cabinet, a sink size of around 22×18 inches serves as a flexible and effective choice, ensuring adequate capacity while maximizing counter use.
Following NKBA guidelines, ensure 24 inches of space on one side and 18 inches on the other; in compact areas, consider using slide-over accessories in lieu of fixed countertops.
Optimal basin depth should range between 8 and 10 inches, as deeper options may lead to forward slumping and discomfort while shallower sinks are more prone to splashing.
Providing task lighting of 300–500 lux with a warm-neutral range of 3000–3500K is essential to minimize glare and ensure accurate color representation, aligned with WELL v2 guidelines.
Yes, over-sink drying racks, colanders, and cutting boards can effectively transform the sink area into a prep zone, helping to compensate for limited counter space.
Composite granite offers superior sound absorption; alternatively, stainless steel sinks fitted with quality underbody pads serve as a capable option. Pair these materials with soft-close hardware to reduce cabinet noise.
Choose an offset drain to maximize under-sink storage, utilize pull-out trays with dividers, and separate filters, trash, and cleaning supplies to avoid plumbing conflicts.
A side-mounted lever, moderate faucet height of 12–14 inches above the rim, and a pull-down spray with at least two functions can effectively minimize wrist strain and overspray.
Incorporate warm neutrals on your walls, slightly darker counters to add depth, and opt for satin finishes to reduce glare; these choices echo color psychology ideas regarding cleanliness and comfort.
Position the dishwasher as close to the sink as feasible, ensuring a clear drop zone between to mitigate drips and streamline the loading process.
Indeed, positioning the drain offset enhances stacking capability in the basin while freeing up storage space beneath the sink.
Select satin finishes, maintain a basin depth of 8–10 inches, and implement diffuse under-cabinet lighting with high CRI to soften reflections and create an inviting kitchen atmosphere.


Homestyler is your ultimate online home design companion! With an intuitive design tool, stunning 3D renderings, diverse design projects, and helpful video tutorials, you can effortlessly create and explore your dream home. Transform your ideas into reality with ease and style!
Design jetzt kostenlos
































