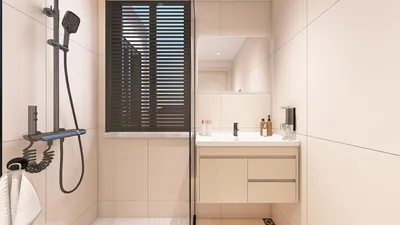


For years, I have specialized in creating wellness-oriented spaces, and one element that stands out for its ability to provide a refreshing reset each day is a home cold plunge. When incorporated correctly, it transforms into a ritual, enhancing mood, speeding up recovery, and anchoring your daily routine. The secret lies in harmonizing functional construction with aspects of safety, cleanliness, and creating an atmosphere that feels welcoming instead of sterile. Utilizing tools like Homestyler can help visualize this design.
Evidence-Backed Benefits and Design Considerations
Cold immersion has documented benefits. Renowned sports medicine studies indicate that cold water immersion reduces perceived muscle soreness in comparison to passive recovery methods. Additionally, numerous users have reported a temporary uplift in mood linked to the invigorating effects of acute cold exposure. When designing the space, I also consider environmental elements: the WELL v2 standards emphasize the importance of thermal comfort, lighting quality, and water quality in positively influencing both physiological and psychological experiences in everyday life. Research from Steelcase highlights how short, purposeful breaks during the day can diminish cognitive overload and foster focus—by optimizing the plunge for efficiency, accessibility, and ease of maintenance, we can better support these restorative intermissions.
The importance of lighting should not be underestimated. Adhering to the IES guidelines regarding glare and vertical illuminance promotes a visually serene environment—cooler white light (around 4000–5000K) can be invigorating for morning sessions, while warmer, dimmable lighting (2700–3000K) eases evening experiences. A practical target is maintaining 100–200 lux at the control height, with gentler ambient pools positioned elsewhere to minimize squinting and glare.
Space Planning: Footprint, Flow, and Safety
The layout needs to be intuitive and slip-resistant. I ensure there is a minimum of 36–42 inches of unobstructed space leading up to the plunge, along with at least 24 inches on one side for safe entry and exit. A non-slip surface, rated with a minimum R10, combined with a gentle slope towards a drainage point, alongside rounded or rubberized edges, can significantly minimize accidents. If the plunge is freestanding, incorporating an anti-tip frame and a certified platform is crucial. Moreover, all electrical outlets should be positioned at least 36 inches away from the waterline and equipped with GFCI protection according to local regulations. For optimizing design, utilizing a room layout tool like Homestyler enables the simulation of space circulation, accessory placement, and ambient lighting in context.
Build Paths: From Stock Tanks to Insulated Vessels
You generally have three options for DIY setups:
Regardless of the option chosen, emphasize the importance of a closed-loop filtration system, easily accessible shut-off valves, and adequate servicing space. Including quick-disconnect fittings greatly simplifies upkeep.
Water Quality, Filtration, and Hygiene Protocols
Maintaining a pristine plunge is crucial. I aim for a multi-phase filtration process, incorporating a 20–50 micron sediment filter, activated carbon for odors and organics, complemented by UV or ozone systems for microbial control. Regularly replace cartridges as per the manufacturer's guidelines and keep track of water clarity. For communal usage, increase maintenance frequency and install a surface skimmer to trap oils. Choose sanitizers appropriately for the vessel material, steering clear of chlorine levels that could damage rubber seals or stainless components. Consistency is key in maintaining water temperature, with most users finding a range between 39–55°F (4–13°C) ideal. This consistency helps solidify habits and eases the workload on chillers.
Thermal Control and Energy Strategy
An effective cold plunge balances insulation, shading, and appropriately sized chillers. To reduce heat gain, consider using reflective wraps, insulated lids, and minimizing direct sunlight exposure. Keeping a small temperature difference between the environment and your desired setpoint will decrease the chiller's operational time. Utilizing timers or smart plugs can help prevent needless overnight cycling, while short and insulated pump lines are essential as extended exposed pipes can warm the water and waste energy.
Lighting and Sensory Experience
The experience of cold immersion is as much about mental awareness as it is about physicality. Research into color psychology shows that cooler blue tones and soft neutrals can help foster a sense of calm and clarity, while vivid reds can increase energy—suitable for workout areas rather than recovery spaces. I prefer integrating indirect lighting and steering clear of direct overhead lights over the plunge to minimize water reflection glare. Strive for low flicker rates, ensuring a CRI of at least 80 for accurate skin tone rendering. If the plunge area also serves as a space for stretching, be sure to include a focused task light that avoids glare.
Ergonomics: Entry, Exit, and Body Position
Human factors in design are often overlooked. The entryway ought to consist of either a single-step or two shallow steps equipped with anti-slip treads, with handholds within easy reach. Ideally, edge heights should be between 18–22 inches. A neutral spine position should be maintained to prevent strain; implementing a contoured seat or foot brace may help avoid slips. The control panel should be comfortably situated at a height of 36–44 inches, allowing for readability without leaning over the water surface. I also find it beneficial to set up towels on a heated rail conveniently close to the exit to avoid chilling on wet floors.
Acoustics, Materials, and Maintenance
The sounds generated by pumps and chillers can be bothersome. To counter this, isolate equipment using vibration pads and refrain from utilizing hard parallel surfaces that might amplify sound. If the plunge is situated in a bathroom, including soft elements like mats and towels can absorb noise. Use durable materials—marine-grade stainless steel, EPDM seals, and water-resistant finishes—to maximize longevity. Opt for low-VOC coatings to promote indoor air quality. Establish a weekly checklist for maintenance: check sanitizer levels, backflush filters, examine seals, and wipe surfaces. A quarterly deep clean using gentle, non-abrasive products prevents biofilm buildup.
Behavioral Patterns and Ritual Design
The success of a cold plunge is largely dependent on creating repeatable behaviors. Ensuring a clear approach pathway, consistent lighting cues, and minimizing setup complexity can foster daily use. Incorporating a visible timer and a designated phone shelf for guided breathing sessions can enhance the overall experience. I've observed that users tend to be more consistent when they link their plunges to specific activities, such as post-workout or morning coffee—setting regular time slots lessens decision fatigue and enhances habit sustainability.
Safety and Health Considerations
Cold immersion can be intense. For beginners, it's advisable to limit sessions to 2-5 minutes and avoid plunging immediately after intense cardio, especially if susceptible to blood pressure changes. Those with medical conditions such as cardiovascular issues, Raynaud’s syndrome, and uncontrolled hypertension should consult healthcare professionals before use. Starting with warm-up practices like a pre-plunge shower and post-plunge rewarming rituals can contribute to a safer and more enjoyable experience.
Codes, Standards, and Useful References
Ensure you utilize GFCI-protected circuits near water and comply with local electrical codes. Good ventilation is paramount to manage condensation, particularly in confined areas. The WELL v2 framework serves as an excellent reference for promoting environmental quality and behavior-friendly design, while IES guidelines offer practical advice on task lighting and glare mitigation. For insights on workplace habits and recovery breaks, the Steelcase research library is valuable. Resources for WELL certification can be explored at v2.wellcertified.com, alongside lighting practices at ies.org/standards.
Estimated Budget and Timeframe
A typical DIY stock tank equipped with chilling and filtration systems usually costs between $1,200–$3,000, varying based on capacity and equipment quality. Anticipate spending a weekend to set up the vessel and an additional day for plumbing, wiring (with a licensed electrician recommended), and fine-tuning filtration. Don't forget to budget for insulation, lids, and soundproofing.
Step-by-Step Quick Build Guide
1) Assess the floor load and ensure waterproofing. 2) Select the vessel size based on user height and available space. 3) Install non-slip flooring alongside a trench or point drain. 4) Position the vessel on a level and rated platform. 5) Connect the pump, filter, and chiller with accessible shut-offs. 6) Apply insulation wrap and secure a tight-fitting lid. 7) Connect the chiller to a GFCI circuit; keep wiring neat and away from splash zones. 8) Set lighting to achieve 100–200 lux ambient illumination with a glare-free task light near the controls. 9) Fill, sanitize, and ensure proper filtration operation. 10) Create a maintenance timetable and outline session protocols.
FAQ
Q1: What is the optimal water temperature for a cold plunge?
A: Most users aim for a consistent range of 39–55°F (4–13°C). It’s essential to select a setpoint that is challenging yet safe; colder temperatures are not necessarily better for adherence.
Q2: How frequently should the water be changed?
A: With adequate filtration and sanitization, many DIY setups refresh their water every 2–4 weeks. However, high usage scenarios or outdoor installations may demand more frequent renovations.
Q3: Is a chiller necessary, or can I get by with ice?
A: While ice can suffice for occasional uses, it requires significant effort and doesn’t offer consistent results. A dedicated chiller paired with filtration ensures stable temperatures and clarity, all while reducing long-term maintenance work.
Q4: What is the best lighting setup for a plunge room?
A: It's advisable to maintain ambient light around 100–200 lux, steering clear of harsh downlights over the water surface, using warmer shades (2700–3000K) in the evenings and cooler tones (4000–5000K) during the mornings. Follow IES recommendations for glare reduction.
Q5: How can I mitigate noise from pumps and chillers?
A: Isolating equipment on vibration-dampening pads, including soft materials, and considering a small equipment closet with acoustic panels can significantly help while maintaining necessary ventilation.
Q6: Which materials are best for resisting corrosion?
A: Marine-grade stainless steel (316), EPDM seals, and high-density polyethylene tanks are excellent choices. It's best to avoid untreated metals that might come into contact with water.
Q7: Are there any health risks associated with cold plunging?
A: Yes, individuals with cardiovascular concerns, Raynaud's disease, or uncontrolled high blood pressure should seek medical advice. Initiating with shorter sessions and stable breathing patterns is recommended to ensure safe experiences.
Q8: Can I incorporate breathwork or timing aids into the plunge experience?
A: Definitely. Installing a wall-mounted timer and providing a shelf for your phone or speaker facilitates guided breathing or music, reducing friction and enhancing consistency.
Q9: What’s the minimum room requirement for a cold plunge setup?
A: You should account for the vessel's footprint, an additional 36–42 inches for clear approach, and at least 24 inches on one side for safe entry and exit.
Q10: How can I keep energy costs manageable with a cold plunge?
A: Insulating the vessel and its lid, minimizing exposure to sunlight, shortening and insulating water lines, and utilizing smart timers to reduce unnecessary operational cycles can all contribute to lower energy expenditures.
Homestyler is your go-to online home design platform! With its user-friendly design tool, stunning 3D renderings, and a treasure trove of DIY video tutorials, you can effortlessly create your dream space. Perfect for both beginners and seasoned designers looking for inspiration!
Zaprojektuj teraz za darmo
































