


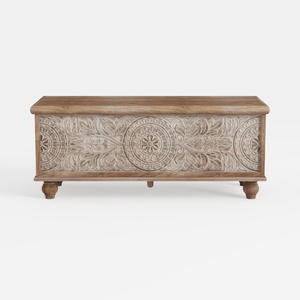
Embarking on the journey of creating a 3D printable model can open the door to a fascinating blend of design and technology. By following some straightforward steps, you can convert your imaginative concepts into physical objects ready for 3D printing. Start by determining what you’d like to craft, whether it’s an artwork, a useful tool, or perhaps a toy. Once you've settled on a vision, sketching your ideas can help clarify dimensions and intricate details. Next, select a 3D modeling software that matches your experience level. For those new to this area, accessible programs like Tinkercad or SketchUp are excellent choices. More seasoned users might gravitate towards advanced tools such as Blender or Fusion 360 for more complex designs. Take time to explore the features and tools of your chosen software, as becoming acquainted with them can significantly optimize your creative process. After gaining comfort with the application, you can begin crafting your model. Start with basic shapes and progressively refine them into your envisioned creation. Keep a close eye on scale and measurements to ensure the final product prints at the intended size. Additionally, consider the type of material you’ll use, since various materials may necessitate specific design adaptations, including thickness or support structures. Once your model is finalized, it’s time to prepare it for 3D printing. Export your design file in a format suitable for 3D printing, like STL or OBJ, which are widely recognized. Before initiating the printing process, utilize slicing software, like Cura or PrusaSlicer, to transform your 3D model into G-code, guiding the printer on how to layer your object. Finally, prepare your 3D printer, checking that it’s calibrated correctly and ready to operate. Load your filament and commence the printing phase, keeping a watchful eye to ensure all functions smoothly. After the print is complete, gently detach your model and make any necessary refinements, such as sanding or painting, to achieve your desired finish. Remember, practice will enhance your skills! Don’t get discouraged by early setbacks; each attempt is a part of the learning curve that moves you closer to expertise in 3D modeling. With growing confidence and abilities, consider delving into more advanced designs and engaging with the vibrant community of makers and designers available online, including platforms like Homestyler.
Tips 1:
Try experimenting with various materials and techniques to discover the most suitable options for your designs. Remember, seeking feedback from fellow enthusiasts can be a valuable part of your learning journey!
FAQ
Q: Which software is recommended for 3D modeling? A: Beginners might find Tinkercad helpful, whereas advanced users typically gravitate towards Blender or Fusion 360.
Q: What are the best file formats for 3D printing? A: STL and OBJ are the most widely utilized file formats for 3D printing.
Q: How should I prepare my model for printing? A: Employ slicing software to translate your 3D model into G-code, which your printer can utilize.
welcome to Homestyler


Homestyler is your go-to online home design platform! With its user-friendly design tool, stunning 3D rendering, and a wealth of design projects and DIY video tutorials, you can effortlessly create your dream space. Perfect for everyone looking to transform their home!
Дизайн сейчас бесплатно


