


Dividing a 3D model in half using Cura is an effective strategy for designers and makers who aim to print larger models on smaller printers, or for those looking to produce interlocking parts. With Ultimaker Cura, this method is straightforward and does not necessitate the use of external CAD software. Below is a detailed guide to help you slice your model precisely down the center, optimizing both accuracy and printability.
1. Load Your 3D Model: Start by opening Cura and importing your STL, OBJ, or 3MF file either by dragging it into the workspace or utilizing the "Open File" function.
2. Select Your Model: Click on the model to unlock the editing features.
3. Access 'Mesh Tools' (Per Model Settings): In the left tool panel, find the "Mesh Tools" (represented by a scalpel icon). If you cannot find these tools, ensure that you have the most recent version of Cura installed and that you are using a compatible printer profile.
4. Utilize the 'Cut' Tool: Select the 'Cut' option, which will display a cutting plane allowing you to choose the cut orientation—X, Y, or Z axis.
5. Position the Cutting Plane: Adjust or rotate the cutting plane to specify the exact location for your model split. For a balanced division, centering the plane (using numerical inputs or 'Layout tools' for enhanced accuracy) is recommended.
6. Execute the Cut: Click “Slice” or “Accept,” depending on your version of Cura. You have the option to retain both pieces or discard one, which is useful if you intend to print the halves separately.
7. Save/Export the Halves: To save each half as a separate STL file, right-click and select "Save as STL." This makes it simple to manage, orient, and print them independently, ensuring optimal quality.
As a designer, dividing a model allows for innovative assembly and finishing techniques—consider incorporating features like pins or slots for straightforward alignment and adhesion after printing. If you’re designing models meant to be split, plan ahead to include elements that facilitate solid, seamless assembly.
For those looking to visualize or customize the split more effectively, consider using a 3D Floor Planner tool. This solution offers enhanced visualization advantages and aids in grasping complex shapes or assembly relationships through immersive real-time previews, an approach I frequently employ when working with spatial divisions in models related to interior design, as an example with Homestyler.
Tip 1:
When slicing models in Cura, it’s crucial to verify "watertightness"—both resulting pieces must be complete solids without any open edges. Utilize Cura’s layer preview feature to ensure the G-code accurately represents your intended cut. For intricate designs, consider reinforcing the cut area with dowels or implementing registration features using mesh editing software prior to slicing.
FAQ
Q: Is it possible to reassemble 3D printed halves seamlessly?
A: Absolutely! You can use modeling glue, super glue, or specialized 3D pen welding techniques. For less visible seams, sand the edges smooth before joining and think about using alignment pegs for precise assembly.
Q: What should I do if the “Cut” tool isn’t visible in my Cura?
A: Check for the latest Cura version and ensure you have the “Mesh Tools” or “Per Model Settings” plugin enabled. Not all versions support direct cutting options.
Q: What are the benefits of splitting a model before printing?
A: Splitting allows larger items to fit on your printer, helps avoid the need for supports, enhances print orientation, or enables the creation of functional assemblies.
Q: Are there alternative methods for complex cuts aside from Cura?
A: Yes—consider using mesh editing software like Meshmixer or Blender for angled cuts or when designing assembly features.
Q: How can I ensure that the halves align perfectly after printing?
A: Integrate registration features such as pegs and sockets into your model using mesh editing software. Ensure that your cuts are perfectly flat to facilitate easy gluing.
Homestyler's roots trace back to Autodesk, the global leader in design and engineering software. That heritage lives on in every feature we build. Today, with a community of more than 18 million users worldwide, Homestyler continues to make professional-quality interior design accessible to everyone — from first-time decorators to seasoned architects.
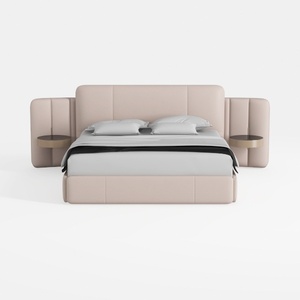
Minimalist Blush Fabric Upholstered King Bed with Attached Side Tables 3D Model

Modern Dark Leather Three Seater Sofa with Throw Pillows and Blanket 3D Model

Minimalist Fabric Oversized Sofa 3D Model
Discover your dream home with Homestyler! This intuitive online design platform offers an easy-to-use design tool, stunning 3D renderings, and a plethora of design projects. Plus, with engaging DIY video tutorials, transforming your space has never been more fun and inspiring!
Progetta ora GRATIS


