


Transforming a 3D model into a captivating pattern can revitalize your design projects. Whether you're aiming to produce textiles, wallpapers, or other aesthetic elements, this comprehensive guide will lead you through the process effortlessly. This overview is tailored for designers wanting to expand their creative toolkit with contemporary techniques and resources such as Homestyler.
Getting Acquainted with Your 3D Model:
The initial step involves preparing your 3D model for pattern creation. Are you dealing with a solid structure or a mesh format? Recognizing this aspect will dictate how you derive the pattern. A tidy and precise model will yield superior results, so kick off with a well-defined option. Moreover, think about your design project specifics—will the resultant pattern be utilized for fabric applications, digital use, or printed material?
Afterward, reflect on which features of your model should take the spotlight. Is it the texture, the shape, or the color that you wish to highlight? Your emphasis will shape the final look of the pattern, ensuring it aligns with your envisioned design and appeals to your target demographic.
Employing Software Tools:
Numerous software alternatives exist for converting 3D models into patterns. Tools such as Blender, Illustrator, and even Homestyler can assist you in extracting slices or contours from your model to serve as the foundation for your pattern. Have you investigated these options? They present a variety of methods, like scaling, rotating, and repeating shapes—elements that significantly impact the overall style and feel of your design.
The beauty of these tools lies in your ability to remix elements—creating overlaps or clusters that result in a more vibrant pattern. Take your time to explore different configurations and don’t shy away from utilizing the software’s features, including layers and blending options, to craft distinctive effects!
Rendering and Finalizing Your Pattern:
Once you're content with your design, it’s time to render the pattern. This step allows you to visualize how it will appear before making it final. Do you lean towards vivid colors or more muted tones? This phase is your chance to fine-tune the color scheme and textures to meet your project requirements, ensuring your end product fulfills your design aspirations and the expectations of your clients.
Following this, export your pattern in your preferred file format. Opt for a vector format for scalability or a raster format for immediate use, depending upon what best suits your production needs. Always remember to factor in the final application of the pattern, as this will affect your choice of file type and resolution specifications.
Frequently Asked Questions
Q: What software can I utilize to generate patterns from 3D models? A: Tools like Blender, Adobe Illustrator, and Homestyler rank among the most sought-after options. Each has unique advantages, so evaluate which features align best with your project's requirements.
Q: Can I create a seamless pattern from a 3D model? A: Absolutely! With meticulous alignment and tiling, a seamless pattern is achievable. Pay close attention to the edges where the pattern repeats to ensure a flawless transition.

Modern Velvet Upholstered 2 Seater Sofa With Black Metal Legs 3D Model

Modern Dark Green Glass Door Display Cabinet Bookshelf 3D Model
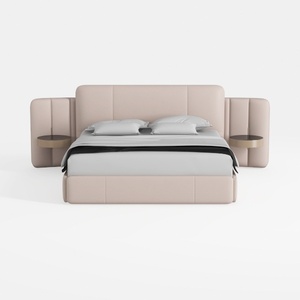
Minimalist Blush Fabric Upholstered King Bed with Attached Side Tables 3D Model
Homestyler is your go-to online platform for creating stunning home designs. With its user-friendly design tool, impressive 3D renderings, and a wealth of inspiring design projects and video tutorials, bringing your home décor ideas to life has never been easier!
立即免费设计


