With Import Floor Plan, you can import existing floor plans into Homestyler and create layouts more efficiently. 🏠
Four methods are supported: Upload Image, Upload DWG, Upload PDF, and RoomScan.
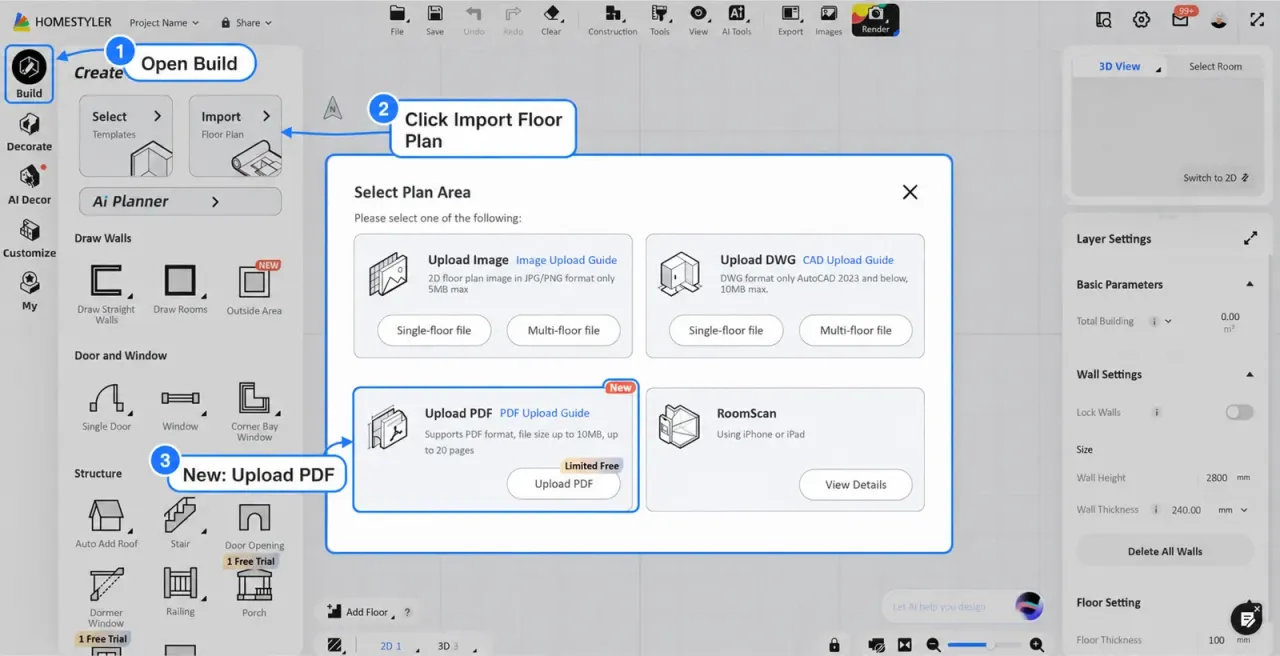
📍 Open Import Floor Plan
Go to Build > Import Floor Plan, then select an import method.
1. Upload a Floor Plan Image
Select Upload Image to import a JPG or PNG floor plan. Each image can be up to 5 MB.
- Single-floor file: Upload one floor plan image.
-Multi-floor file: Upload up to 10 images, with one floor per image.
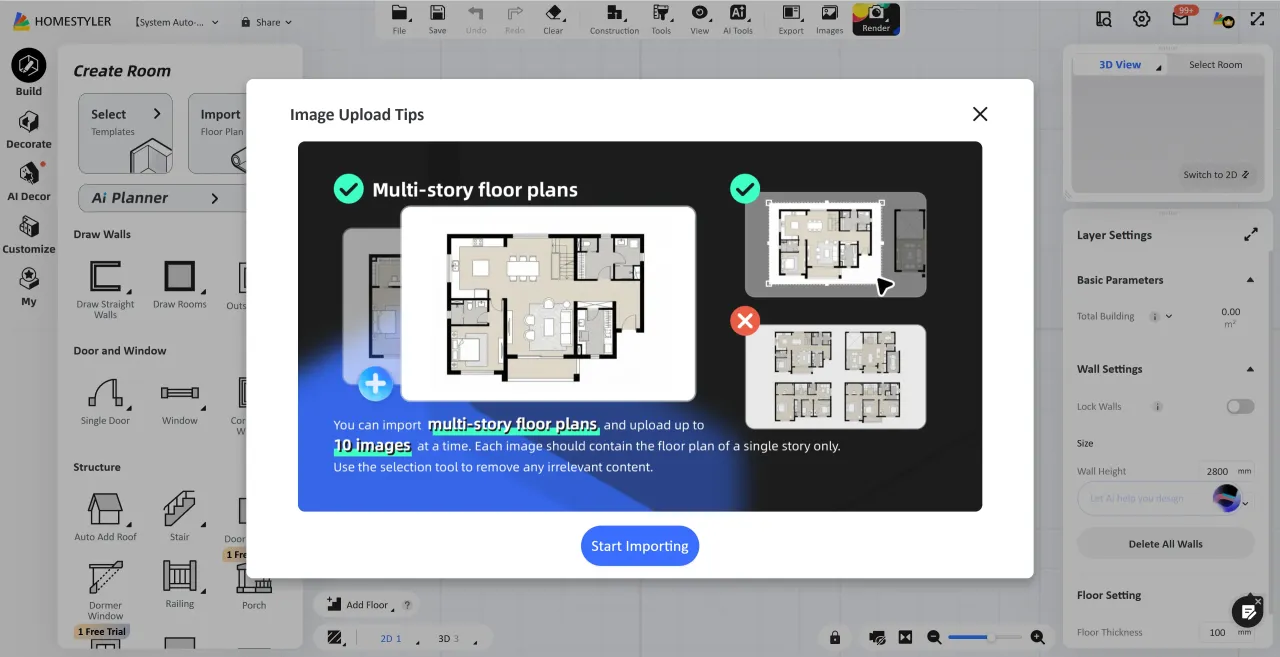
For detailed instructions, see How to Import Multi-floor Floor Plans.
2. Upload a DWG Floor Plan
- Select Upload DWG to import a CAD floor plan.
- Supports AutoCAD 2023 and earlier;
- Maximum file size: 10 MB;
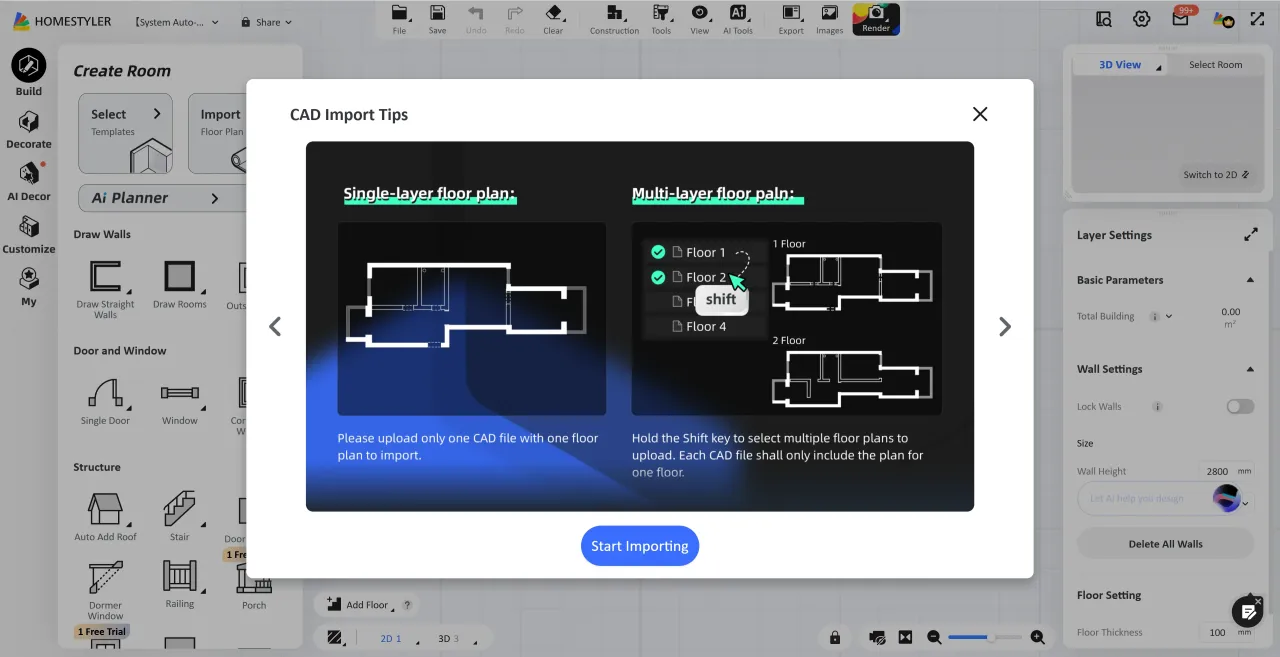
- Single-floor file: Upload one CAD file;
- Multi-floor file: Upload up to 10 CAD files, with one floor per file.
Before importing, remove elevations, detailed drawings, cover pages, furniture, annotation leaders, drawing frames, and other unrelated content. Click CAD Upload Guide for details.
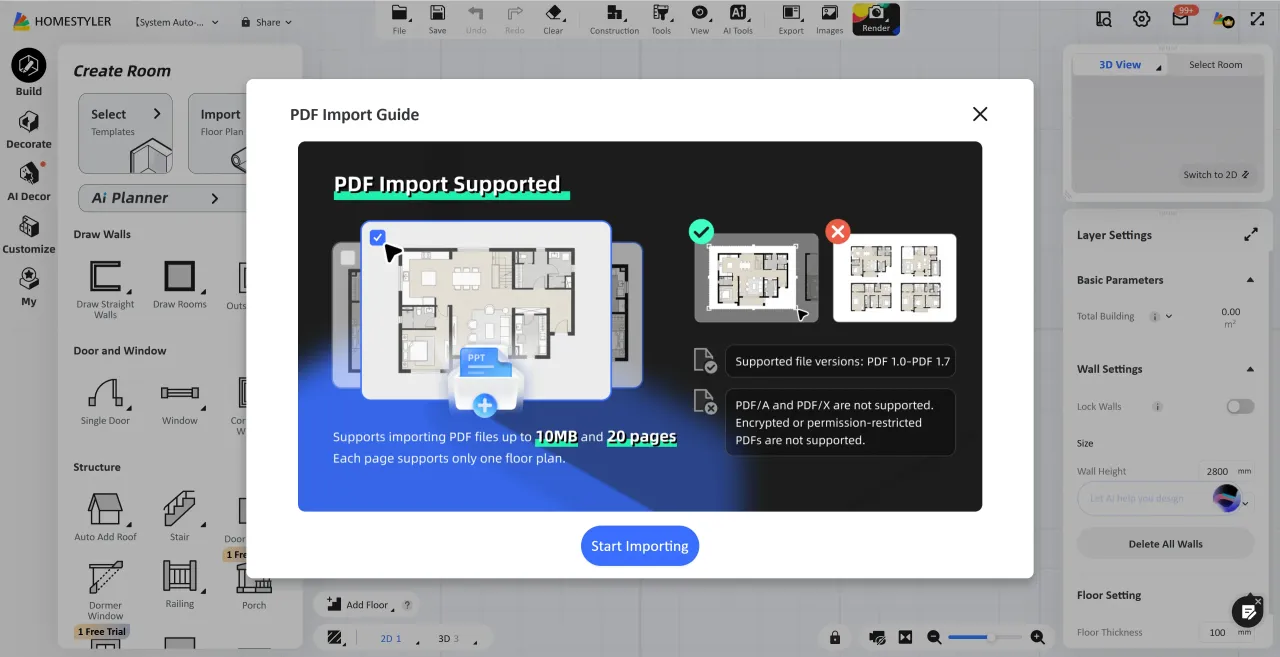
3. Upload a PDF Floor Plan ✦ NEW
Select Upload PDF to import a PDF floor plan.
- Supports PDF 1.0–PDF 1.7;
- Maximum file size: 10 MB;
- Supports up to 20 pages;
- Each page should contain only one floor plan.
PDF/A, PDF/X, encrypted, and permission-restricted PDF files are not supported.
4. Create a Floor Plan with RoomScan
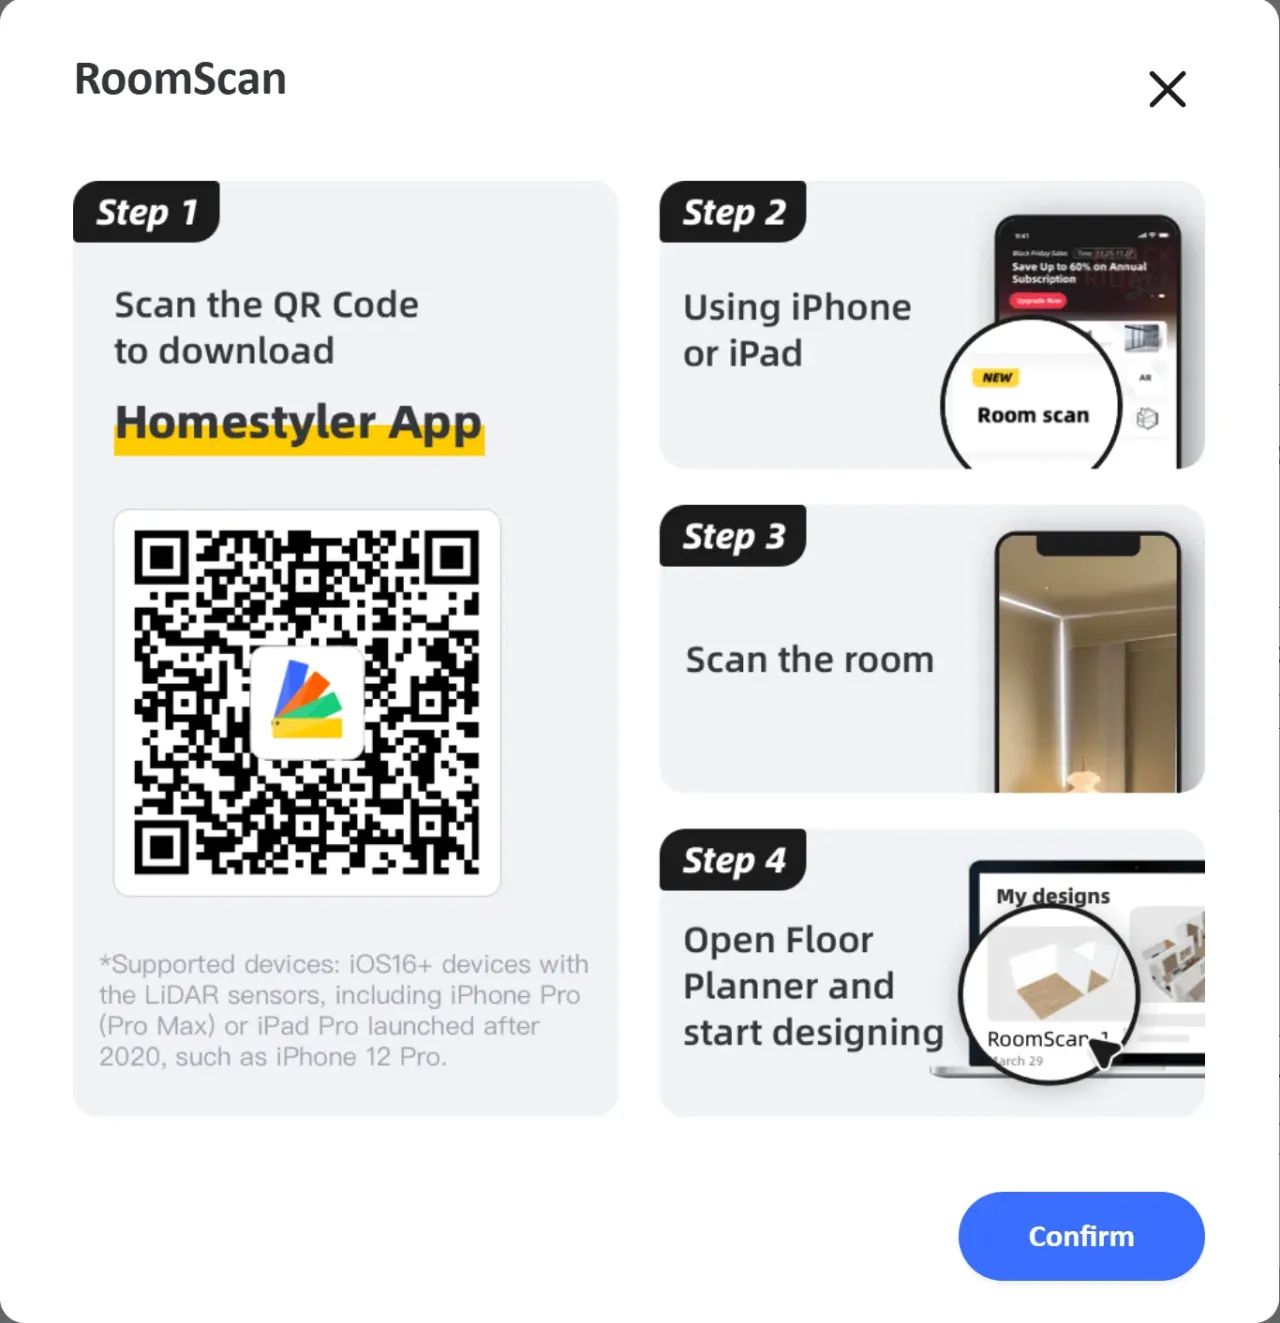
Select RoomScan > View Details, then:
- Scan the QR code to download the Homestyler App.
- Open RoomScan on a supported iPhone or iPad.
- Scan the room.
- Open the result in Floor Planner and continue designing.
RoomScan requires an iOS 16 or later device with a LiDAR sensor.
5. Choose a Floor Plan Creation Method
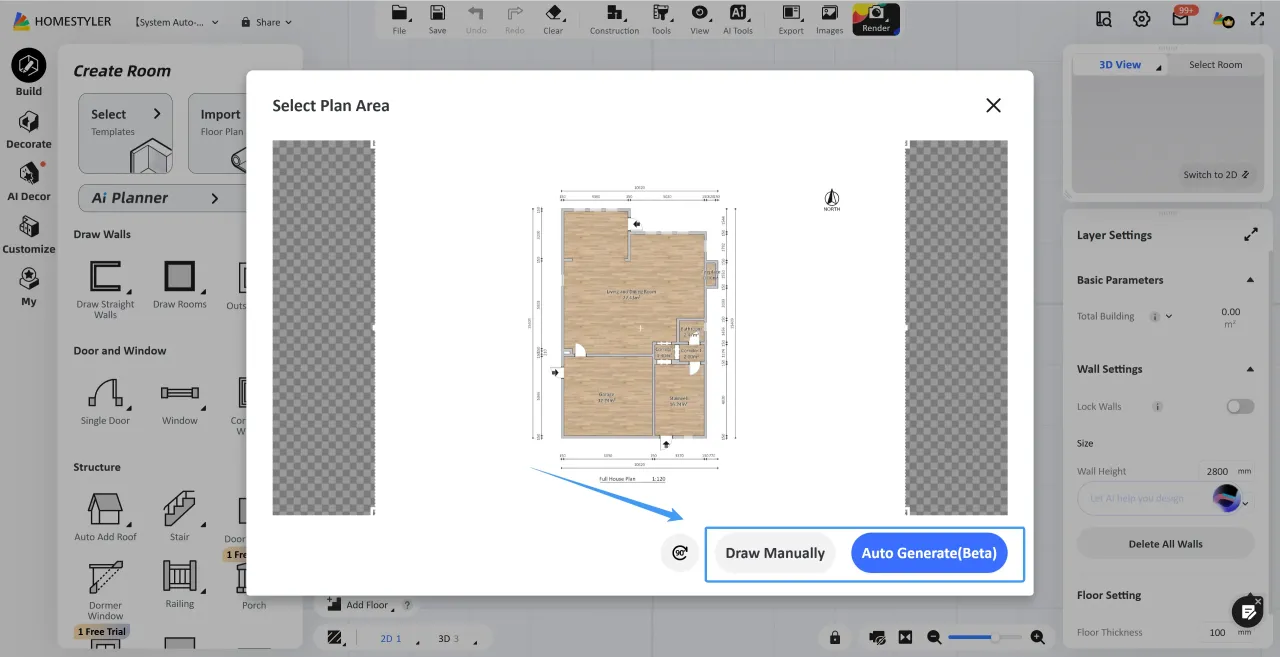
After uploading an image, DWG, or PDF floor plan, choose one of the following:
- Draw Manually: Use the imported floor plan as an underlay and draw the walls manually.
- Auto Generate (Beta): Let the system generate the floor plan automatically.
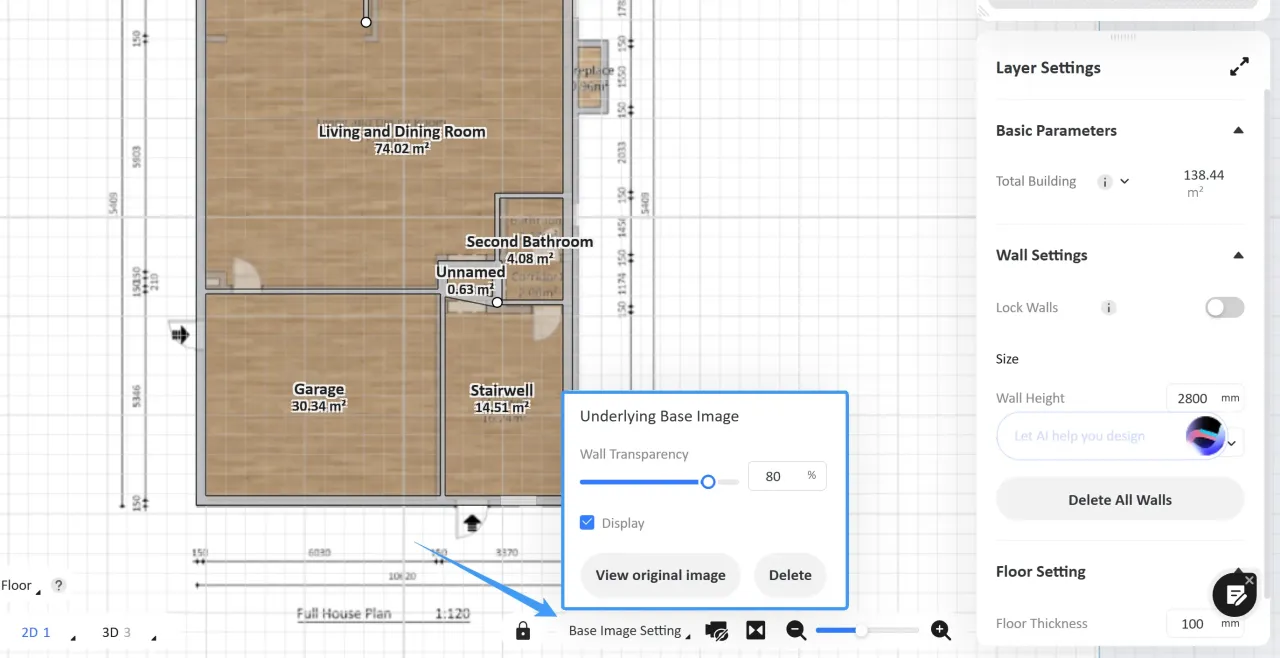
6. Adjust the Base Image and Wall Display
- After the floor plan is generated, click Base Image Setting in the lower-right corner.
- Wall Transparency: Adjust the transparency of the generated walls.
- Display: Show or hide the imported base image.
- View original image: View the source image.
- Delete: Remove the base image.